Popular Woodworking 2006-10 № 157, страница 59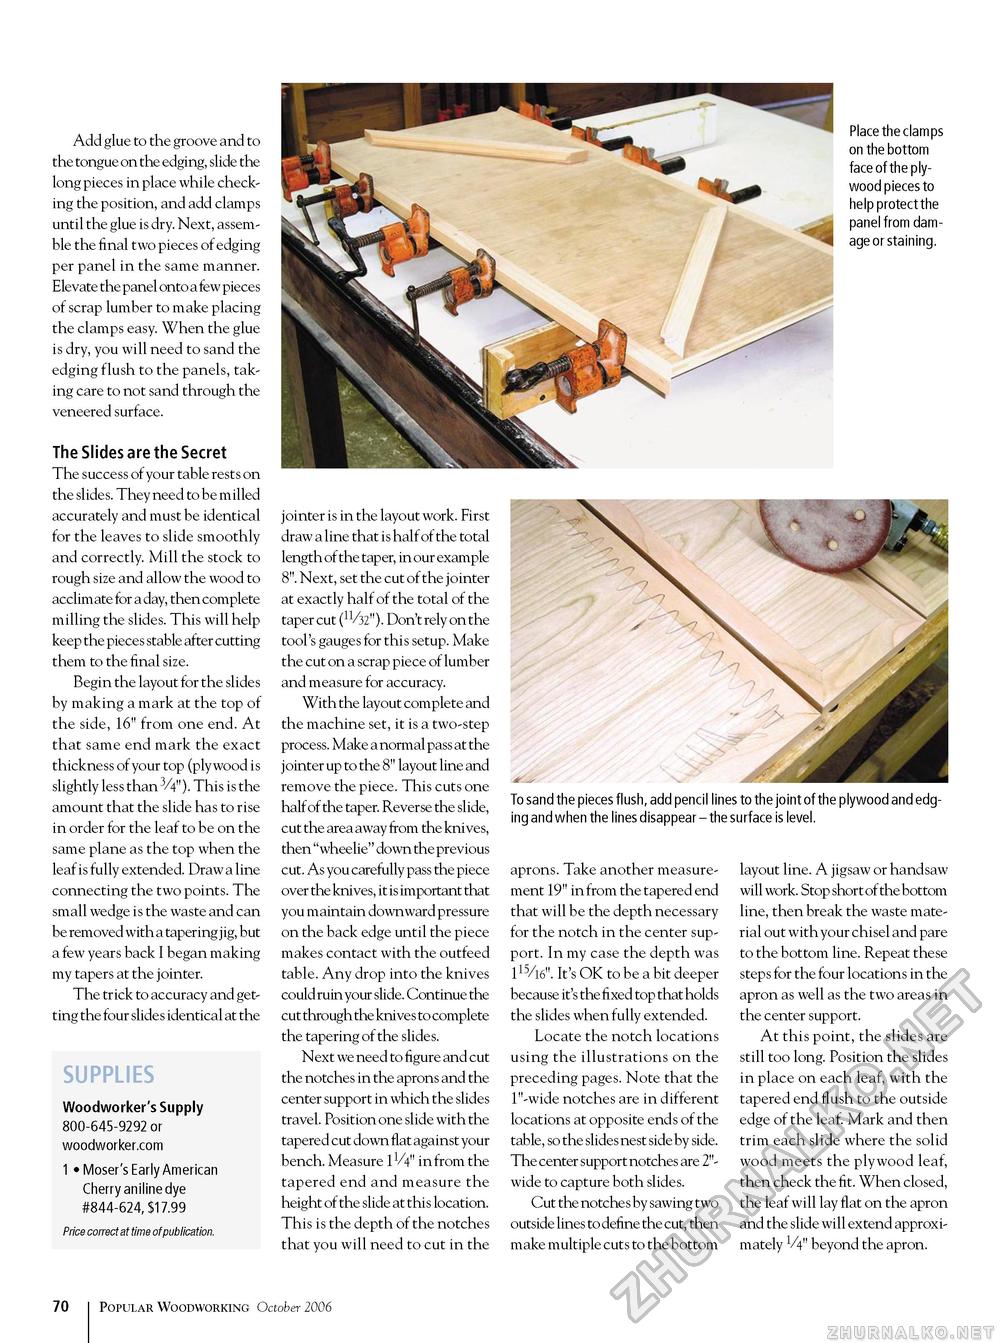
Add glue to the groove and to the tongue on the edging, slide the long pieces in place while checking the position, and add clamps until the glue is dry. Next, assemble the final two pieces of edging per panel in the same manner. Elevate the panel onto a few pieces of scrap lumber to make placing the clamps easy. When the glue is dry, you will need to sand the edging flush to the panels, taking care to not sand through the veneered surface. The Slides are the Secret The success of your table rests on the slides. They need to be milled accurately and must be identical for the leaves to slide smoothly and correctly. Mill the stock to rough size and allow the wood to acclimate for a day, then complete milling the slides. This will help keep the pieces stable after cutting them to the final size. Begin the layout for the slides by making a mark at the top of the side, 16" from one end. At that same end mark the exact thickness of your top (plywood is slightly less than 3/4"). This is the amount that the slide has to rise in order for the leaf to be on the same plane as the top when the leaf is fully extended. Draw a line connecting the two points. The small wedge is the waste and can be removed with a tapering j ig, but a few years back I began making my tapers at the jointer. The trick to accuracy and getting the four slide s identical at the SUPPLIES Woodworker's Supply 800-645-9292 or woodworker.com 1 • Moser's Early American Cherry aniline dye #844-624, $17.99 Price correct at time of publication. Place the clamps on the bottom face of the plywood pieces to help protect the panel from damage or staining. To sand the pieces flush, add pencil lines to the joint of the plywood and edging and when the lines disappear - the surface is level. jointer is in the layout work. First draw a line that is half of the total length of the taper, in our example 8". Next, set the cut of the jointer at exactly half of the total of the taper cut (n/32"). Don't rely on the tool's gauges for this setup. Make the cut on a scrap piece of lumber and measure for accuracy. With the layout complete and the machine set, it is a two-step process. Make a normal pass at the jointer up to the 8" layout line and remove the piece. This cuts one half of the taper. Reverse the slide, cut the area away from the knives, then "wheelie" down the previous cut. As you carefully pass the piece over the knives, it is important that you maintain downward pressure on the back edge until the piece makes contact with the outfeed table. Any drop into the knives could ruin your slide. Continue the cut through the knive s to complete the tapering of the slides. Next we need to figure and cut the notches in the aprons and the center support in which the slides travel. Position one slide with the tapered cut down flat against your bench. Measure IV4" in from the tapered end and measure the height of the slide at this location. This is the depth of the notches that you will need to cut in the aprons. Take another measurement 19" in from the tapered end that will be the depth necessary for the notch in the center support. In my case the depth was 115/l6". It's OK to be a bit deeper because it's the fixed top that holds the slides when fully extended. Locate the notch locations using the illustrations on the preceding pages. Note that the 1"-wide notches are in different locations at opposite ends of the table, so the slides nest side by side. The center support notches are 2"-wide to capture both slides. Cut the notche s by sawing two outside lines to define the cut, then make multiple cuts to the bottom layout line. A jigsaw or handsaw will work. Stop short of the bottom line, then break the waste material out with your chisel and pare to the bottom line. Repeat these steps for the four locations in the apron as well as the two areas in the center support. At this point, the slides are still too long. Position the slides in place on each leaf, with the tapered end flush to the outside edge of the leaf. Mark and then trim each slide where the solid wood meets the plywood leaf, then check the fit. When closed, the leaf will lay flat on the apron and the slide will extend approximately V4" beyond the apron. 70 Popular Woodworking October 2006 |


