Popular Woodworking 2007-04 № 161, страница 68
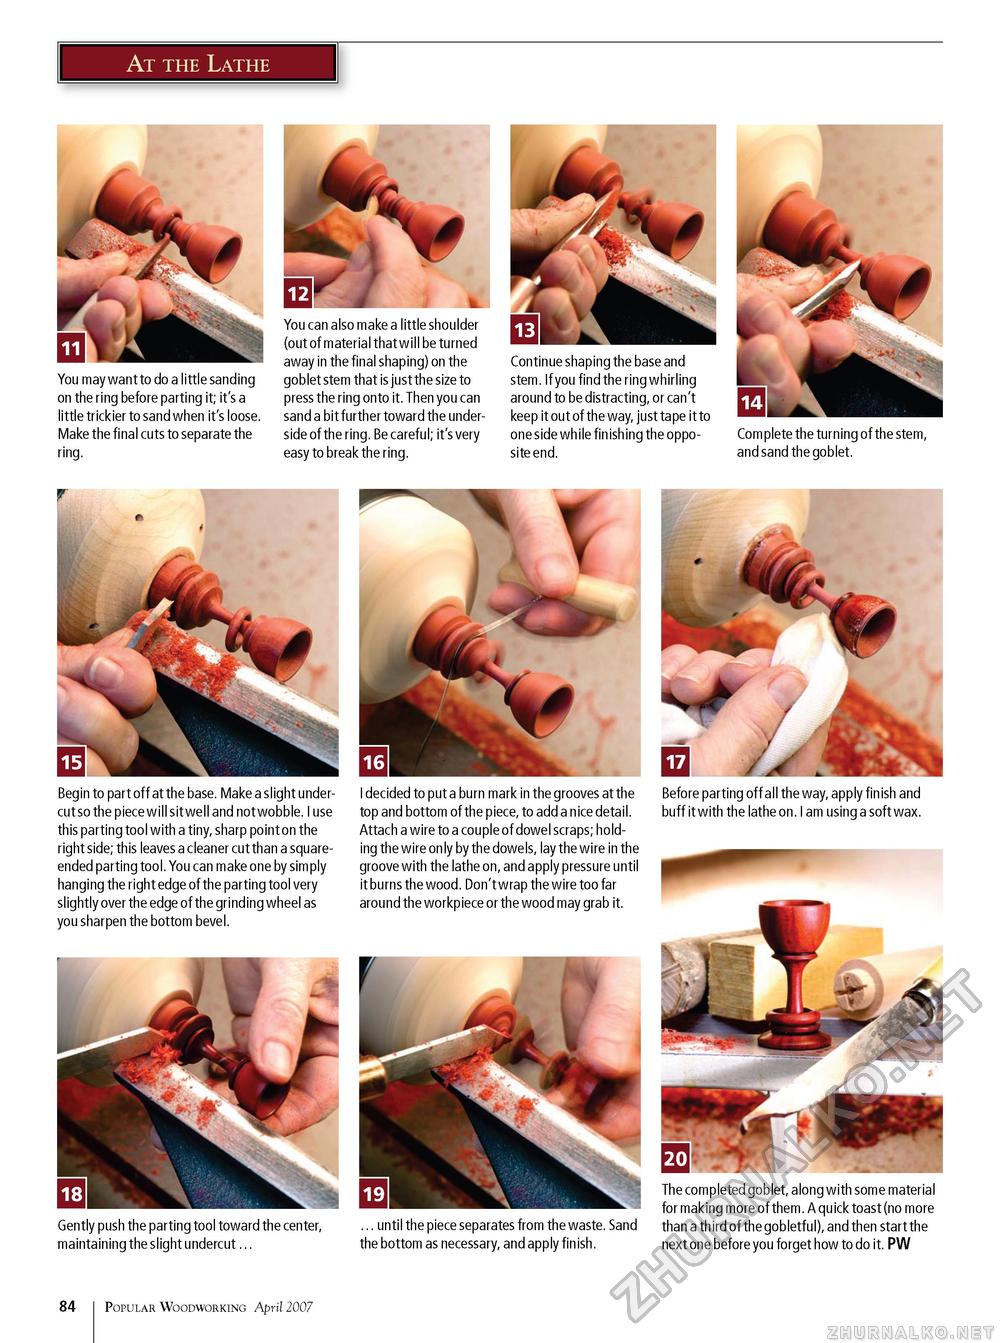
You may want to do a little sanding on the ring before parting it; it's a little trickier to sand when it's loose. Make the final cuts to separate the ring. You can also make a little shoulder (out of material that will be turned away in the final shaping) on the goblet stem that is just the size to press the ring onto it. Then you can sand a bit further toward the underside of the ring. Be careful; it's very easy to break the ring. Continue shaping the base and stem. If you find the ring whirling around to be distracting, or can't keep it out of the way, just tape it to one side while finishing the opposite end. Complete the turning of the stem, and sand the goblet. Begin to part off at the base. Make a slight undercut so the piece will sit well and not wobble. I use this parting tool with a tiny, sharp point on the right side; this leaves a cleaner cut than a square-ended parting tool. You can make one by simply hanging the right edge of the parting tool very slightly over the edge of the grinding wheel as you sharpen the bottom bevel. I decided to put a burn mark in the grooves at the top and bottom of the piece, to add a nice detail. Attach a wire to a couple of dowel scraps; holding the wire only by the dowels, lay the wire in the groove with the lathe on, and apply pressure until it burns the wood. Don't wrap the wire too far around the workpiece or the wood may grab it Before parting off all the way, apply finish and buff it with the lathe on. I am using a soft wax. Gently push the parting tool toward the center, maintaining the slight undercut ... ... until the piece separates from the waste. Sand the bottom as necessary, and apply finish. The completed goblet, along with some material for making more of them. A quick toast (no more than a third of the gobletful), and then start the next one before you forget how to do it. PW 84 Popular Woodworking April 2007 |


