Popular Woodworking 2007-08 № 163, страница 27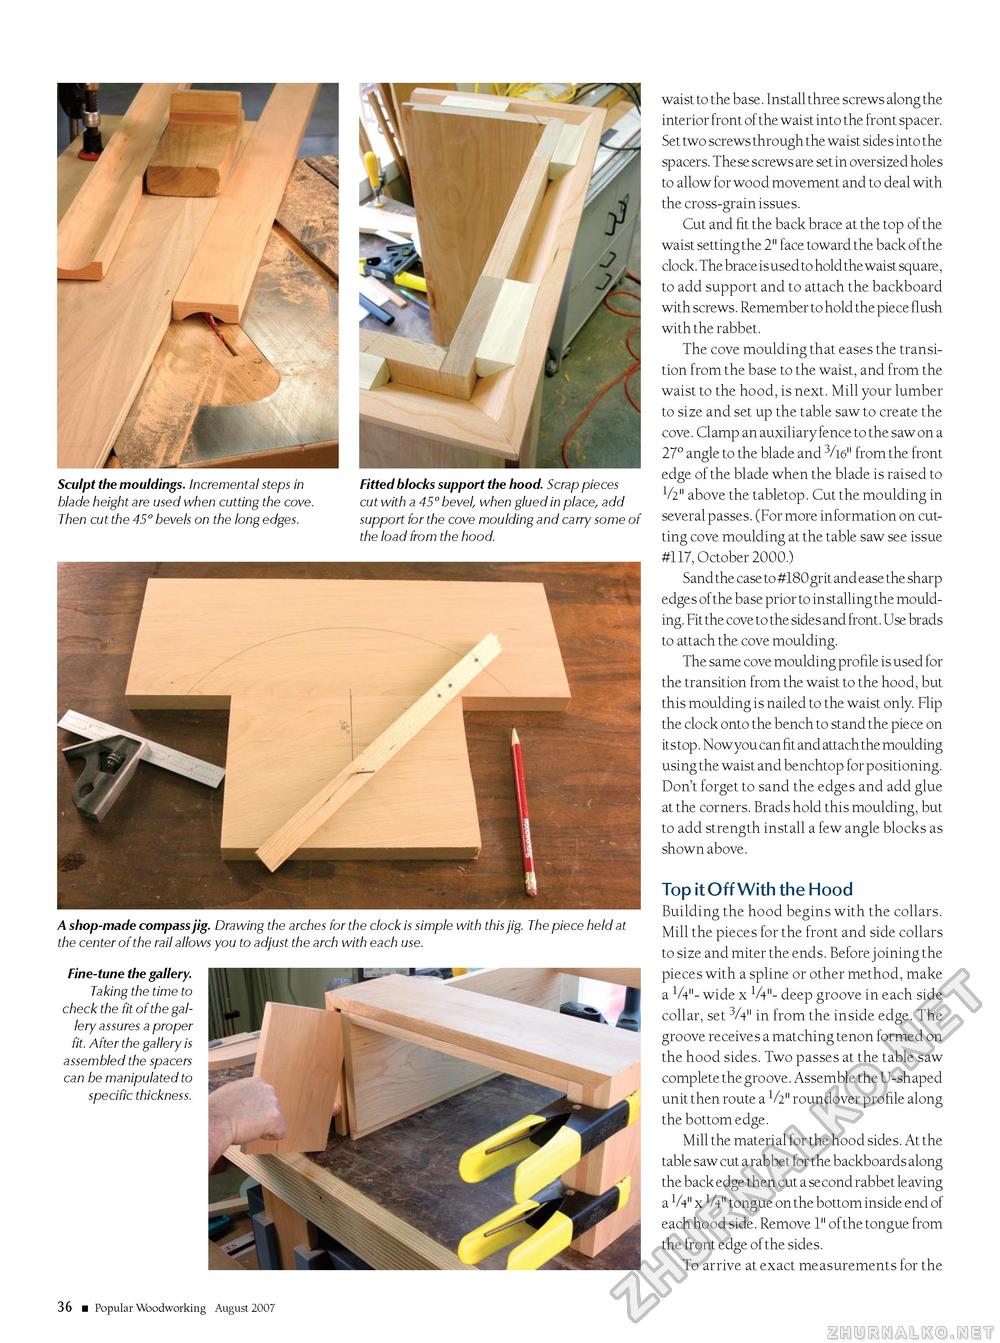
Sculpt the mouldings. Incremental steps in blade height are used when cutting the cove. Then cut the 45° bevels on the long edges. Fitted blocks support the hood. Scrap pieces cut with a 45° bevel, when glued in place, add support for the cove moulding and carry some of the load from the hood. A shop-made compass jig. Drawing the arches for the clock is simple with this jig. The piece held at the center of the rail allows you to adjust the arch with each use. Fine-tune the gallery. Taking the time to check the fit of the gallery assures a proper fit. After the gallery is assembled the spacers can be manipulated to specific thickness. waist to the base. Install three screws along the interior front of the waist into the front spacer. Set two screws through the waist sides into the spacers. These screws are set in oversized holes to allow for wood movement and to deal with the cross-grain issues. Cut and fit the back brace at the top of the waist setting the 2" face toward the back of the clock. The brace is used to hold the waist square, to add support and to attach the backboard with screws. Remember to hold the piece flush with the rabbet. The cove moulding that eases the transition from the base to the waist, and from the waist to the hood, is next. Mill your lumber to size and set up the table saw to create the cove. Clamp an auxiliary fence to the saw on a 27° angle to the blade and 3/16" from the front edge of the blade when the blade is raised to V2" above the tabletop. Cut the moulding in several passes. (For more information on cutting cove moulding at the table saw see issue #117, October 2000.) Sand the case to #180 grit and ease the sharp edges of the base prior to installing the moulding. Fit the cove to the sides and front. Use brads to attach the cove moulding. The same cove moulding profile is used for the transition from the waist to the hood, but this moulding is nailed to the waist only. Flip the clock onto the bench to stand the piece on its top. Now you can fit and attach the moulding using the waist and benchtop for positioning. Don't forget to sand the edges and add glue at the corners. Brads hold this moulding, but to add strength install a few angle blocks as shown above. Top it Off With the Hood Building the hood begins with the collars. Mill the pieces for the front and side collars to size and miter the ends. Before j oining the pieces with a spline or other method, make a V4"- wide x 1/4"- deep groove in each side collar, set 3/4" in from the inside edge. The groove receives a matching tenon formed on the hood sides. Two passes at the table saw complete the groove. Assemble the U-shaped unit then route a V2" roundover profile along the bottom edge. Mill the material for the hood sides. At the table saw cut a rabbet for the backboards along the back edge then cut a second rabbet leaving a V4" x V4" tongue on the bottom inside end of each hood side. Remove 1" of the tongue from the front edge of the sides. To arrive at exact measurements for the 36 ■ Popular Woodworking August 2007 |


