Popular Woodworking 2007-08 № 163, страница 30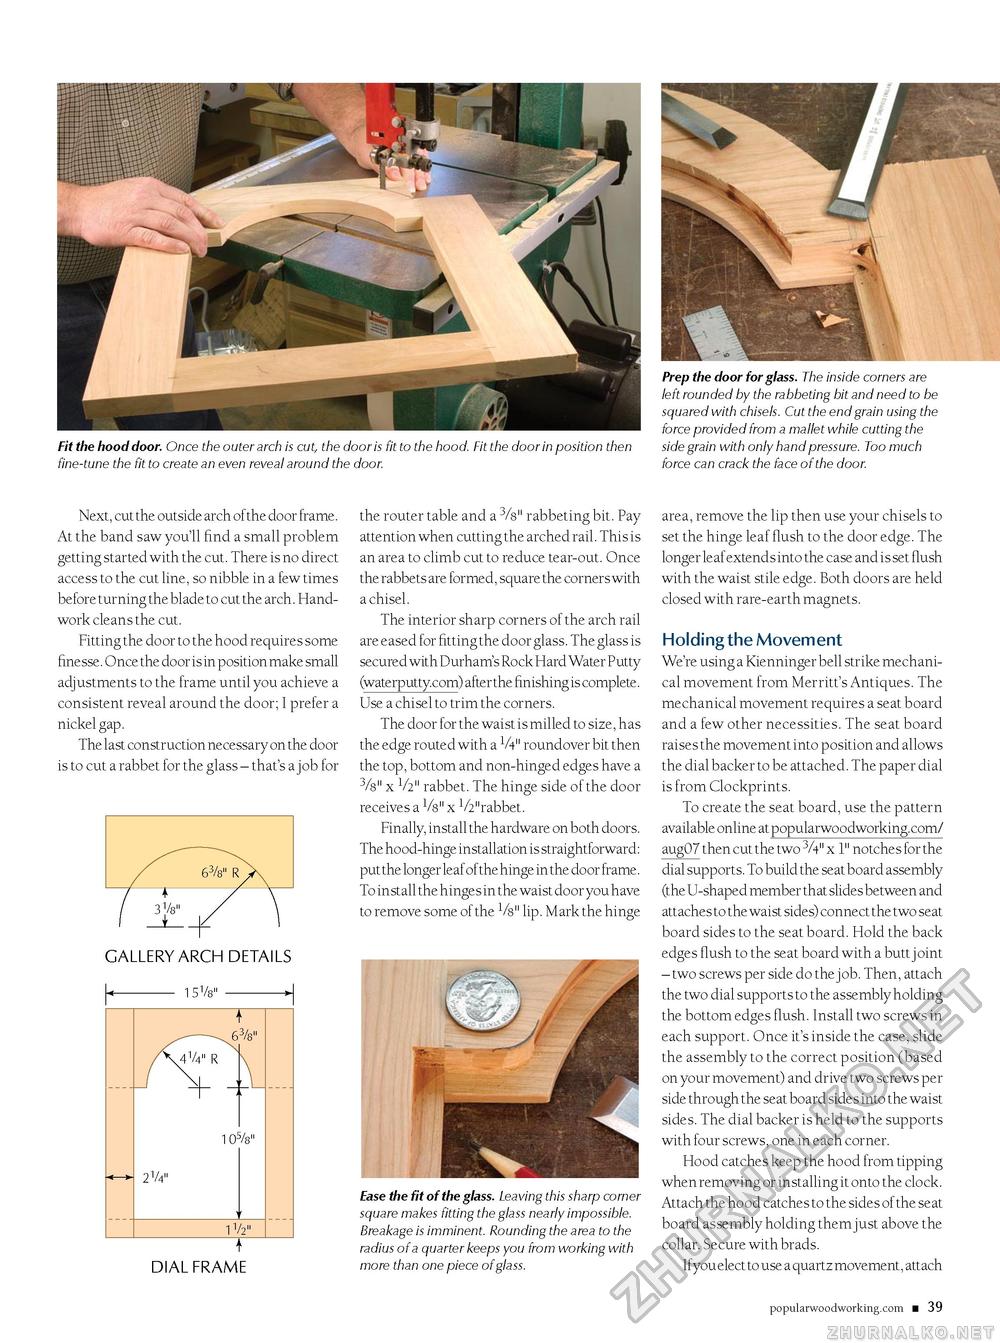
Fit the hood door. Once the outer arch is cut, the door is fit to the hood. Fit the door in position then side grain with only hand pressure. Too much fine-tune the fit to create an even reveal around the door. force can crack the face of the door. Next, cut the outside arch ofthe door frame. At the band saw you'll find a small problem getting started with the cut. There is no direct access to the cut line, so nibble in a few times before turning the blade to cut the arch. Handwork cleans the cut. Fitting the door to the hood requires some finesse. Once the door is in position make small adjustments to the frame until you achieve a consistent reveal around the door; I prefer a nickel gap. The last construction necessary on the door is to cut a rabbet for the glass - that's a job for
~r DIAL FRAME the router table and a 3/8" rabbeting bit. Pay attention when cutting the arched rail. This is an area to climb cut to reduce tear-out. Once the rabbets are formed, square the corners with a chisel. The interior sharp corners of the arch rail are eased for fitting the door glass. The glass is secured with Durham's Rock Hard Water Putty (waterputty.com) after the finishing is complete. Use a chisel to trim the corners. The door for the waist is milled to size, has the edge routed with a 1/4" roundover bit then the top, bottom and non-hinged edges have a 3/8" x V2" rabbet. The hinge side of the door receives a V8" x 1/2"rabbet. Finally, install the hardware on both doors. The hood-hinge installation is straightforward: put the longer leaf ofthe hinge in the door frame. To install the hinges in the waist door you have to remove some of the 1/8" lip. Mark the hinge Ease the fit of the glass. Leaving this sharp corner square makes fitting the glass nearly impossible. Breakage is imminent. Rounding the area to the radius of a quarter keeps you from working with more than one piece of glass. area, remove the lip then use your chisels to set the hinge leaf flush to the door edge. The longer leaf extends into the case and is set flush with the waist stile edge. Both doors are held closed with rare-earth magnets. Holding the Movement We're using a Kienninger bell strike mechanical movement from Merritt's Antiques. The mechanical movement requires a seat board and a few other necessities. The seat board raises the movement into position and allows the dial backer to be attached. The paper dial is from Clockprints. To create the seat board, use the pattern available online at popularwoodworking.com/ aug07 then cut the two 3A" x 1" notches for the dial supports. To build the seat board assembly (the U-shaped member that slides between and attaches to the waist sides) connect the two seat board sides to the seat board. Hold the back edges flush to the seat board with a butt joint - two screws per side do the job. Then, attach the two dial supports to the assembly holding the bottom edges flush. Install two screws in each support. Once it's inside the case, slide the assembly to the correct position (based on your movement) and drive two screws per side through the seat board sides into the waist sides. The dial backer is held to the supports with four screws, one in each corner. Hood catches keep the hood from tipping when removing or installing it onto the clock. Attach the hood catches to the sides of the seat board assembly holding them just above the collar. Secure with brads. Ifyou elect to use a quartz movement, attach popularwoodworking.com ■ 39 |
||||||||||||||||||||||||||||


