Popular Woodworking 2007-08 № 163, страница 31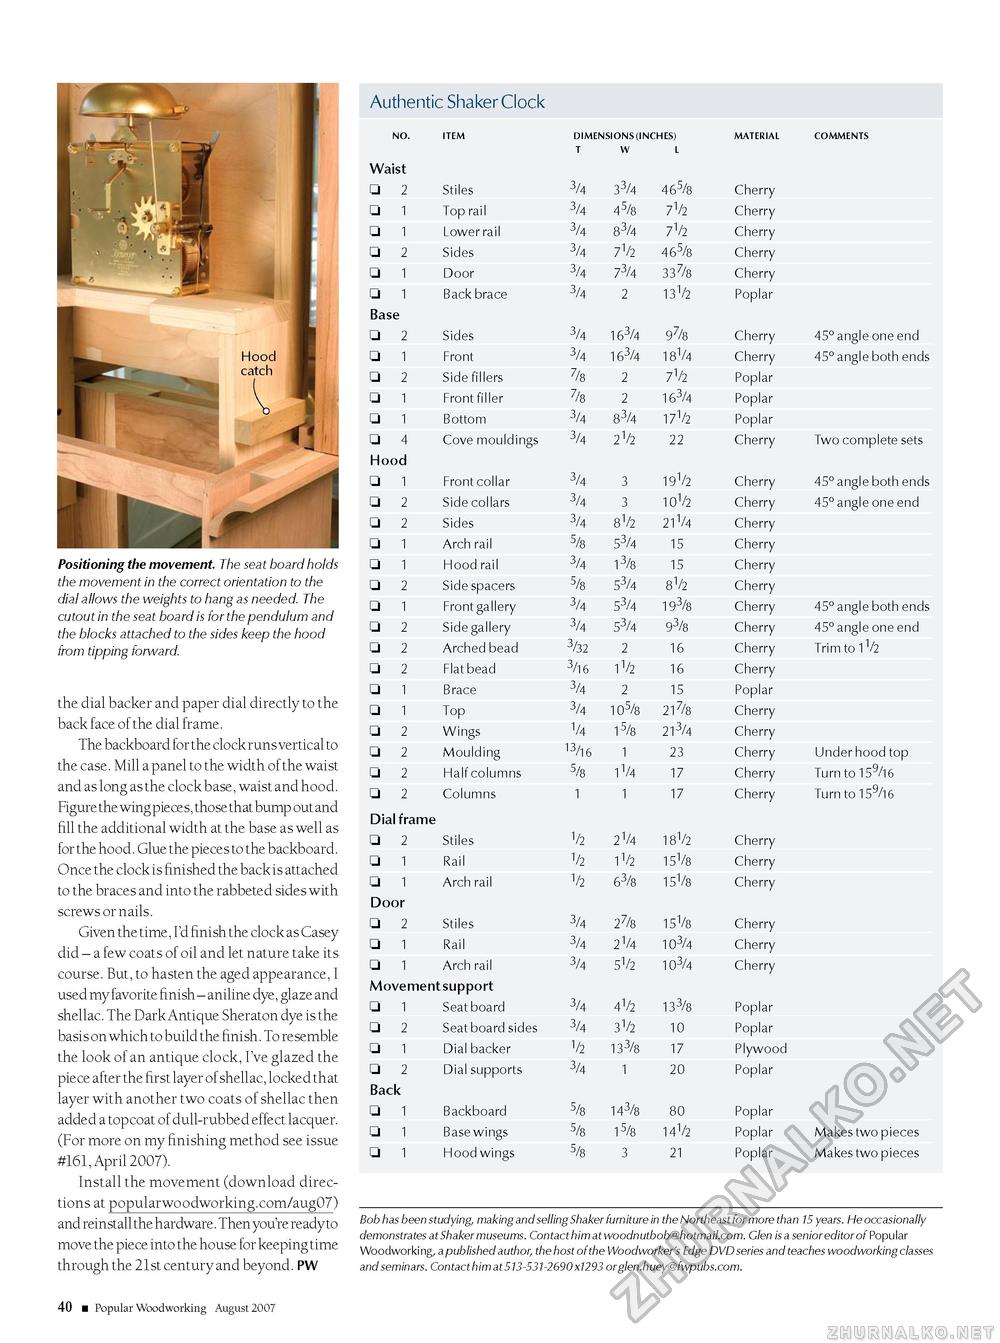
Positioning the movement. The seat board holds the movement in the correct orientation to the dial allows the weights to hang as needed. The cutout in the seat board is for the pendulum and the blocks attached to the sides keep the hood from tipping forward. the dial backer and paper dial directly to the back face of the dial frame. The backboard for the clock runs vertical to the case. Mill a panel to the width of the waist and as long as the clock base, waist and hood. Figure the wing pieces, those that bump out and fill the additional width at the base as well as for the hood. Glue the pieces to the backboard. Once the clock is finished the back is attached to the braces and into the rabbeted sides with screws or nails. Given the time, I'd finish the clock as Casey did - a few coats of oil and let nature take its course. But, to hasten the aged appearance, I used my favorite finish - aniline dye, glaze and shellac. The Dark Antique Sheraton dye is the basis on which to build the finish. To resemble the look of an antique clock, I've glazed the piece after the first layer of shellac, locked that layer with another two coats of shellac then added a topcoat of dull-rubbed effect lacquer. (For more on my finishing method see issue #161, April 2007). Install the movement (download directions at popularwoodworking.com/aug07) and reinstall the hardware. Then you're ready to move the piece into the house for keeping time through the 21st century and beyond. PW 40 ■ Popular Woodworking August 2007
Bob has been studying, making and selling Shaker furniture in the Northeast for more than 15 years. He occasionally demonstrates at Shaker museums. Contact him at woodnutbob@hotmail.com. Glen is a senior editor of Popular Woodworki ng, a published author, the host of the Woodworker's Edge DVD series and teaches woodworking classes and seminars. Contact him at 513-531-2690 x1293 orglen.huey@fwpubs.com. |
|||||||||||||||||||||||||||||||||||||||||||||||||||||||||||||||||||||||||||||||||||||||||||||||||||||||||||||||||||||||||||||||||||||||||||||||||||||||||||||||||||||||||||||||||||||||||||||||||||||||||||||||||||||||||||||||||||||||||||||||||||||||||||||||||||||||||||||||||||||||||||||||||||||||||||||||||||||||||||||||||||||||||||||||||||||||||||||||||||||


