Popular Woodworking 2007-10 № 164, страница 43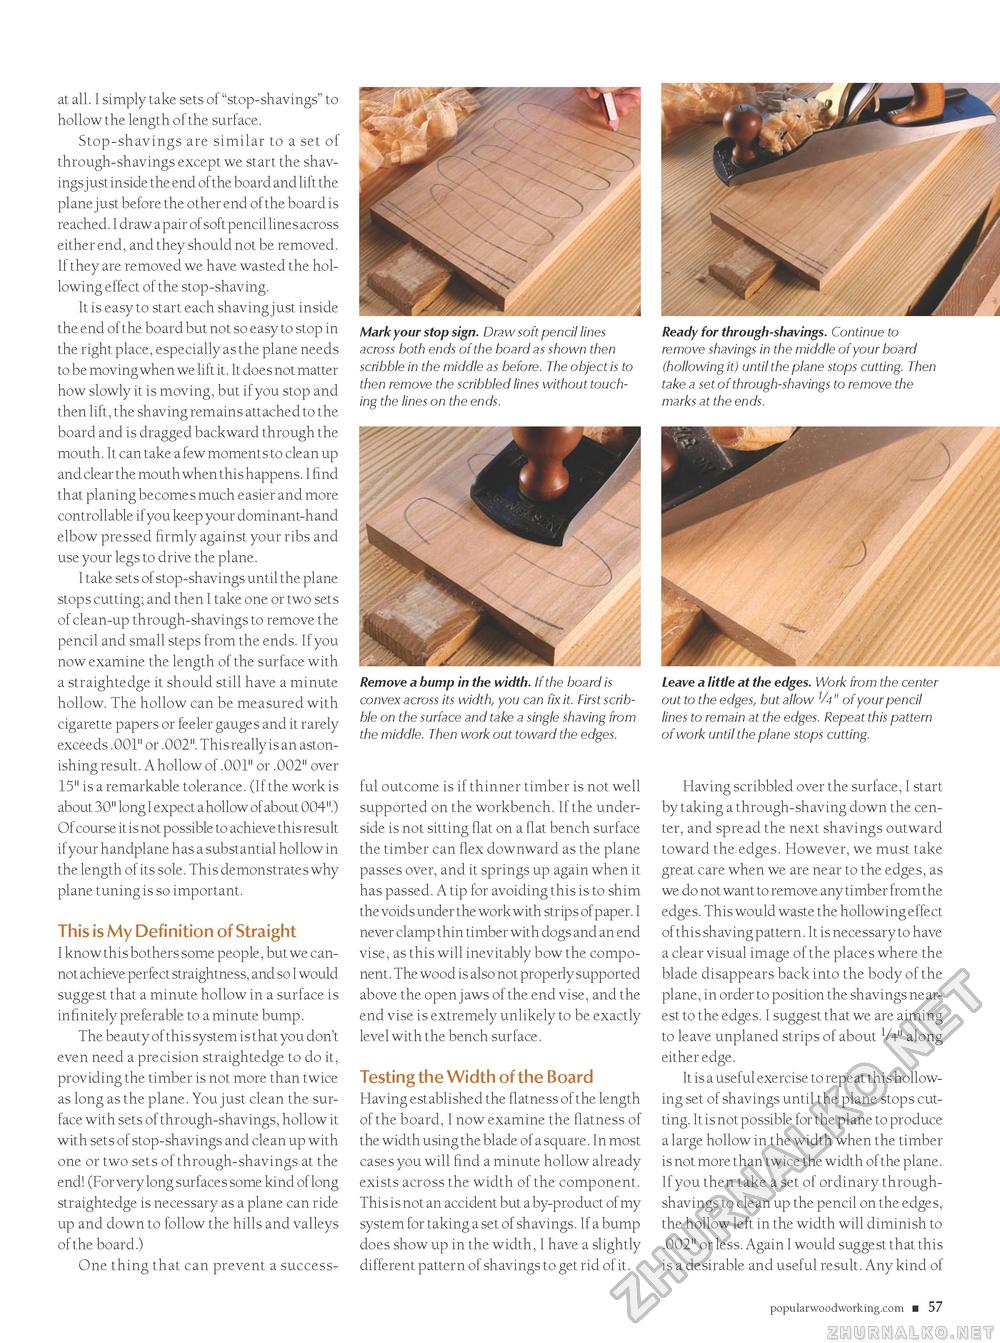
at all. I simply take sets of "stop-shavings" to hollow the length of the surface. Stop-shavings are similar to a set of through-shavings except we start the shavings just inside the end of the board and lift the plane just before the other end of the board is reached. I draw a pair of soft pencil lines across either end, and they should not be removed. If they are removed we have wasted the hollowing effect of the stop-shaving. It is easy to start each shaving just inside the end of the board but not so easy to stop in the right place, especially as the plane needs to be moving when we lift it. It does not matter how slowly it is moving, but if you stop and then lift, the shaving remains attached to the board and is dragged backward through the mouth. It can take a few moments to clean up and clear the mouth when this happens. I find that planing becomes much easier and more controllable if you keep your dominant-hand elbow pressed firmly against your ribs and use your legs to drive the plane. I take sets of stop-shavings until the plane stops cutting; and then I take one or two sets of clean-up through-shavings to remove the pencil and small steps from the ends. If you now examine the length of the surface with a straightedge it should still have a minute hollow. The hollow can be measured with cigarette papers or feeler gauges and it rarely exceeds .001" or .002". This really is an astonishing result. A hollow of .001" or .002" over 15" is a remarkable tolerance. (If the work is about 30" long I expect a hollow of about 004".) Of course it is not possible to achieve this result if your handplane has a substantial hollow in the length of its sole. This demonstrates why plane tuning is so important. This is My Definition of Straight I know this bothers some people, but we cannot achieve perfect straightness, and so I would suggest that a minute hollow in a surface is infinitely preferable to a minute bump. The beauty of this system is that you don't even need a precision straightedge to do it, providing the timber is not more than twice as long as the plane. You just clean the surface with sets of through-shavings, hollow it with sets of stop-shavings and clean up with one or two sets of through-shavings at the end! (For very long surfaces some kind of long straightedge is necessary as a plane can ride up and down to follow the hills and valleys of the board.) One thing that can prevent a success- Mark your stop sign. Draw soft pencil lines across both ends of the board as shown then scribble in the middle as before. The object is to then remove the scribbled lines without touching the lines on the ends. Ready for through-shavings. Continue to remove shavings in the middle of your board (hollowing it) until the plane stops cutting. Then take a set of through-shavings to remove the marks at the ends. Remove a bump in the width. If the board is convex across its width, you can fix it. First scribble on the surface and take a single shaving from the middle. Then work out toward the edges. Leave a little at the edges. Work from the center out to the edges, but allow V4" of your pencil lines to remain at the edges. Repeat this pattern of work until the plane stops cutting. ful outcome is if thinner timber is not well supported on the workbench. If the underside is not sitting flat on a flat bench surface the timber can flex downward as the plane passes over, and it springs up again when it has passed. A tip for avoiding this is to shim the voids under the work with strips of paper. I never clamp thin timber with dogs and an end vise, as this will inevitably bow the component. The wood is also not properly supported above the open jaws of the end vise, and the end vise is extremely unlikely to be exactly level with the bench surface. Testing the Width of the Board Having established the flatness of the length of the board, I now examine the flatness of the width using the blade of a square. In most cases you will find a minute hollow already exists across the width of the component. This is not an accident but a by-product of my system for taking a set of shavings. If a bump does show up in the width, I have a slightly different pattern of shavings to get rid of it. Having scribbled over the surface, I start by taking a through-shaving down the center, and spread the next shavings outward toward the edges. However, we must take great care when we are near to the edges, as we do not want to remove any timber from the edges. This would waste the hollowing effect of this shaving pattern. It is necessary to have a clear visual image of the places where the blade disappears back into the body of the plane, in order to position the shavings nearest to the edges. I suggest that we are aiming to leave unplaned strips of about V4" along either edge. It is a useful exercise to repeat this hollowing set of shavings until the plane stops cutting. It is not possible for the plane to produce a large hollow in the width when the timber is not more than twice the width of the plane. If you then take a set of ordinary through-shavings to clean up the pencil on the edges, the hollow left in the width will diminish to .002" or less. Again I would suggest that this is a desirable and useful result. Any kind of popularwoodworking.com ■ 57 CIRCLE #152 ON FREE INFORMATION CARD. |


