Popular Woodworking 2007-10 № 164, страница 42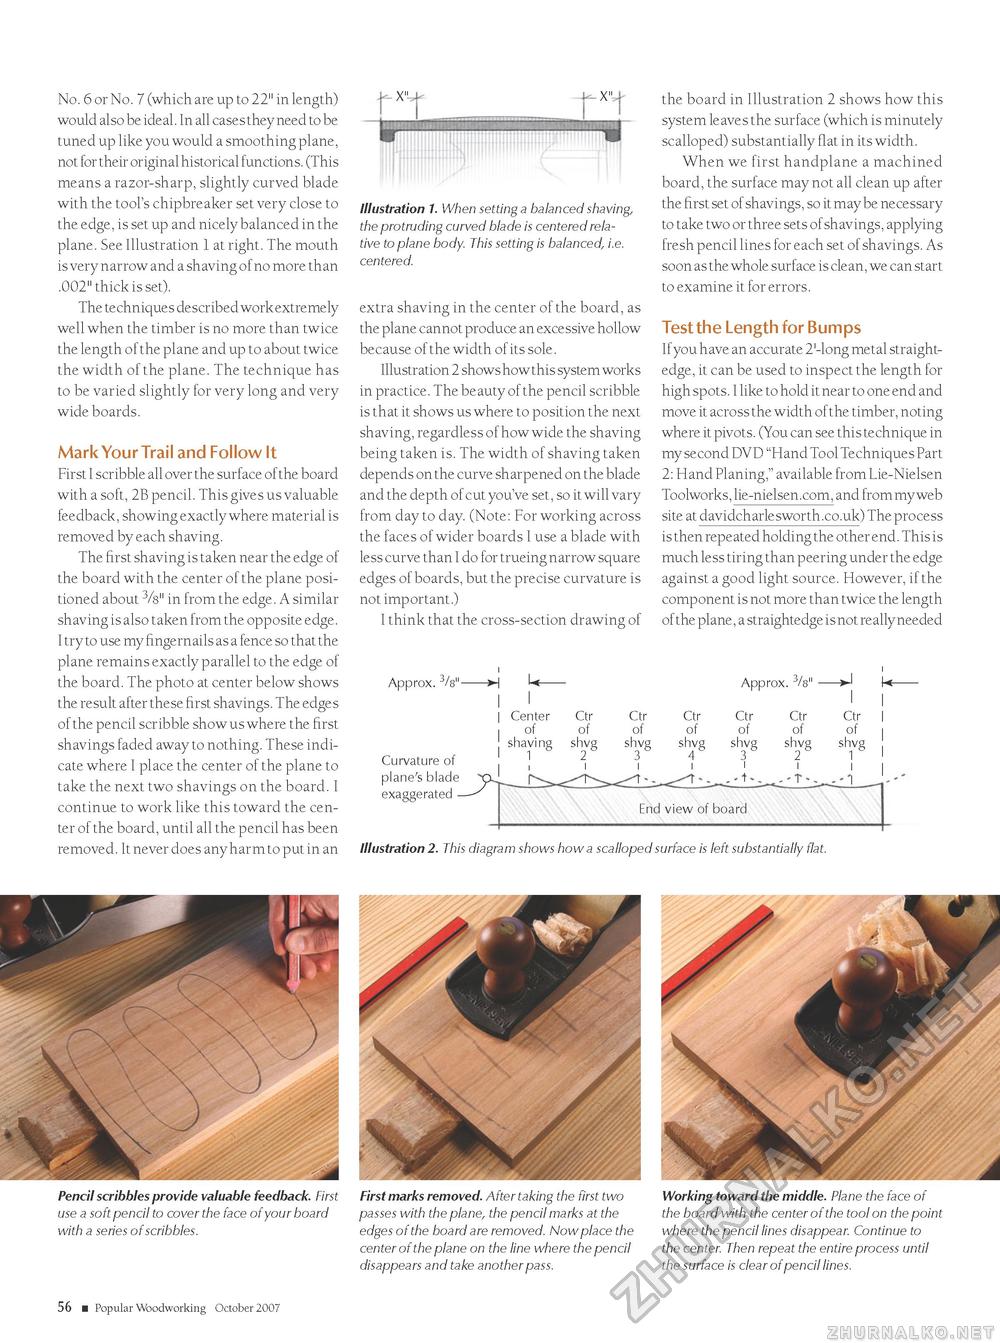
No. 6 or No. 7 (which are up to 22" in length) would also be ideal. In all cases they need to be tuned up like you would a smoothing plane, not for their original historical functions. (This means a razor-sharp, slightly curved blade with the tool's chipbreaker set very close to the edge, is set up and nicely balanced in the plane. See Illustration 1 at right. The mouth is very narrow and a shaving of no more than .002" thick is set). The techniques described work extremely well when the timber is no more than twice the length of the plane and up to about twice the width of the plane. The technique has to be varied slightly for very long and very wide boards. Mark Your Trail and Follow It First I scribble all over the surface of the board with a soft, 2B pencil. This gives us valuable feedback, showing exactly where material is removed by each shaving. The first shaving is taken near the edge of the board with the center of the plane positioned about 3/8" in from the edge. A similar shaving is also taken from the opposite edge. I try to use my fingernails as a fence so that the plane remains exactly parallel to the edge of the board. The photo at center below shows the result after these first shavings. The edges of the pencil scribble show us where the first shavings faded away to nothing. These indicate where I place the center of the plane to take the next two shavings on the board. I continue to work like this toward the center of the board, until all the pencil has been removed. It never does any harm to put in an .X"J r Illustration 1. When setting a balanced shaving, the protruding curved blade is centered relative to plane body. This setting is balanced, i.e. centered. extra shaving in the center of the board, as the plane cannot produce an excessive hollow because of the width of its sole. Illustration 2 shows how this system works in practice. The beauty of the pencil scribble is that it shows us where to position the next shaving, regardless of how wide the shaving being taken is. The width of shaving taken depends on the curve sharpened on the blade and the depth of cut you've set, so it will vary from day to day. (Note: For working across the faces of wider boards I use a blade with less curve than I do for trueing narrow square edges of boards, but the precise curvature is not important.) I think that the cross-section drawing of Approx. 3/s" Curvature of plane's blade exaggerated Illustration 2. This diagram shows how a scalloped surface is left substantially flat. the board in Illustration 2 shows how this system leaves the surface (which is minutely scalloped) substantially flat in its width. When we first handplane a machined board, the surface may not all clean up after the first set of shavings, so it may be necessary to take two or three sets of shavings, applying fresh pencil lines for each set of shavings. As soon as the whole surface is clean, we can start to examine it for errors. Test the Length for Bumps If you have an accurate 2'-long metal straightedge, it can be used to inspect the length for high spots. I like to hold it near to one end and move it across the width of the timber, noting where it pivots. (You can see this technique in my second DVD "Hand Tool Techniques Part 2: Hand Planing," available from Lie-Nielsen Toolworks, lie-nielsen.com, and from my web site at davidcharlesworth.co.uk) The process is then repeated holding the other end. This is much less tiring than peering under the edge against a good light source. However, if the component is not more than twice the length of the plane, a straightedge is not really needed Pencil scribbles provide valuable feedback. First use a soft pencil to cover the face of your board with a series of scribbles. First marks removed. After taking the first two passes with the plane, the pencil marks at the edges of the board are removed. Now place the center of the plane on the line where the pencil disappears and take another pass. Working toward the middle. Plane the face of the board with the center of the tool on the point where the pencil lines disappear. Continue to the center. Then repeat the entire process until the surface is clear of pencil lines. 56 ■ Popular Woodworking October 2007 |


