Popular Woodworking 2007-11 № 165, страница 69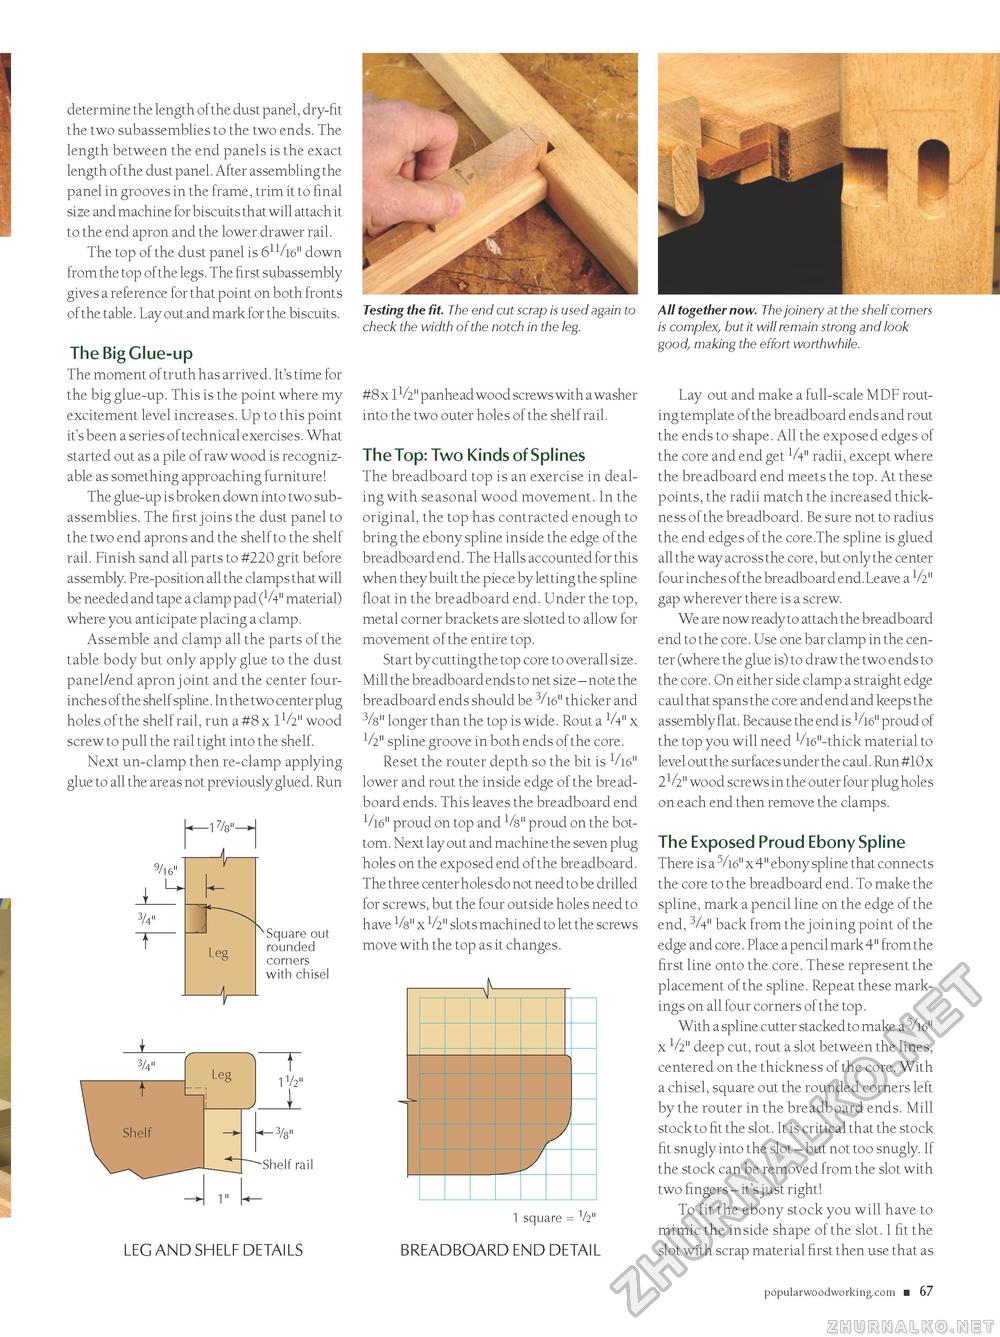
determine the length of the dust panel, dry-fit the two subassemblies to the two ends. The length between the end panels is the exact length of the dust panel. After assembling the panel in grooves in the frame, trim it to final size and machine for biscuits that will attach it to the end apron and the lower drawer rail. The top of the dust panel is 611/l6" down from the top of the legs. The first subassembly gives a reference for that point on both fronts of the table. Lay out and mark for the biscuits. The Big Glue-up The moment of truth has arrived. It's time for the big glue-up. This is the point where my excitement level increases. Up to this point it's been a series of technical exercises. What started out as a pile of raw wood is recognizable as something approaching furniture! The glue-up is broken down into two subassemblies. The first joins the dust panel to the two end aprons and the shelf to the shelf rail. Finish sand all parts to #220 grit before assembly. Pre-position all the clamps that will be needed and tape a clamp pad (V4" material) where you anticipate placing a clamp. Assemble and clamp all the parts of the table body but only apply glue to the dust panel/end apron joint and the center four-inches of the shelf spline. In the two center plug holes of the shelf rail, run a #8 x 11/2" wood screw to pull the rail tight into the shelf. Next un-clamp then re-clamp applying glue to all the areas not previously glued. Run 178"—j 3/4" rrn Leg -f "Square out rounded corners with chisel Shelf rail LEG AND SHELF DETAILS Testing the fit. The end cut scrap is used again to check the width of the notch in the leg. #8 x 1V2" panhead wood screws with a washer into the two outer holes of the shelf rail. The Top: Two Kinds of Splines The breadboard top is an exercise in dealing with seasonal wood movement. In the original, the top has contracted enough to bring the ebony spline inside the edge of the breadboard end. The Halls accounted for this when they built the piece by letting the spline float in the breadboard end. Under the top, metal corner brackets are slotted to allow for movement of the entire top. Start by cutting the top core to overall size. Mill the breadboard ends to net size - note the breadboard ends should be 3/16" thicker and 3/8" longer than the top is wide. Rout a V4" x V2" spline groove in both ends of the core. Reset the router depth so the bit is 1/16" lower and rout the inside edge of the breadboard ends. This leaves the breadboard end 1/16" proud on top and 1/8" proud on the bottom. Next lay out and machine the seven plug holes on the exposed end of the breadboard. The three center holes do not need to be drilled for screws, but the four outside holes need to have 1/8" x V2" slots machined to let the screws move with the top as it changes. 1 square = V2" BREADBOARD END DETAIL All together now. The joinery at the shelf corners is complex, but it will remain strong and look good, making the effort worthwhile. Lay out and make a full-scale MDF routing template of the breadboard ends and rout the ends to shape. All the exposed edges of the core and end get 1/4" radii, except where the breadboard end meets the top. At these points, the radii match the increased thickness of the breadboard. Be sure not to radius the end edges of the core.The spline is glued all the way across the core, but only the center four inches of the breadboard end.Leave a gap wherever there is a screw. We are now ready to attach the breadboard end to the core. Use one bar clamp in the center (where the glue is) to draw the two ends to the core. On either side clamp a straight edge caul that spans the core and end and keeps the assembly flat. Because the end is V16" proud of the top you will need VW'-thick material to level out the surfaces under the caul. Run #10 x 2V2" wood screws in the outer four plug holes on each end then remove the clamps. The Exposed Proud Ebony Spline There is a x 4" ebony spline that connects the core to the breadboard end. To make the spline, mark a pencil line on the edge of the end, 3A" back from the joining point of the edge and core. Place a pencil mark 4" from the first line onto the core. These represent the placement of the spline. Repeat these markings on all four corners of the top. With a spline cutter stacked to make a x 1/2" deep cut, rout a slot between the lines, centered on the thickness of the core. With a chisel, square out the rounded corners left by the router in the breadboard ends. Mill stock to fit the slot. It is critical that the stock fit snugly into the slot - but not too snugly. If the stock can be removed from the slot with two fingers - it's just right! To fit the ebony stock you will have to mimic the inside shape of the slot. I fit the slot with scrap material first then use that as popularwoodworking.com ■ 67 |


