Popular Woodworking 2007-11 № 165, страница 71
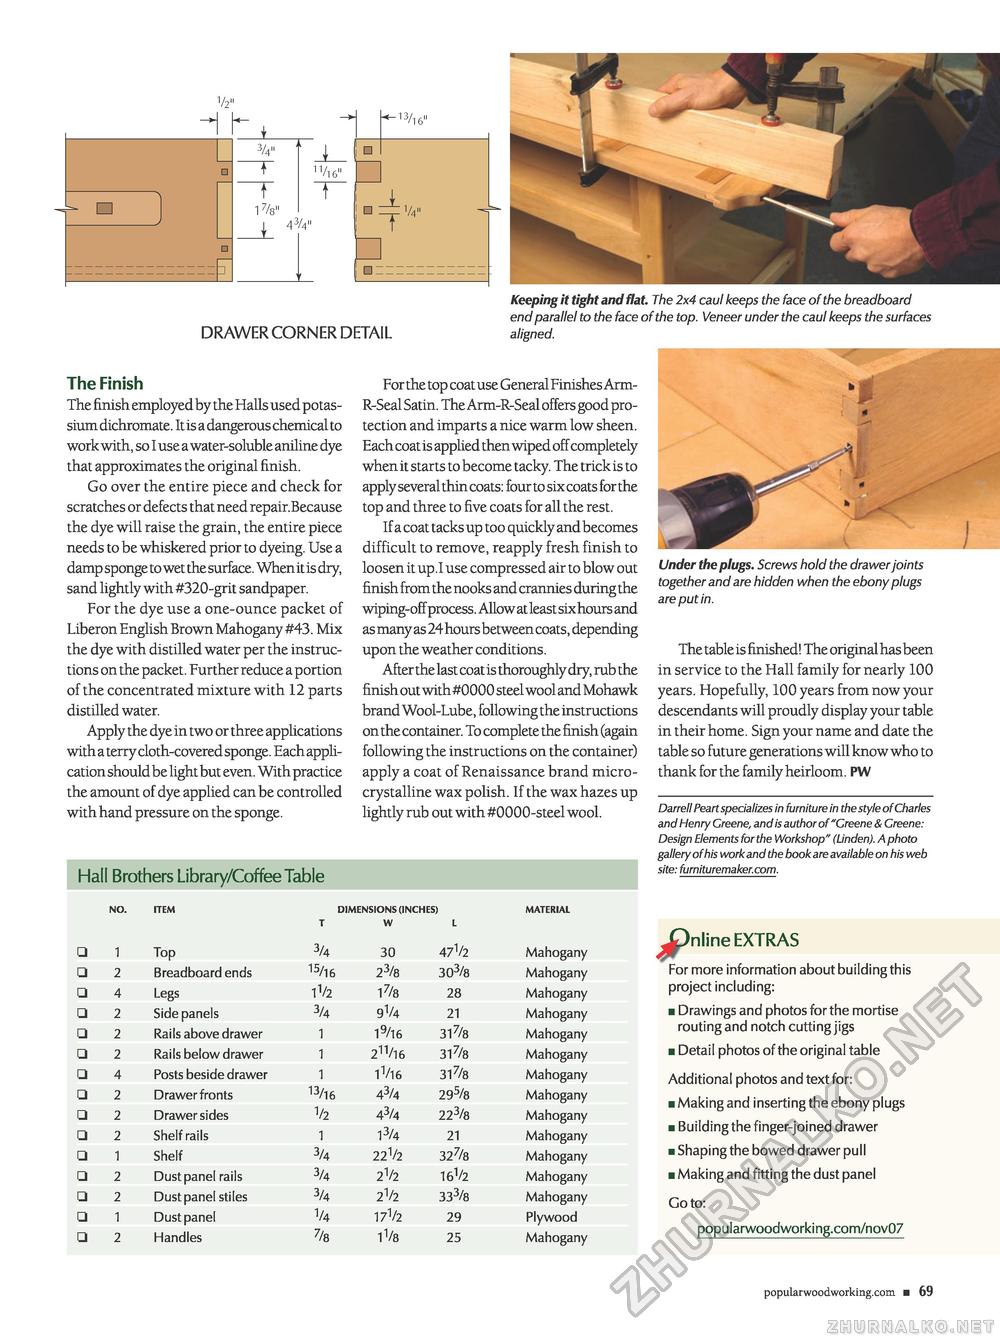
1/2" □ fi 3/4" 43/4" DRAWER CORNER DETAIL Keeping it tight and flat. The 2x4 caul keeps the face of the breadboard end parallel to the face of the top. Veneer under the caul keeps the surfaces aligned. The Finish The finish employed by the Halls used potassium dichromate. It is a dangerous chemical to work with, so I use a water-soluble aniline dye that approximates the original finish. Go over the entire piece and check for scratches or defects that need repair.Because the dye will raise the grain, the entire piece needs to be whiskered prior to dyeing. Use a damp sponge to wet the surface. When it is dry, sand lightly with #320-grit sandpaper. For the dye use a one-ounce packet of Liberon English Brown Mahogany #43. Mix the dye with distilled water per the instructions on the packet. Further reduce a portion of the concentrated mixture with 12 parts distilled water. Apply the dye in two or three applications with a terry cloth-covered sponge. Each application should be light but even. With practice the amount of dye applied can be controlled with hand pressure on the sponge. For the top coat use General Finishes Arm-R-Seal Satin. The Arm-R-Seal offers good protection and imparts a nice warm low sheen. Each coat is applied then wiped off completely when it starts to become tacky. The trick is to apply several thin coats: four to six coats for the top and three to five coats for all the rest. If a coat tacks up too quickly and becomes difficult to remove, reapply fresh finish to loosen it up.I use compressed air to blow out finish from the nooks and crannies during the wiping-off process. Allow at least six hours and as many as 24 hours between coats, depending upon the weather conditions. After the last coat is thoroughly dry, rub the finish out with #0000 steel wool and Mohawk brand Wool-Lube, following the instructions on the container. To complete the finish (again following the instructions on the container) apply a coat of Renaissance brand micro-crystalline wax polish. If the wax hazes up lightly rub out with #0000-steel wool. Hall Brothers Library/Coffee Table
Under the plugs. Screws hold the drawer joints together and are hidden when the ebony plugs are put in. The table is finished! The original has been in service to the Hall family for nearly 100 years. Hopefully, 100 years from now your descendants will proudly display your table in their home. Sign your name and date the table so future generations will know who to thank for the family heirloom. PW Darrell Peart specializes in furniture in the style of Charles and Henry Greene, and is author of "Greene & Greene: Design Elements for the Workshop" (Linden). A photo gallery of his work and the book are available on his web site: furnituremaker.com. ^Pnline EXTRAS For more information about building this project including: ■ Drawings and photos for the mortise routing and notch cutting jigs ■ Detail photos of the original table Additional photos and text for: ■ Making and inserting the ebony plugs ■ Building the finger-joined drawer ■ Shaping the bowed drawer pull ■ Making and fitting the dust panel Goto: popularwoodworking.com/nov07 popularwoodworking.com ■ 69 |
||||||||||||||||||||||||||||||||||||||||||||||||||||||||||||||||||||||||||||||||||||||||||||||||||||||||||||||||


