Popular Woodworking 2008-04 № 168, страница 56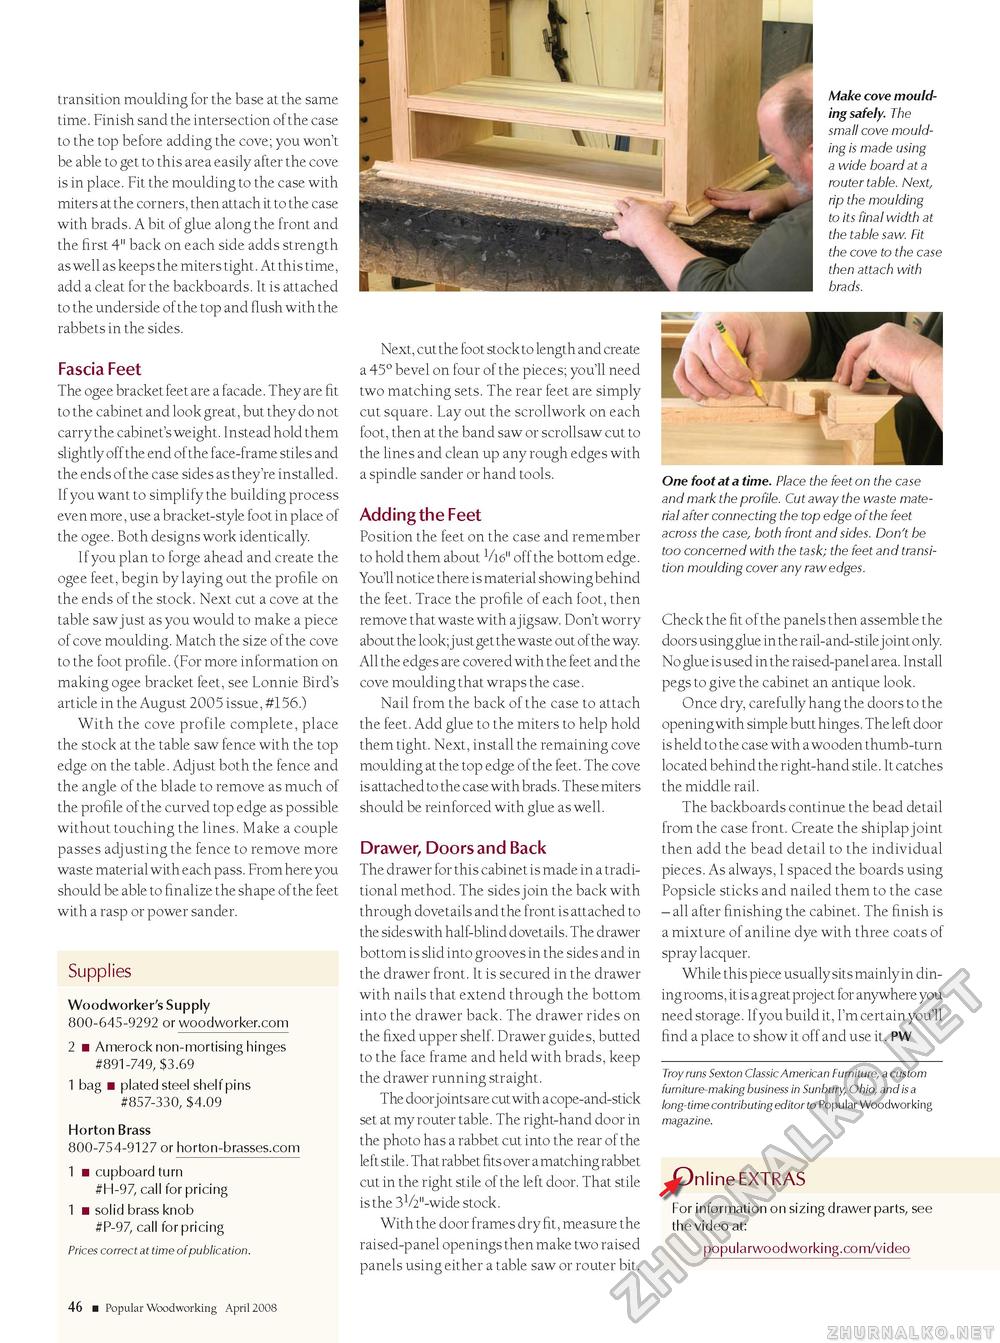
transition moulding for the base at the same time. Finish sand the intersection of the case to the top before adding the cove; you won't be able to get to this area easily after the cove is in place. Fit the moulding to the case with miters at the corners, then attach it to the case with brads. A bit of glue along the front and the first 4" back on each side adds strength as well as keeps the miters tight. At this time, add a cleat for the backboards. It is attached to the underside of the top and flush with the rabbets in the sides. Fascia Feet The ogee bracket feet are a facade. They are fit to the cabinet and look great, but they do not carry the cabinet's weight. Instead hold them slightly off the end of the face-frame stiles and the ends of the case sides as they're installed. If you want to simplify the building process even more, use a bracket-style foot in place of the ogee. Both designs work identically. If you plan to forge ahead and create the ogee feet, begin by laying out the profile on the ends of the stock. Next cut a cove at the table saw just as you would to make a piece of cove moulding. Match the size of the cove to the foot profile. (For more information on making ogee bracket feet, see Lonnie Bird's article in the August 2005 issue, #156.) With the cove profile complete, place the stock at the table saw fence with the top edge on the table. Adjust both the fence and the angle of the blade to remove as much of the profile of the curved top edge as possible without touching the lines. Make a couple passes adjusting the fence to remove more waste material with each pass. From here you should be able to finalize the shape of the feet with a rasp or power sander. Supplies Woodworker's Supply 800-645-9292 or woodworker.com 2 ■ Amerock non-mortising hinges #891-749, $3.69 1 bag ■ plated steel shelf pins #857-330, $4.09 Horton Brass 800-754-9127 or horton-brasses.com 1 ■ cupboard turn #H-97, call for pricing 1 ■ solid brass knob #p-97, call for pricing Prices correct at time of publication. Make cove moulding safely. The small cove moulding is made using a wide board at a router table. Next, rip the moulding to its final width at the table saw. Fit the cove to the case then attach with brads. Next, cut the foot stock to length and create a 45° bevel on four of the pieces; you'll need two matching sets. The rear feet are simply cut square. Lay out the scrollwork on each foot, then at the band saw or scrollsaw cut to the lines and clean up any rough edges with a spindle sander or hand tools. Adding the Feet Position the feet on the case and remember to hold them about V16" off the bottom edge. You'll notice there is material showing behind the feet. Trace the profile of each foot, then remove that waste with a jigsaw. Don't worry about the look; just get the waste out of the way. All the edges are covered with the feet and the cove moulding that wraps the case. Nail from the back of the case to attach the feet. Add glue to the miters to help hold them tight. Next, install the remaining cove moulding at the top edge of the feet. The cove is attached to the case with brads. These miters should be reinforced with glue as well. Drawer, Doors and Back The drawer for this cabinet is made in a traditional method. The sides join the back with through dovetails and the front is attached to the sides with half-blind dovetails. The drawer bottom is slid into grooves in the sides and in the drawer front. It is secured in the drawer with nails that extend through the bottom into the drawer back. The drawer rides on the fixed upper shelf. Drawer guides, butted to the face frame and held with brads, keep the drawer running straight. The door joints are cut with a cope-and-stick set at my router table. The right-hand door in the photo has a rabbet cut into the rear of the left stile. That rabbet fits over a matching rabbet cut in the right stile of the left door. That stile is the 31/2"-wide stock. With the door frames dry fit, measure the raised-panel openings then make two raised panels using either a table saw or router bit. One foot at a time. Place the feet on the case and mark the profile. Cut away the waste material after connecting the top edge of the feet across the case, both front and sides. Don't be too concerned with the task; the feet and transition moulding cover any raw edges. Check the fit of the panels then assemble the doors using glue in the rail-and-stile j oint only. No glue is used in the raised-panel area. Install pegs to give the cabinet an antique look. Once dry, carefully hang the doors to the opening with simple butt hinges. The left door is held to the case with a wooden thumb-turn located behind the right-hand stile. It catches the middle rail. The backboards continue the bead detail from the case front. Create the shiplap joint then add the bead detail to the individual pieces. As always, I spaced the boards using Popsicle sticks and nailed them to the case - all after finishing the cabinet. The finish is a mixture of aniline dye with three coats of spray lacquer. While this piece usually sits mainly in dining rooms, it is a great project for anywhere you need storage. Ifyou build it, I'm certain you'll find a place to show it off and use it. PW Troy runs Sexton Classic American Furniture, a custom furniture-making business in Sunbury, Ohio, and is a long-time contributing editor to popular woodworking magazine. O nline EXTRAS For information on sizing drawer parts, see the video at: popularwoodworking.com/video 46 ■ Popular Woodworking April 2008 |


