Popular Woodworking 2008-08 № 170, страница 14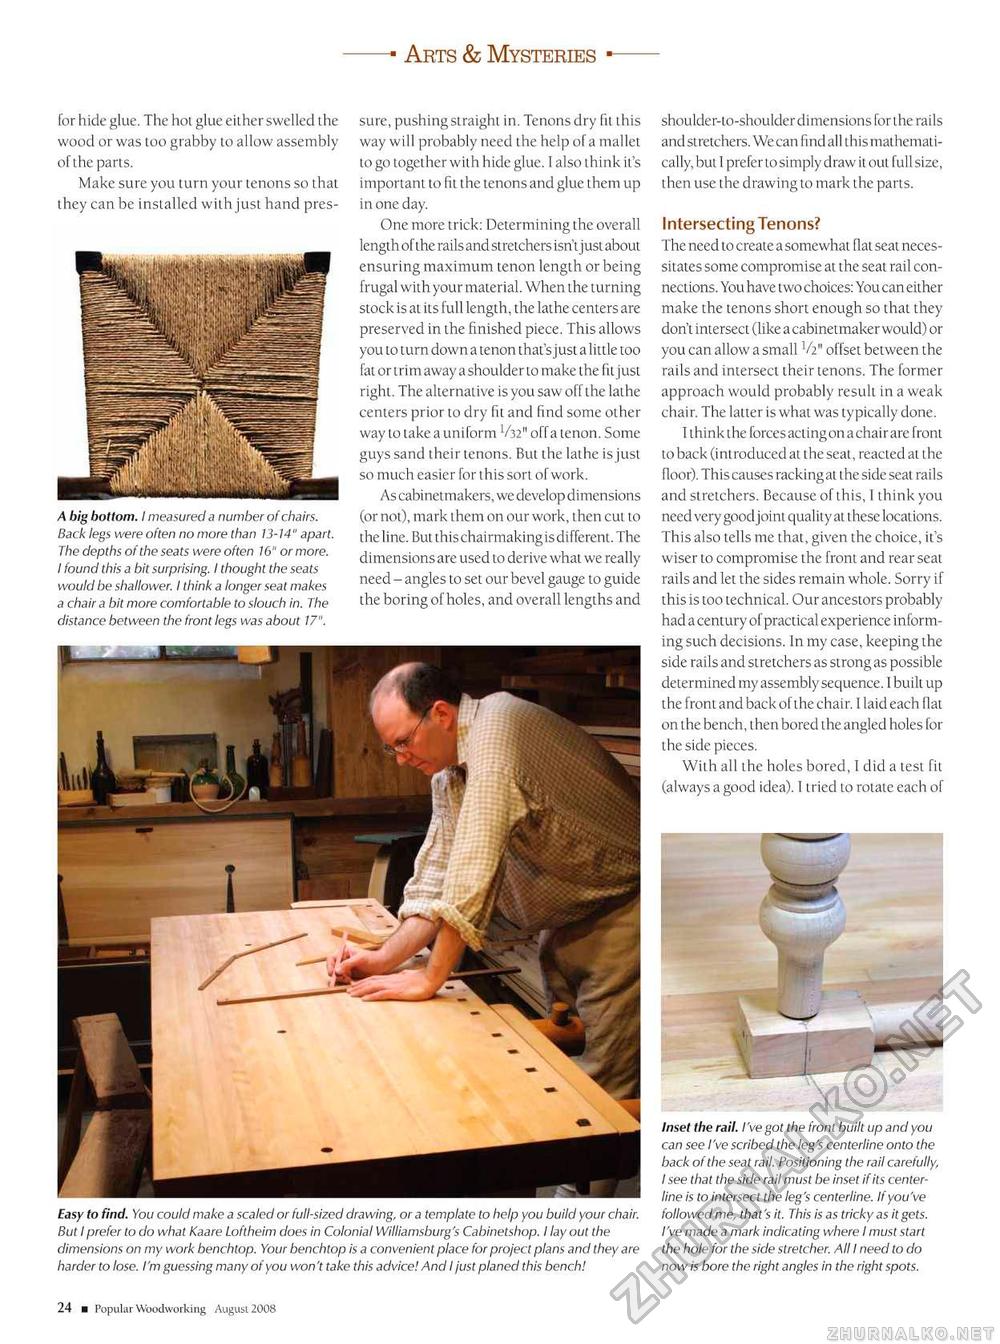
—" Arts & Mysteries ■— Easy to find. You could make a scaled or full-sized drawing, or a template to help you build your chair. But I prefer to do what Kaare Loftheim does in Colonial Williamsburg's Cabinetshop. I lay out the dimensions on my work benchtop. Your benchtop is a convenient place for project plans and they are harder to lose. I'm guessing many of you won't take this advice! And I just planed this bench! sure, pushing straight in. Tenons dry fit this way will probably need the help of a mallet to go together with hide glue. 1 also think it's important to fit the tenons and glue them up in one day. One more trick: Determining the overall length of the rails and stretchers isn't just about ensuring maximum tenon length or being frugal with your material. When the turning stock is at its full length, the lathe centers are preserved in the finished piece. This allows you to turn down a tenon that's just a little too fat or trim away a shoulder to make the fit just right. The alternative is you saw off the lathe centers prior to dry fit and find some other way to take a uniform V32" off a tenon. Some guys sand their tenons. But the lathe is just so much easier for this sort of work. As cabinetmakers, we develop dimensions (or not), mark them on our work, then cut to the line. But this chairmaking is different. The dimensions are used to derive what we really need - angles to set our bevel gauge to guide the boring of holes, and overall lengths and shoulder-to-shoulderdimensions forthe rails and stretchers. We can find all this mathematically, but I prefer to simply draw it out full size, then use the drawing to mark the parts. Intersecting Tenons? The need to create a somewhat fiat seat necessitates some compromise at the seat rail connections. You have two choices: You can either make the tenons short enough so that they don't intersect (like a cabinetmaker would) or you can allow a small V2" offset between the rails and intersect their tenons. The former approach would probably result in a weak chair. The latter is what was typically done. I think the forces actingonachairare front to back (introduced at the seal, reacted at the floor). This causes racking at the side seat rails and stretchers. Because of this, 1 think you need very goodjoint quality at these locations. This also tells me that, given the choice, it's wiser to compromise the front and rear seat rails and let the sides remain whole. Sorry if this is too technical. Our ancestors probably had a century of practical experience informing such decisions. In my case, keeping the side rails and stretchers as strong as possible determined my assembly sequence. I built up the front and back of the chair. I laid each flat on the bench, then bored the angled holes for the side pieces. With all the holes bored, 1 did a test fit (always a good idea). I tried to rotate each of Inset the rail. I've got the front built up and you can see I've scribed the leg's centerline onto the back of the seat rail. Positioning the rail carefully, I see that the side rail must be inset if its center-line is to intersect the leg's centerline. If you've followed me, that's it. This is as tricky as it gets. I've made a mark indicating where I must start the hole for the side stretcher. All I need to do now is bore the right angles in the right spots. for hide glue. The hot glue either swelled the wood or was too grabby to allow assembly of the parts. Make sure you turn your tenons so that they can be installed with just hand pres A big bottom. I measured a number of chairs. Back legs were often no more than 13-14" apart. The depths of the seats were often 16" or more. I found this a bit surprising. I thought the seats would be shallower. I think a longer seat makes a chair a bit more comfortable to slouch in. The distance between the front legs was about 17". 24 ■ Popular Woodworking August 2008 |


