Popular Woodworking 2008-08 № 170, страница 15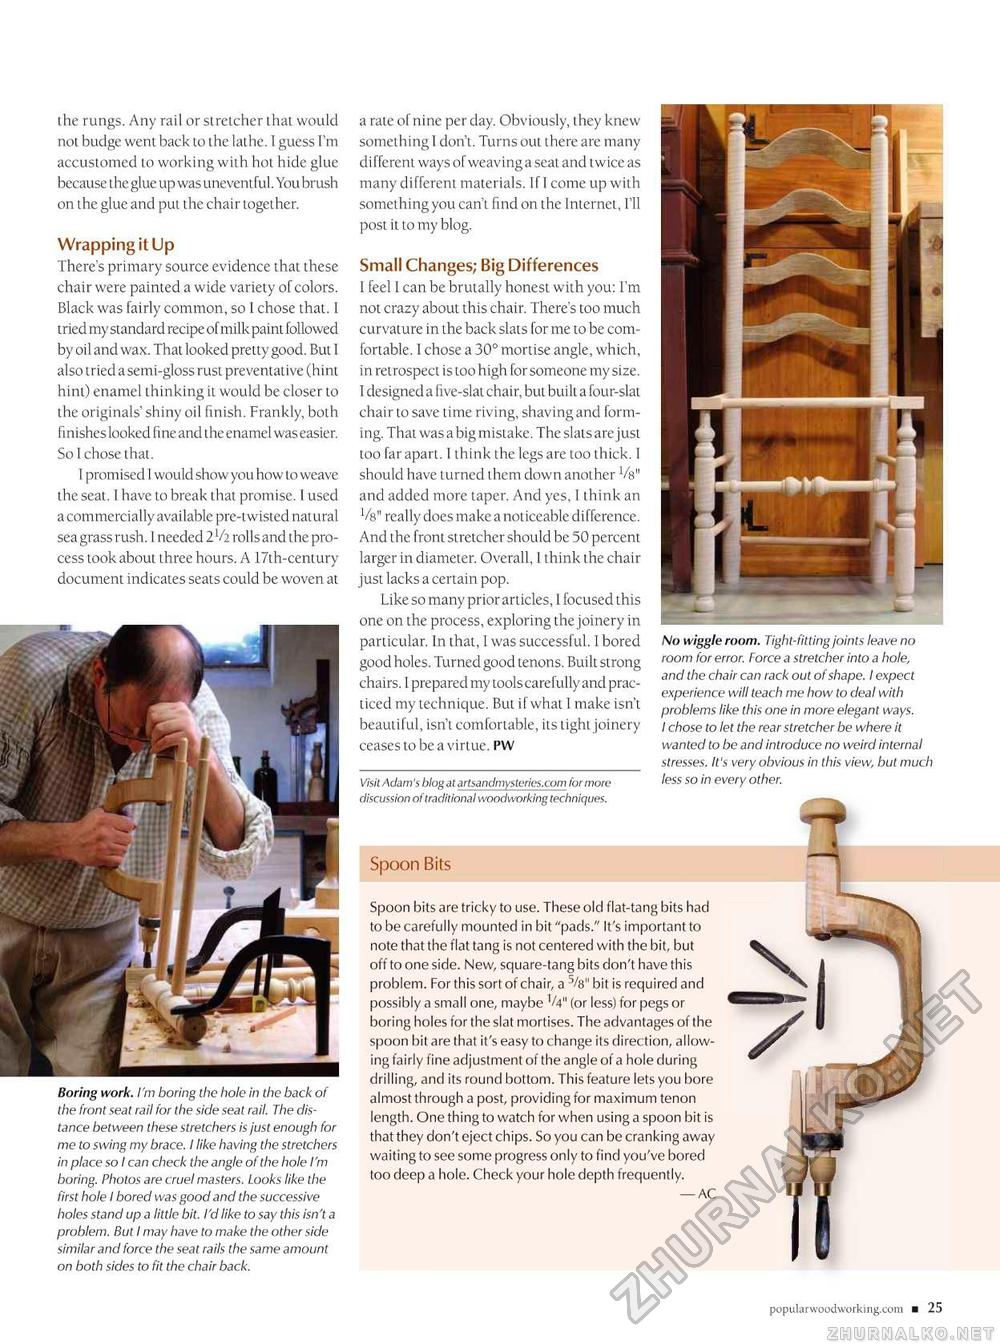
the rungs. Any rail or stretcher that would not budge went back to the lathe. I guess I'm accustomed to working with hot hide glue because the glue up was uneventful. You brush on the glue and put the chair together. Wrapping it Up There's primary source evidence that these chair were painted a wide variety of colors. Black was fairly common, so I chose that. I tried my standard recipe of milk paint followed by oil and wax. That looked pretty good. But I also tried a semi-gloss rust preventative (hint hint) enamel thinking it would be closer to the originals' shiny oil finish. Frankly, both finishes looked fine and the enamel was easier. So I chose that. I promised I would show you how to weave the seat. I have to break that promise. 1 used a commercially available pre-twisted natural sea grass rush. I needed 2V2 rolls and the process took about three hours. A 17th-century document indicates seats could be woven at a rate of nine per day. Obviously, they knew something I don't. Turns out there are many different ways of weaving a seat and twice as many different materials. If I come up with something you can't find on the Internet, I'll post it to my blog. Small Changes; Big Differences I feel I can be brutally honest with you: I'm not crazy about this chair. There's too much curvature in the back slats for me to be comfortable. 1 chose a 30° mortise angle, which, in retrospect is too high for someone my size. I designed a five-slat chair, but built a four-slat chair to save time riving, shaving and forming. That was a big mistake. The slats are just too far apart. I think the legs are too thick. I should have turned them down another Vs" and added more taper. And yes, I think an Vs" really does make a noticeable difference. And the front stretcher should be 50 percent larger in diameter. Overall, 1 think the chair just lacks a certain pop. Like so many prior articles, 1 focused this one on the process, exploring the joinery in particular. In that, I was successful. I bored good holes. Turned good tenons. Built strong chairs. I prepared my tools carefully and practiced my technique. But if what I make isn't beautiful, isn't comfortable, its tight joinery ceases to be a virtue. PW Visit Adam's blog at artsandmysteries.com for more discussion of traditional woodworking techniques. No wiggle room. Tight-fitting joints leave no room for error. Force a stretcher into a hole, and the chair can rack out of shape. I expect experience will teach me how to deal with problems like this one in more elegant ways. I chose to let the rear stretcher be where it wanted to be and introduce no weird internal stresses. It's very obvious in this view, but much less so in every other. Boring work. I'm boring the hole in the back of the front seat rail for the side seat rail. The distance between these stretchers is just enough for me to swing my brace. I like having the stretchers in place so I can check the angle of the hole I'm boring. Photos are cruel masters. Looks like the first hole I bored was good and the successive holes stand up a little bit. I'd like to say this isn't a problem. But I may have to make the other side similar and force the seat rails the same amount on both sides to fit the chair back. Spoon Bits Spoon bits are tricky to use. These old flat-tang bits had to be carefully mounted in bit "pads." It's important to note that the flat tang is not centered with the bit, but off to one side. New, square-tang bits don't have this problem. For this sort of chair, a 5/8" bit is required and possibly a small one, maybe V4" (or less) for pegs or 1 boring holes for the slat mortises. The advantages of the spoon bit are that it's easy to change its direction, allowing fairly fine adjustment of the angle of a hole during drilling, and its round bottom. This feature lets you bore almost through a post, providing for maximum tenon length. One thing to watch for when using a spoon bit is that they don't eject chips. So you can be cranking away waiting to see some progress only to find you've bored too deep a hole. Check your hole depth frequently. —AC \i |


