Popular Woodworking 2008-08 № 170, страница 17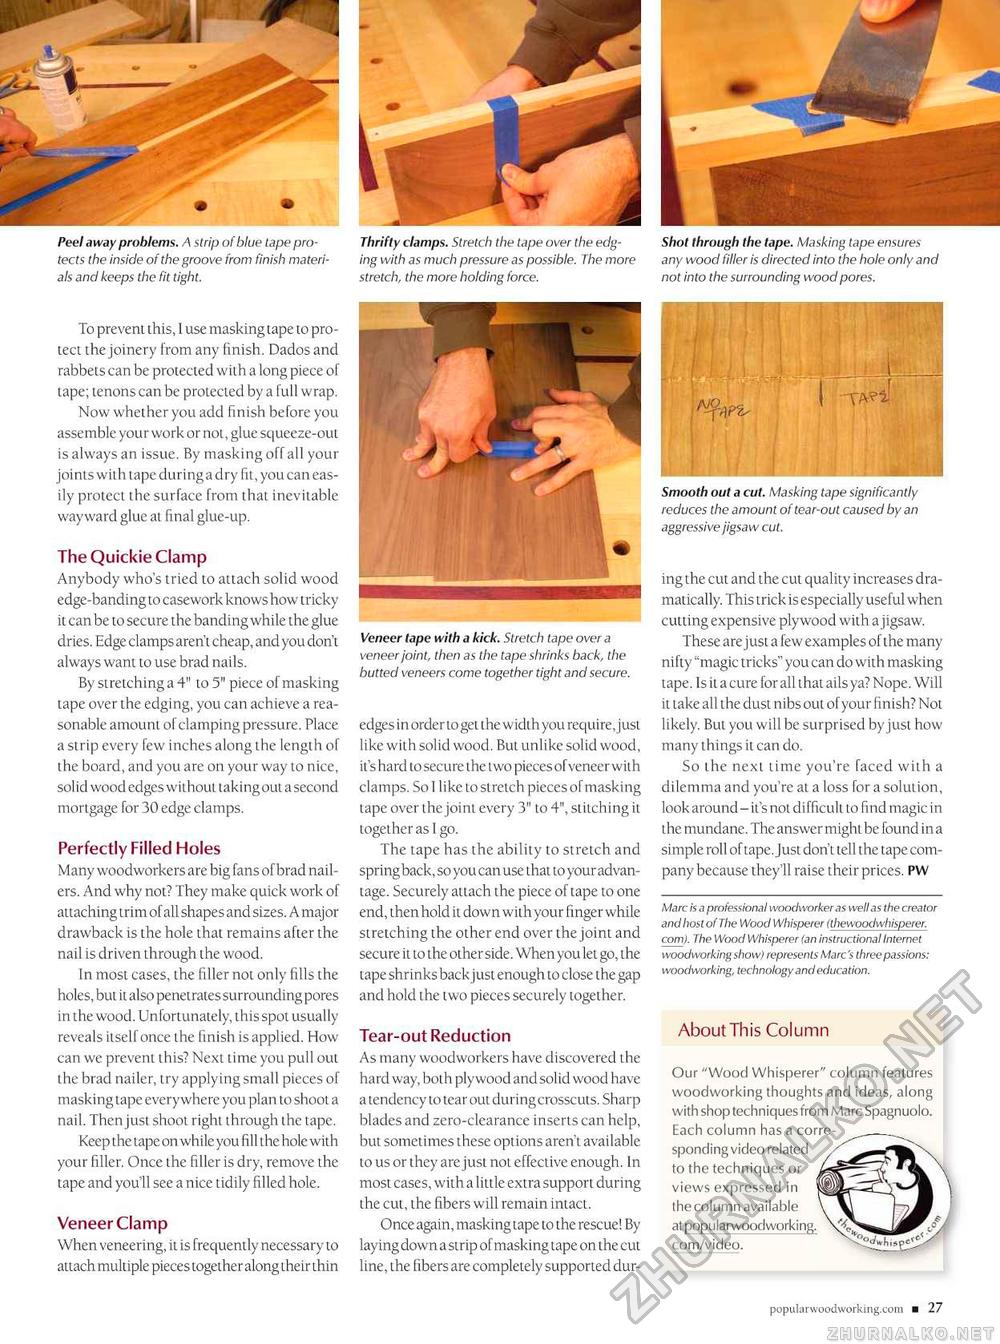
Peel away problems. A strip of blue tape protects the inside of the groove from finish materials and keeps the fit tight. Thrifty clamps. Stretch the tape over the edging with as much pressure as possible. The more stretch, the more holding force. Shot through the tape. Masking tape ensures any wood filler is directed into the hole only and not into the surrounding wood pores. Shot through the tape. Masking tape ensures any wood filler is directed into the hole only and not into the surrounding wood pores.
Smooth out a cut. Masking tape significantly reduces the amount of tear-out caused by an aggressive jigsaw cut. Smooth out a cut. Masking tape significantly reduces the amount of tear-out caused by an aggressive jigsaw cut. ing the cut and the cut quality increases dramatically. This trick is especially useful when cutting expensive plywood with a jigsaw. These are just a few examples of the many nifty "magic tricks" you can do with masking tape. Is it a cure for all that ailsya? Nope. Will it take all the dust nibs out of your finish? Not likely. But you will be surprised by just how many things it can do. So the next time you're faced with a dilemma and you're at a loss for a solution, look around - it's not difficult to find magic in the mundane. The answer might be found in a simple roll of tape. Just don't tell the tape company because they'll raise their prices. PW Marc is a professional woodworker as well as the creator and host of The Wood Whisperer (thewoodwhisperer. com). The Wood Whisperer (an instructional Internet woodworking show) represents Marc's three passions: woodworking, technology and education. About This Column Our "Wood Whisperer" column features woodworking thoughts and ideas, along with shop techniques from Marc Spagnuolo. Each column has a corre-sponding video related -' to the techniques or ^^ \ views expressed in jislSIj-^SrV*-^^ \ the column available \ ^ Nj^B J com/video. To prevent this, 1 use masking tape to protect the joinery from any finish. Dados and rabbets can be protected with a long piece of tape; tenons can be protected by a full wrap. Now whether you add finish before you assemble your work or not, glue squeeze-out is always an issue. By maski ng off all your joints with tape during a dry fit, you can easily protect the surface from that inevitable wayward glue at final glue-up. The Quickie Clamp Anybody who's tried to attach solid wood edge-banding to casework knows how tricky it can be to secure the banding while the glue dries. Edge clamps aren't cheap, and you don't always want to use brad nails. By stretching a 4" to 5" piece of masking tape over the edging, you can achieve a reasonable amount of clamping pressure. Place a strip every few inches along the length of the board, and you are on your way to nice, solid wood edges without taking out a second mortgage for 30 edge clamps. Perfectly Filled Holes Many woodworkers are big fans of brad nailers. And why not? They make quick work of attaching trim of all shapes and sizes. A major drawback is the hole that remains after the nail is driven through the wood. In most cases, the filler not only fills the holes, but it also penetrates surrounding pores in the wood. Unfortunately, this spot usually reveals itself once the finish is applied. How can we prevent this? Next lime you pull out the brad nailer, try applying small pieces of masking tape everywhere you plan to shoot a nail. Then just shoot right through the tape. Keep the tape on while you fill the hole with your filler. Once the filler is dry, remove the tape and you'll see a nice tidily filled hole. Veneer Clamp When veneering, it is frequently necessary to attach multiple pieces together along their thin Veneer tape with a kick. Stretch tape over a veneer joint, then as the tape shrinks back, the butted veneers come together tight and secure. edges in order to get the width you require,just like with solid wood. But unlike solid wood, it's hard to secure the two piecesof veneer with clamps. So I like to stretch pieces of masking tape over the joint every 3" to 4", stitching it together as I go. The tape has the ability to stretch and spring back, so you can use that to your advantage. Securely attach the piece of tape to one end, then hold it down with your finger while stretching the other end over the joint and secure it to the otherside. When you let go, the tape shrinks back just enough to close the gap and hold the two pieces securely together. Tear-out Reduction As many woodworkers have discovered the hard way, both plywood and solid wood have a tendency to tear out duringcrosscuts. Sharp blades and zero-clearance inserts can help, but sometimes these options aren't available to us or they are just not effective enough. In most cases, with a little extra support during the cut, the fibers will remain intact. Once again, masking tape to the rescue! By laying down a strip of masking tape on the cut line, the fibers are completely supported dur- |


