Popular Woodworking 2008-08 № 170, страница 29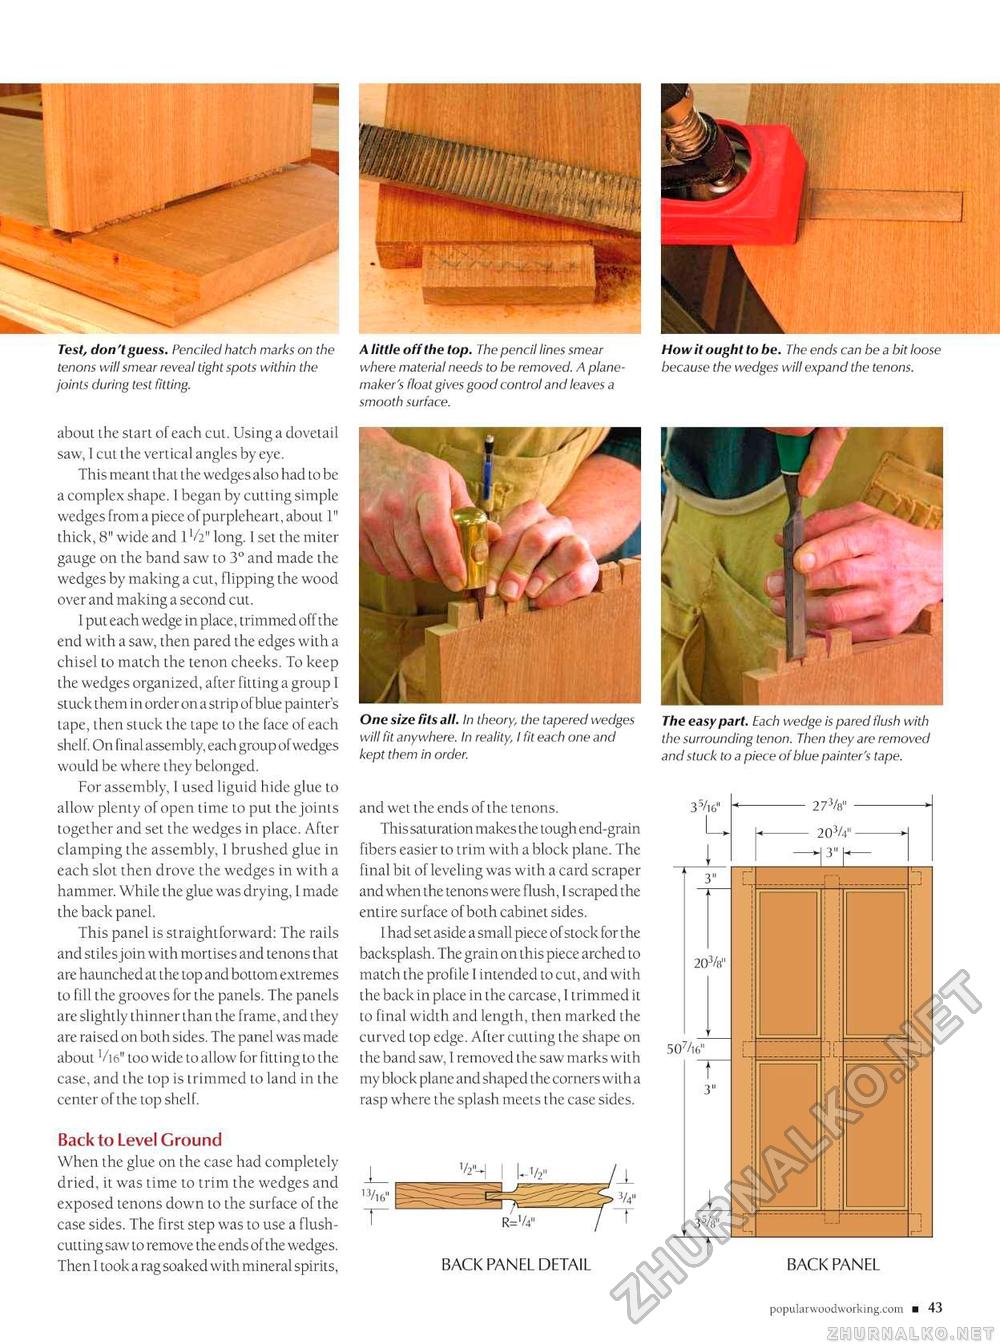
Test, don't guess. Penciled hatch marks on the A little off the top. The pencil lines smear tenons will smear reveal tight spots within the where material needs to be removed. A plane-joints during test fitting. maker's float gives good control and leaves a smooth surface. How it ought to be. The ends can be a bit loose because the wedges will expand the tenons. about the start of each cut. Using a dovetail saw, I cut the vertical angles by eye. This meant that the wedges also had to be a complex shape. I began by cutting simple wedges from a piece of purpleheart, about 1" thick, 8" wide and IV2" long. 1 set the miter gauge on the band saw to 3° and made the wedges by making a cut, flipping the wood over and making a second cut. I put each wedge in place, trimmed off the end with a saw, then pared the edges with a chisel to match the tenon cheeks. To keep the wedges organized, after fitting a group I stuck them in order on a strip of blue painter's tape, then stuck the tape to the face of each shelf. On final assembly, each group of wedges would be where they belonged. For assembly, I used liguid hide glue to allow plenty of open time to put the joints together and set the wedges in place. After clamping the assembly, 1 brushed glue in each slot then drove the wedges in with a hammer. While the glue was drying, 1 made the back panel. This panel is straightforward: The rails and stiles join with mortises and tenons that are haunched at the top and bottom extremes to fill the grooves for the panels. The panels are slightly thinner than the frame, and they are raised on both sides. The panel was made about V16" too wide to allow for fitting to the case, and the top is trimmed to land in the center of the top shelf. Back to Level Ground When the glue on the case had completely dried, it was time to trim the wedges and exposed tenons down to the surface of the case sides. The first step was to use a flush-cutting saw to remove the ends of the wedges. Then I took a rag soaked with mineral spirits, One size fits all. In theory, the tapered wedges will fit anywhere. In reality, I fit each one and kept them in order. The easy part. Each wedge is pared flush with the surrounding tenon. Then they are removed and stuck to a piece of blue painter's tape. and wet the ends of the tenons. This saturation makes the tough end-grain fibers easier to trim with a block plane. The final bit of leveling was with a card scraper and when the tenons were flush, I scraped the entire surface of both cabinet sides. I had set aside a small piece of stock for the backsplash. The grain on this piece arched to match the profile 1 intended to cut, and with the back in place in the carcase, I trimmed it to final width and length, then marked the curved top edge. After cutting the shape on the band saw, I removed the saw marks with my block plane and shaped the corners with a rasp where the splash meets the case sides. BACK PANEL DETAIL |


