Popular Woodworking 2008-08 № 170, страница 34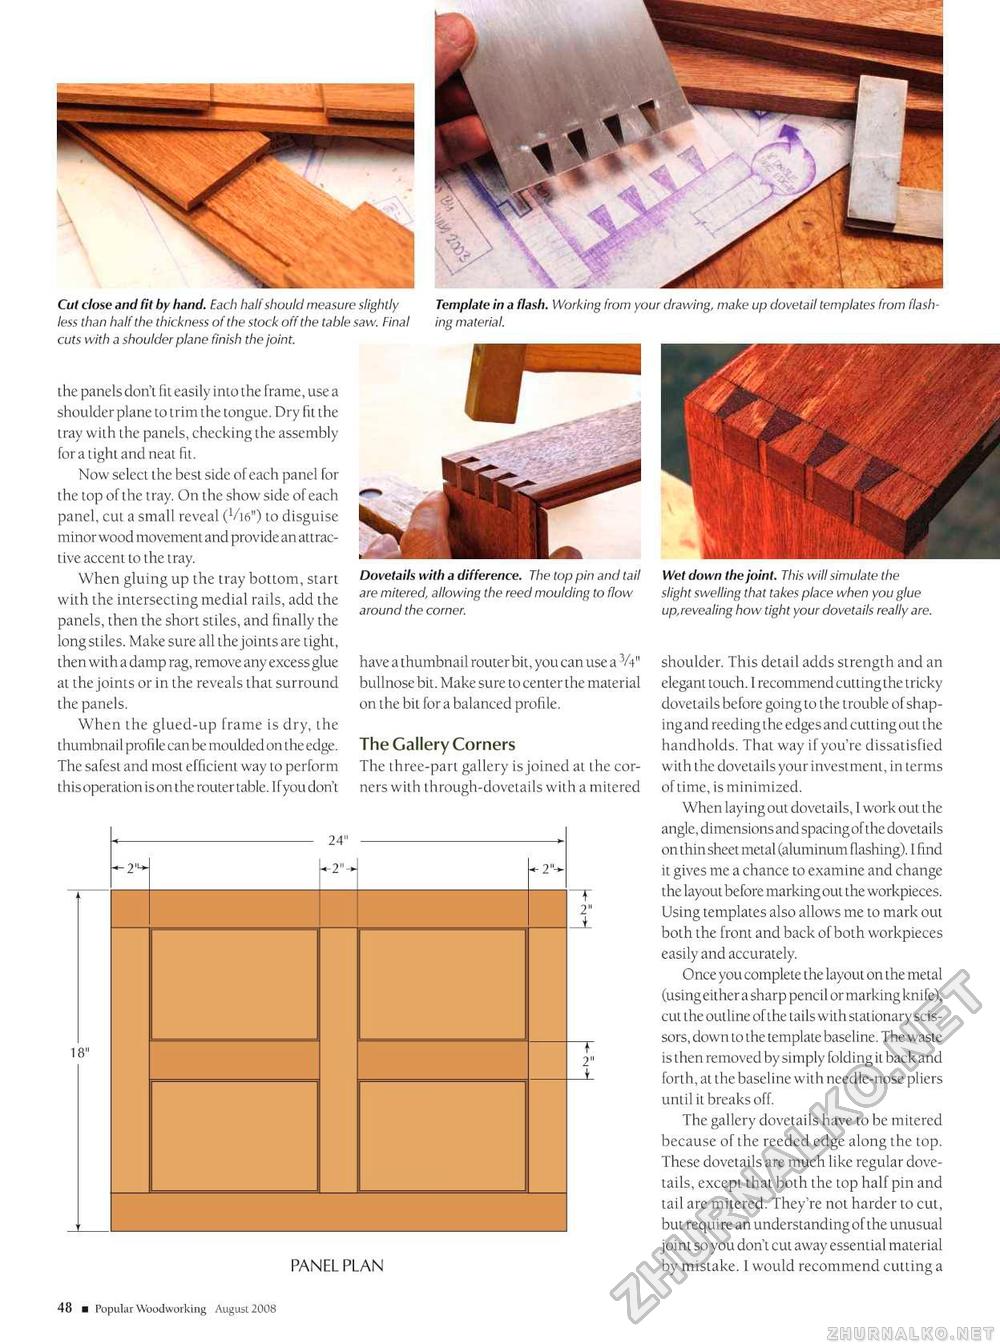
Cut close and fil by hand. Each half should measure slightly less than half the thickness of the stock off the table saw. Final cuts with a shoulder plane finish the joint. Template in a flash. Working from your drawing, make up dovetail templates from flashing material. Wet down the joint. This will simulate the slight swelling that takes place when you glue up,revealing how tight your dovetails really are. shoulder. This detail adds strength and an elegant touch. I recommendcuttingthe tricky dovetails before going to the trouble of shaping and reeding the edgesand cutting out the handholds. That way if you're dissatisfied with the dovetails your investment, in terms of time, is minimized. When laying out dovetails, 1 work out the angle, dimensions and spacing of the dovetails on thin sheet metal (aluminum flashing). 1 find it gives me a chance to examine and change the layout before marking out the workpieces. Using templates also allows me to mark out both the front and back of both workpieces easily and accurately. Once you complete the layout on the metal (using either a sharp pencil or marking knife), cut the outline of the tails with stationary scissors, down to the template baseline. The waste is then removed by simply folding it back and forth, at the baseline with needle-nose pliers until it breaks off. the panels don't fit easily into the frame, use a shoulder plane to trim the tongue. Dry fit the tray with the panels, checking the assembly for a tight and neat fit. Now select the best side of each panel for the top of the tray. On the show side of each panel, cut a small reveal (Vie") to disguise minor wood movement and provide an attractive accent to the tray. When gluing up the tray bottom, start with the intersecting medial rails, add the panels, then the short stiles, and finally the long stiles. Make sure all the joints are tight, then with a damp rag, remove any excess glue at the joints or in the reveals that surround the panels. When the glued-up frame is dry, the thumbnail profile can be moulded on the edge. The safest and most efficient way to perform this operation is on the router table. I f you don't Dovetails with a difference. The lop pin and tail are mitered, allowing the reed moulding to flow around the corner. have a thumbnail router bit, you can use a 3A" bullnose bit. Make sure to center the material on the bit for a balanced profile. The Gallery Corners The three-part gallery is joined at the corners with through-dovetails with a mitered The gallery dovetails have to be mitered because of the reeded edge along the top. These dovetails are much like regular dove-■ ^H except that both the top half pin and tail are mitered. They're not harder to cut, but require an understanding of the unusual joint so you don't cut away essential material PANEL PLAN by mistake. 1 would recommend cutting a 48 ■ Popular Woodworking August 2008 |


