Popular Woodworking 2008-08 № 170, страница 36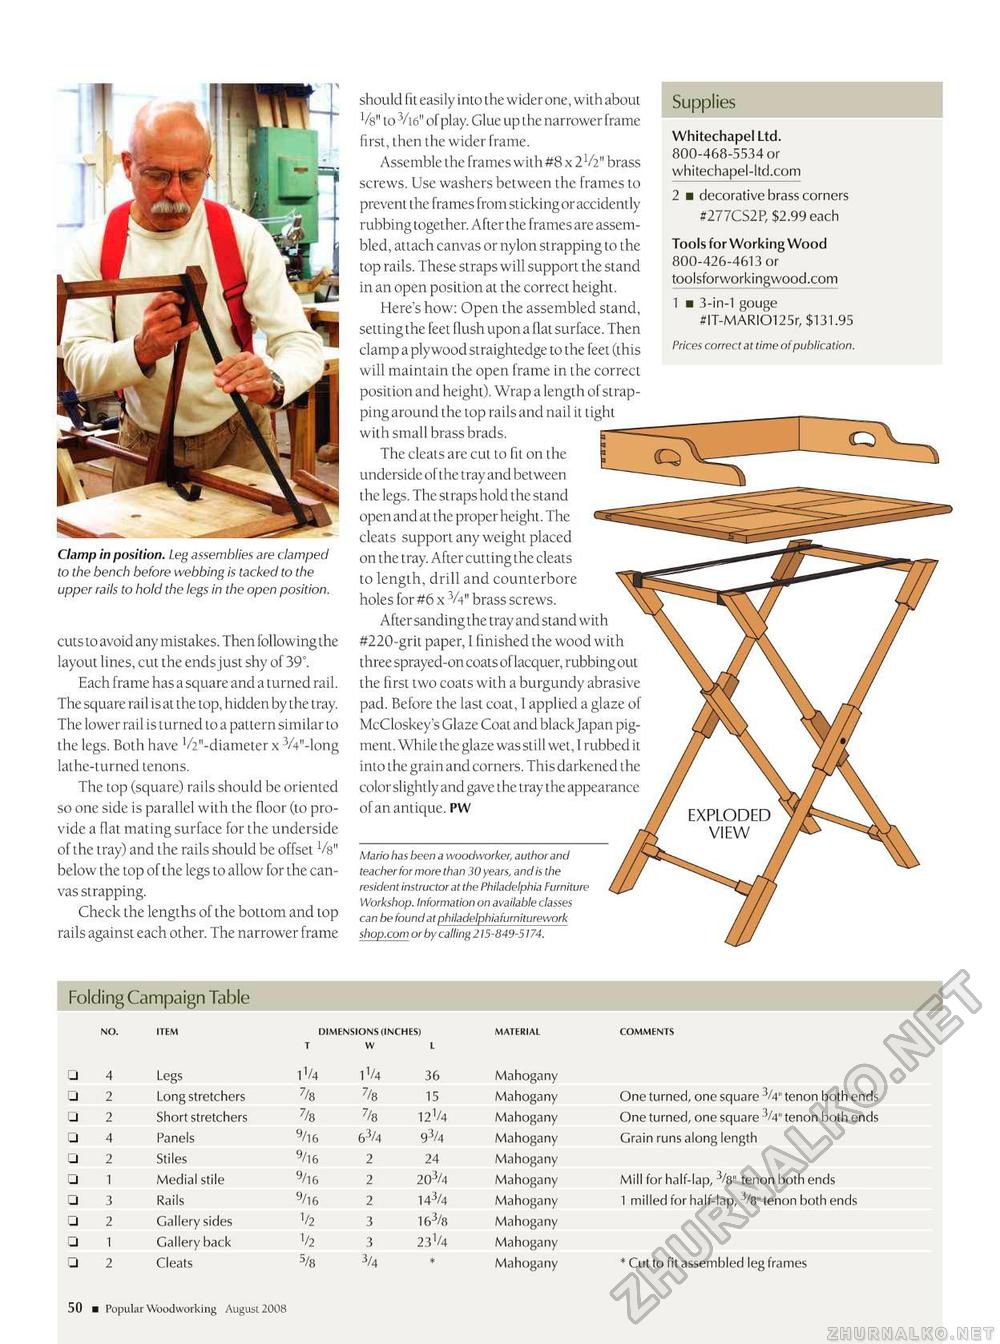
Clamp in position. Leg assemblies are clamped to the bench before webbing is tacked to the upper rails to hold the legs in the open position. cuts to avoid any mistakes. Then following the layout lines, cut the ends just shy of 39°. Each frame has a square and a turned rail. The square rail is at the top, hidden by the tray. The lower rail is turned to a pattern similar to the legs. Both have '/V'-diameter x 3/4"-long lathe-turned tenons. The top (square) rails should be oriented so one side is parallel with the floor (to provide a flat mating surface for the underside of the tray) and the rails should be offset Vs" below the top of the legs to allow for the canvas strapping. Check the lengths of the bottom and top rails against each other. The narrower frame
should fit easily into the wider one, with about Vs" to 3/16" of play. Glue up the narrower frame first, then the wider frame. Assemble the frames with #8 x 2V2" brass screws. Use washers between the frames to prevent the frames from sticking or accidently rubbing together. After the frames are assembled, attach canvas or nylon strapping to the top rails. These straps will support the stand in an open position at the correct height. Here's how: Open the assembled stand, setting the feet flush upon a flat surface. Then clamp a plywood straightedge to the feet (this will maintain the open frame in the correct position and height). Wrap a length of strapping around the top rails and nail it light with small brass brads. The cleats are cut to fit on the underside of the tray and between the legs. The straps hold the stand open and at the proper height. The cleats support any weight placed on the tray. After cutting the cleats to length, drill and counterbore holes for #6 x 3A" brass screws. After sanding the tray and stand with #220-grit paper, I finished the wood with three sprayed-on coats of lacquer, rubbing out the first two coats with a burgundy abrasive pad. Before the last coat, I applied a glaze of McCloskey's Glaze Coat and black Japan pigment. While the glaze wasstill wet, 1 rubbed it into the grain and corners. This darkened the colorslightly and gave the tray the appearance of an antique. PW Supplies Whitechapel Ltd. 800-468-5534 or whitechapel-ltd.com 2 ■ decorative brass corners #277CS2P, $2.99 each Tools for Working Wood 800-426-4613 or toolsforworkingwood.com 1 ■ 3-in-l gouge #IT-MARI0125r, $131.95 Mario has been a woodworker, author and teacher for more than 30 years, and is the resident instructor at the Philadelphia FurnitL Workshop. Information on available classes can be found at philadelphiafurniturework shop.com or by calling 215-849-5174. 50 ■ Popular Woodworking August 2008 |


