Popular Woodworking 2008-08 № 170, страница 35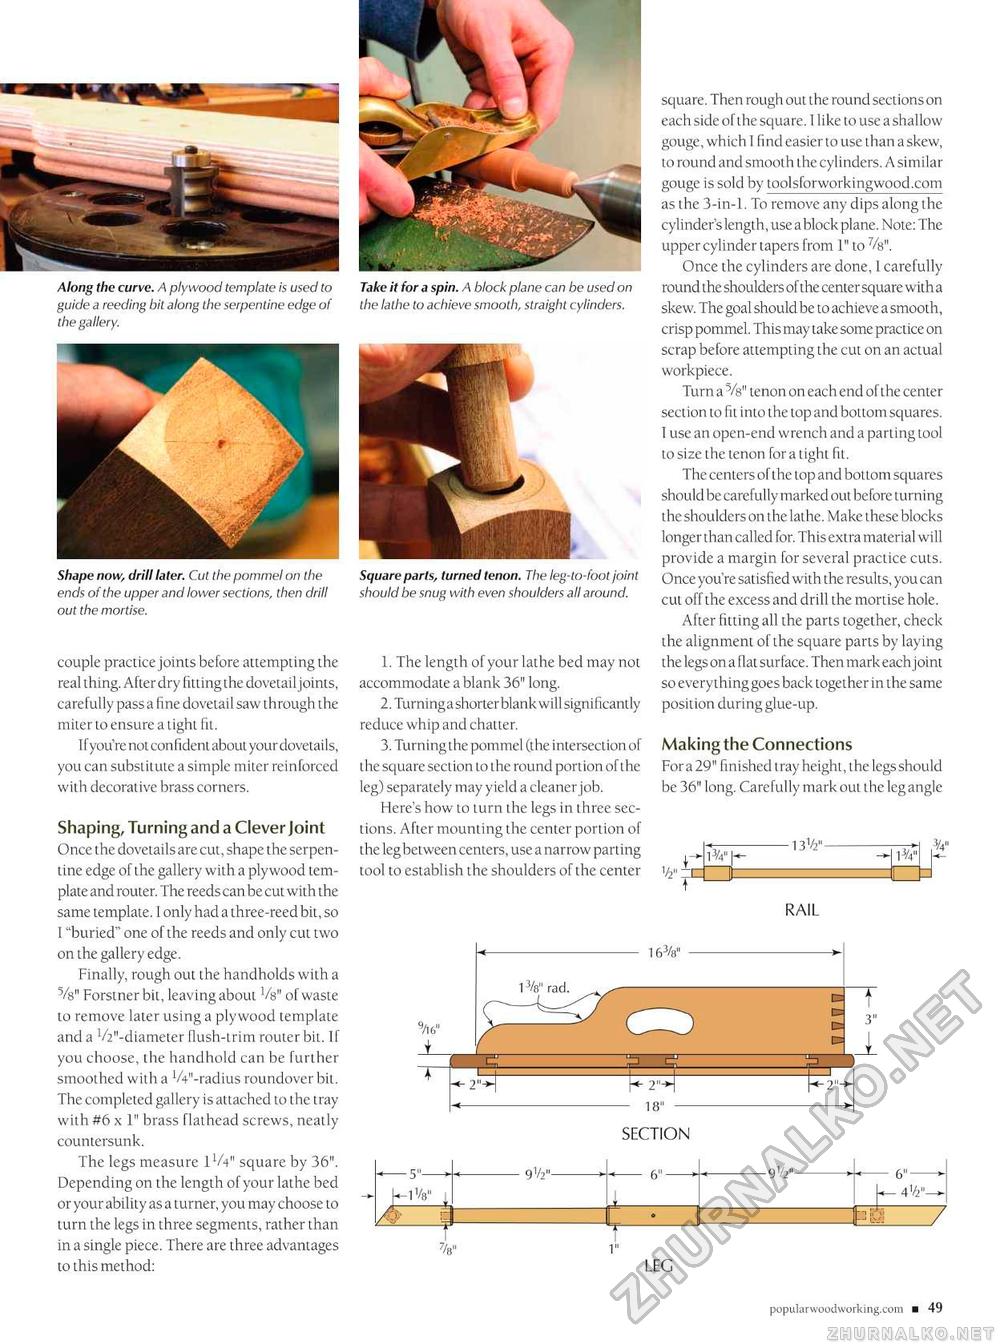
Along the curve. A plywood template is used to guide a reeding bit along the serpentine edge of the gallery. Shape now, drill later. Cut the pommel on the ends of the upper and lower sections, then drill out the mortise. couple practice joints before attempting the real thing. After dry fitting the dovetail joints, carefully pass a fine dovetail saw through the miter to ensure a tight fit. If you're not confident about your dovetails, you can substitute a simple miter reinforced with decorative brass corners. Shaping, Turning and a Clever Joint Once the dovetails are cut, shape the serpentine edge of the gallery with a plywood template and router. The reeds can be cut with the same template. I only had a three-reed bit, so I "buried" one of the reeds and only cut two on the gallery edge. Finally, rough out the handholds with a V8" Forstnerbit, leaving about Vs" of waste to remove later using a plywood template and a !/2"-diameter flush-trim router bit. If you choose, the handhold can be further smoothed with a VV-radius roundover bit. The completed gallery is attached to the tray with #6 x 1" brass flathead screws, neatly countersunk. The legs measure IV4" square by 36". Depending on the length of your lathe bed or your ability as a turner, you may choose to turn the legs in three segments, rather than in a single piece. There are three advantages to this method: Take it for a spin. A block plane can be used on the lathe to achieve smooth, straight cylinders. Square parts, turned tenon. The leg-to- foot joint should be snug with even shoulders all around. 1. The length of your lathe bed may not accommodate a blank 36" long. 2. Turninga shorter blank will significantly reduce whip and chatter. 3. Turning the pommel (the intersection of the square section to the round portion of the leg) separately may yield a cleaner job. Here's how to turn the legs in three sections. After mounting the center portion of the leg between centers, use a narrow parting tool to establish the shoulders of the center square. Then rough out the round sectionson each side of the square. I like to use a shallow gouge, which I find easier to use than a skew, to round and smooth the cylinders. A similar gouge is sold by toolsforworkingwood.com as the 3-in-l. To remove any dips along the cylinder's length, use a block plane. Note: The upper cylinder tapers from 1" to %". Once the cylinders are done, 1 carefully round the shoulders of the center square with a skew. The goal should be to achieve a smooth, crisp pommel. This may take some practice on scrap before attempting the cut on an actual workpiece. Turn a %" tenon on each end of the center section to fit into the top and bottom squares. I use an open-end wrench and a parting tool to size the tenon for a tight fit. The centers of the top and bottom squares should be carefully marked out before turning the shoulders on the lathe. Make these blocks longer than called for. This extra material will provide a margin for several practice cuts. Once you're satisfied with the results, you can cut off the excess and drill the mortise hole. After fitting all the parts together, check the alignment of the square parts by laying the legs on a flat surface. Then mark each joint so everything goes back together in the same position during glue-up. Making the Connections Fora 29" finished tray height, the legs should be 36" long. Carefully mark out the leg angle RAIL 16®'-- LEG |


