Popular Woodworking 2008-10 № 171, страница 26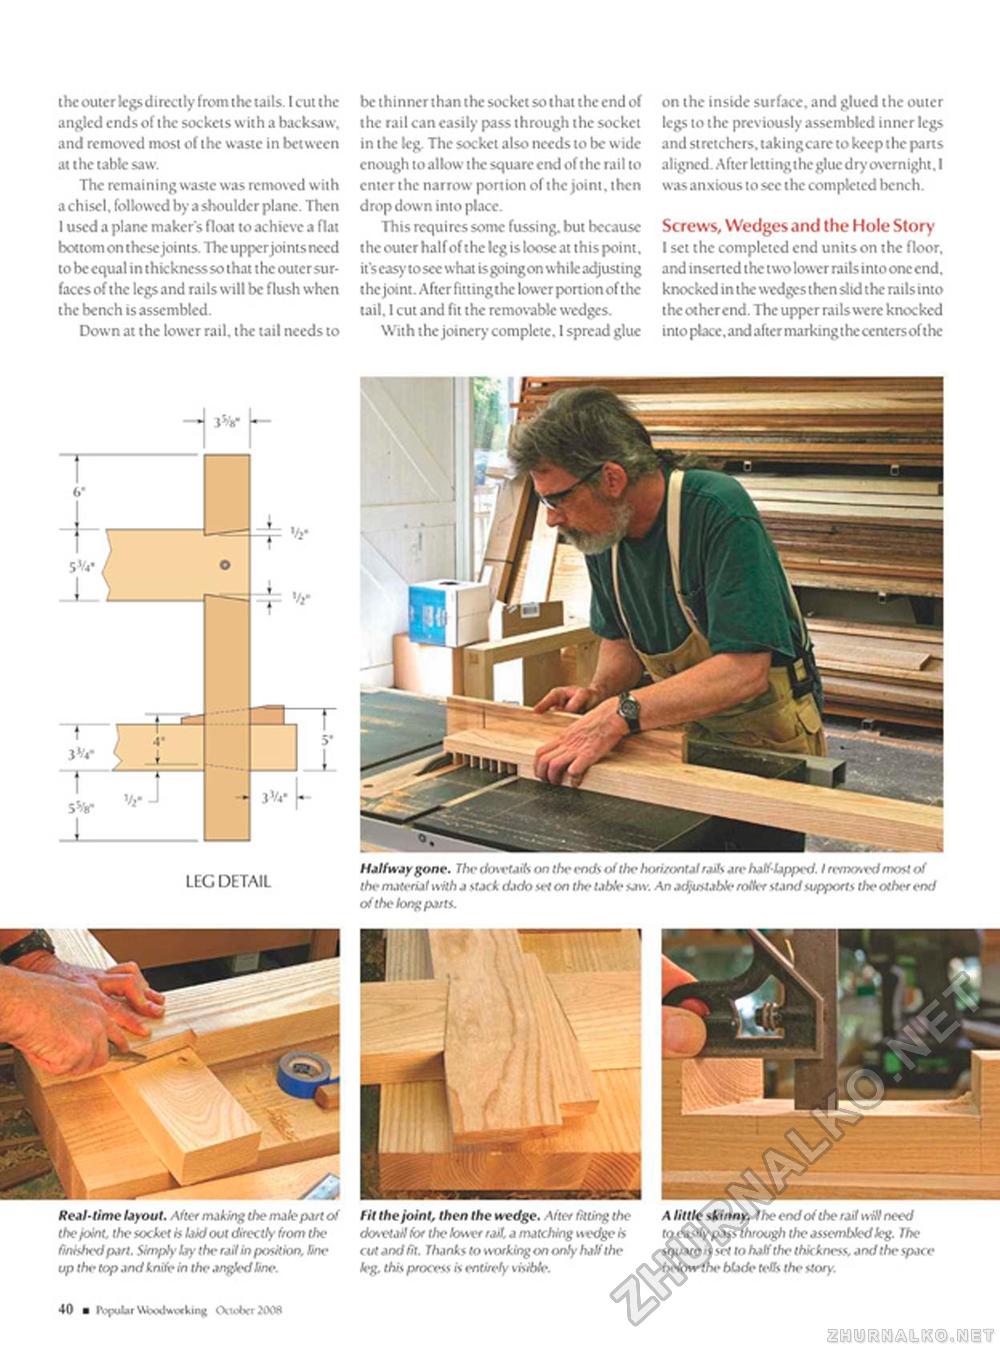
the outer legs directly from the tails. I cut the angled ends of the sockets with a hacksaw, and removed most of the waste in between at the table saw. The remaining waste was removed with a chisel, followed by a shoulder plane. Then 1 used a plane maker's float to achieve a flat bottom on these joints. The upper joints need to be equal in thickness so that the outer surfaces of the legs and rails will be flush when the bcnch is assembled. Down at the lower rail, the tail needs to be thinner than the socket so that the end of the rail can easily pass through the socket in the leg The socket also needs to be wide enough to allow the square end of the rail to enter the narrow portion of the joint, then drop down into place. This requires some fussing, but because the outer half of the leg is loose at this point, it'seasy tosce what isgoingon while adjusting the joint. After lutingthc lower portion of the tail. 1 cut and fit the removable wedges. With the joinery- complete. I spread glue on the inside surface, and glued the outer legs to the previously assembled inner legs and stretchers, taking care to keep the parts aligned. After lettingthegluedry overnight. I was anxious to see the completed bcnch. Screws, Wedges and the Hole Story I set the completed end units on the floor, and insened the two lower rails intoonc end. knocked in the wedges then slid the rails into the other end. The upper rails were knocked into place, and after markingthcccntcrsof the Halfway gone. The dosvtaits on /he ends of Ihe horizontal rails are hatf-lapped. I rtvnoved most of the ntaterial with a stack dido let on the i.hWe MW, An adju>table rotter stand supports the other end of the loot; pans. fit the joint, then the wedge. After fitting the dovetail for the lower rail, a matching wedge is cut and fit. Thanks to working on only half the leg. this process is entirely visible. A little skinny. The end of the rarf nrN need to easily pass through the assembledleg. The square is set to half the thickness, and the space below the blade teBs the story. LEC DETAIL Real-time layout. After making the male part of the joint, the socket is laid out directly front the finished part. Simply lay the rail in position, fox-up the top and knife in the angled bne. 40 ■ r\yuUi WMWMM* OmbrJOM |


