Popular Woodworking 2008-12 № 173, страница 49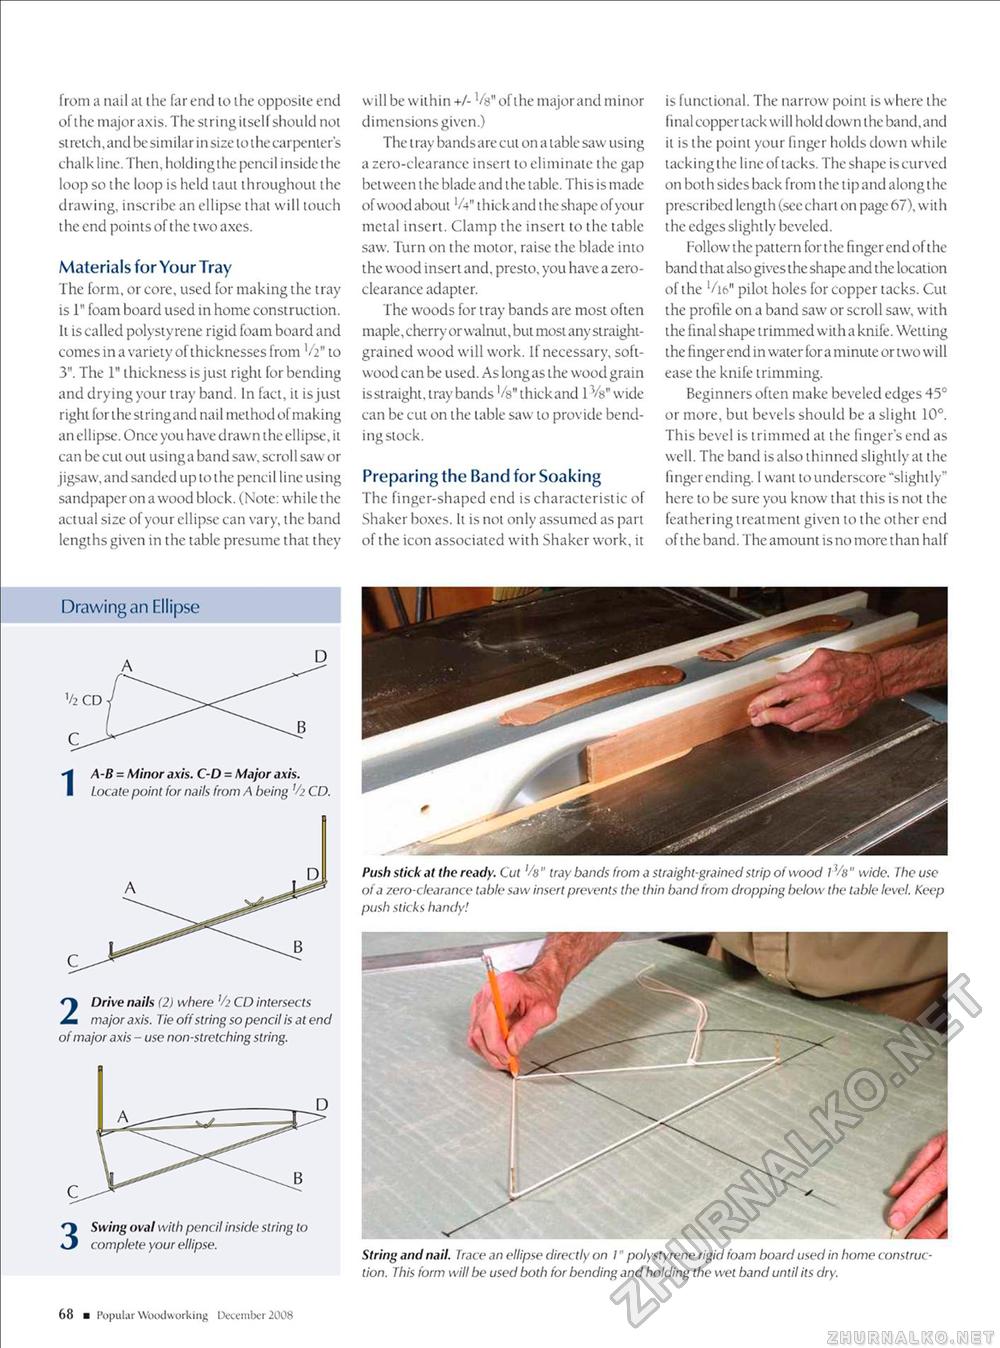
from a nail ai ihe far end 10 ihe opposite end of ihe major axis. The stringilself should not stretch, and be similar in size lo ihe carpenter's chalk line. Then, holding the pencil inside the loop so the loop is held taut throughout the drawing, inscribe an ellipse that will touch the end points of the two axes. Materials for Your Tray The form, or core, used for making the tray is 1" foam board used in home construction. Ii is called polystyrene rigid foam board and comes in a variety of thicknesses from V2" 10 3". The 1" thickness is just right for bending and drying your tray band. In fact, ii is just righi for the siring and nail method of making an ellipse. Once you have drawn the ellipse, it can be cut out usinga band saw, scroll saw or jigsaw, and sanded up to t he pencil line using sandpaper on a wood block. (Note: while the actual size of your ellipse can vary, the band lengths given in the table presume that they Drawing an Ellipse 1A-B = Minor axis. C-D = Major axis. Locate point for nails from A being '/2 CD. 2 Drive nails (2) where '/> CD intersects major axis. Tie off string so pencil is at end of major axis - use non-stretching string. Swing oval with pencil inside siring lo complete your ellipse. will be within +/- Vs" of ihe major and minor dimensions given.) The tray bandsare cut on a table saw using a zero-clearance insert to eliminate the gap between the blade and the lable. This is made of wood about 'A" thick and theshape of your metal insert. Clamp the insert to the table saw. Turn on the motor, raise the blade into the wood insert and, presto, you have a zero-clearance adapter. The woods for tray bands are most often maple, cherry or walnut, but most any straight-grained wood will work. If necessary, softwood can be used. As long as the wood grain issiraighi. tray bands '/g" thickand 1 M$" wide can be cut on the table saw to provide bending stock. Preparing the Band for Soaking The finger-shaped end is characteristic of Shaker boxes. It is not only assumed as part of the icon associated with Shaker work, it is functional. The narrow point is where the final copper tack will hold down ihe band, and it is the poini your finger holds down while tacking the line of lacks. The shape is curved on both sides back from the tip and along the prescribed length (seechart on page 67), with the edges slightly beveled. Follow the pattern for the finger end of the band that also gives the shape and the location of the 16" pilot holes for copper tacks. Cut the profile on a band saw or scroll saw, with the final shape trimmed with a knife. Welting the finger end in water for a minute or two will ease ihe knife trimming. Beginners often make beveled edges 45° or more, bul bevels should be a slight 10°. This bevel is trimmed at the finger's end as well. The band is also thinned slightly at the finger ending. 1 want lo underscore "slightly" here lo be sure you know that this is not the feathering treatment given to the other end of t he band .The amount is no more than half Push stick at the ready. Cut '/a" tray bands from a straight-grained strip of wood 1" wide. The use of a zero-clearance table saw insert prevents the thin band from dropping below the table level. Keep push sticks handy! String and nail. Trace an ellipse directly on I" polystyrene rigid foam board used in home construction. This form will be used both for bending and holding the wet band until its dry. 68 ■ Popul ar Woodworking December 2008 |


