Popular Woodworking 2008-12 № 173, страница 50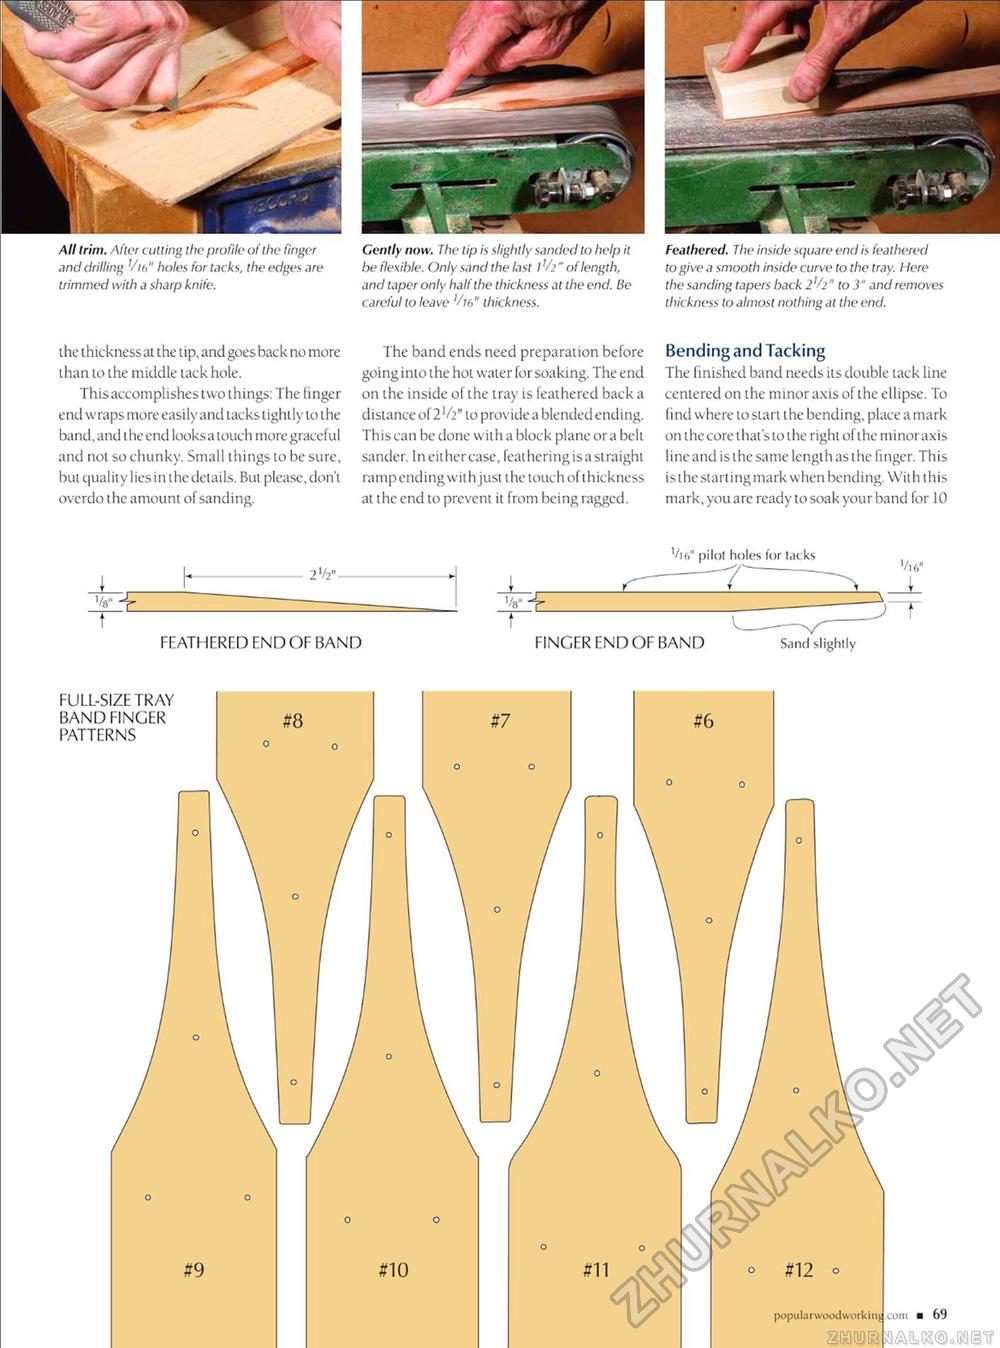
Gently now. The lip is slightly sanded to help it he flexible. Only sand the last 1'/?" of length, and taper only half the thickness at the end. Be careful to leave '/16" thickness. Feathered. The inside square end is feathered to give a smooth inside curve to the tray. Here the sanding tapers back 2'/j>" to 3" and removes thickness to almost nothing at the end. the thickness at the tip, and goes back no more than to the middle lack hole. This accomplishes two things: The finger end wraps more easily and lacks lightly to the band, and the end looksa touch more graceful and not so chunky. Small things to be sure, but quality lies in i he details. But please, don't overdo the amount of sanding. The band ends need preparation before going into the hoi water for soaking. The end on ihe inside of the tray is feathered back a distance of 2'/2" to provide a blended ending. This can be done with a block plane or a belt sander. Ineithercase,feathcringisaslraight ramp ending with just the touch of thickness al the end to prevent it from being ragged. Bending and Tacking The finished band needs its double tack line centered on the minor axis of the ellipse. To find where to start the bending, place a mark on i he core that's to the right of the minor axis line and is ihe same length as the finger. This is the starling mark when bending. Wit h this mark, you are ready to soak your band for 10 2 V2" '/«" "f Vi6" pilot holes for tacks - T Vl6« FEATHERED END OF BAND FINGER END OF BAND Sand slightly |


