Popular Woodworking 2009-06 № 176, страница 36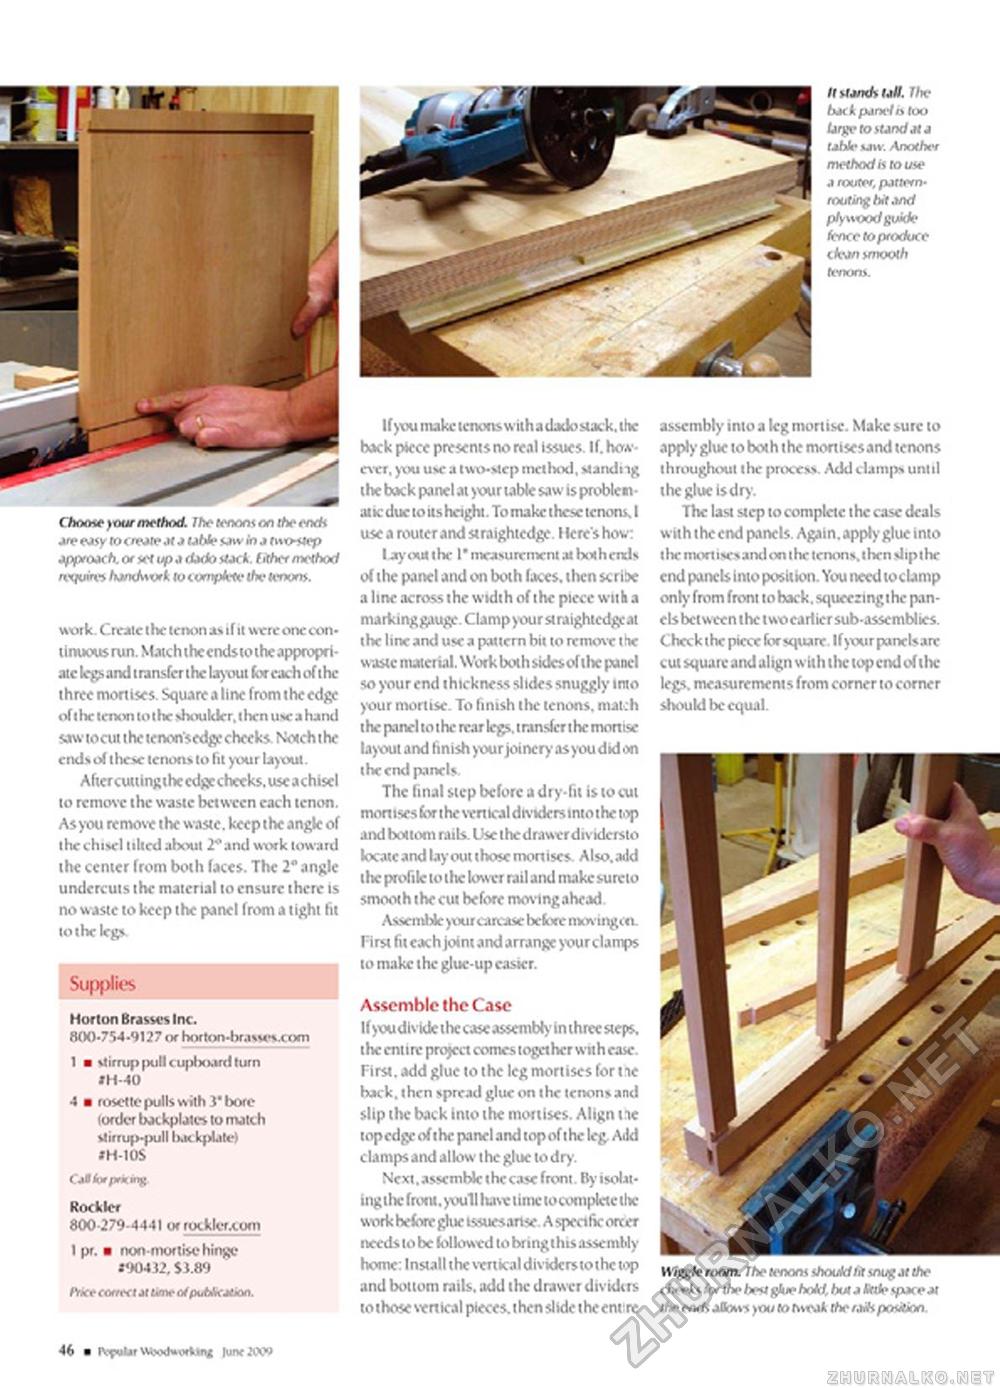
t mar work. Create the tenon a* if it were one continuous run. Maichihecndstoiheappropri-ate legs and transfer the lay-out foe each of the three mortises Square a line from the edge oft he tenon to the shoulder, then use a hand saw tocut the tenonsedgr cheeks Notch the ends of these tenons to fit your layout. Afiercuttingthccdgcchecks.uscachiscl to remove the waste between each tenon. Asyou remove the waste, keep the angle of the chisel tilted about 2° and wtwk toward the center from both faces. The 2" angle undercuts the material to ensure there is no waste to keep the panel from a tight fit Supplies Assemble the Case Ifyoudlvkkthccase assembly in three steps, the entire project comcs together with ease. First, add glue to the leg mortises for tie back, then spread glue on the tenons and slip the back into the mortises. Align tie top edge of the panel and top of t he leg Add clamps and allow the glue to dry. Next, assemble the case front. Byisobt-ingthe front. youll have time tocomplcte tlie work before glue issues anse A specific otter needs to be (ollowed to bringt his assembly home: Installthevenkaldividcrstothctop and bottom rails, add the drawer dividers to those vienkal pieces, then slide the entire Wiggle room. I he (coons ■JyxMht snog at the cheeks for the best glue hold, hut a Sole spare at the ends aflnt vs you lo rtseaA the raft position. If you make tenons with a dado stack, the back piece presents no real issues. If. however, you use a two-step method, standiig the bock panel at your table saw is problematic due to its height. To make these tenons. I use a router and straightedge. Ikre's how: layout the I* measurement at hothends of the panel and on both faces, then scribe a line across the width of the piece with a markinggauge.Clampyourstraightcdgeat the line and use a pattern bit to remove the waste material. Work both sidesof tlx- panel so your end thickness slides snuggly into your mortise. To finish the tenons, match the panel to t he rear legs, t ransfer t he montse layout and finish your joinery asyou did on the end panels. The final step before a dry-fit is to cut monises for the vvn ical dividers into the top and bottom rails. Use thedrawerdividersto locate and lay outthose monises. Also, add the profile lo tlic fower rail and make sureto smooth the cut before movlngahead Assemble your carcasc before nkningtti. First fit each joint and arrange your clamps to make the glue-up easier. assembly into a leg mortise. Make sure to apply glue to bot h t he monises and tenons throughout the process. Add clamps until the glue Isdry. The last step to complete the ease deals with the end panels. Again, apply glue into the monisesand on the tenons, then slip the end panels into position. You need toclamp only from front toback, squeezingthe panels between the twocarlier sub-assemblies. Check the piece for square. Ifyourpanelsare cut square and align with the top end of the legs, measurement s from corner to corner should be equal. 46 ■ IVf-Jlit WixxWorVini |ur»f JQQP |


