Popular Woodworking 2009-06 № 176, страница 38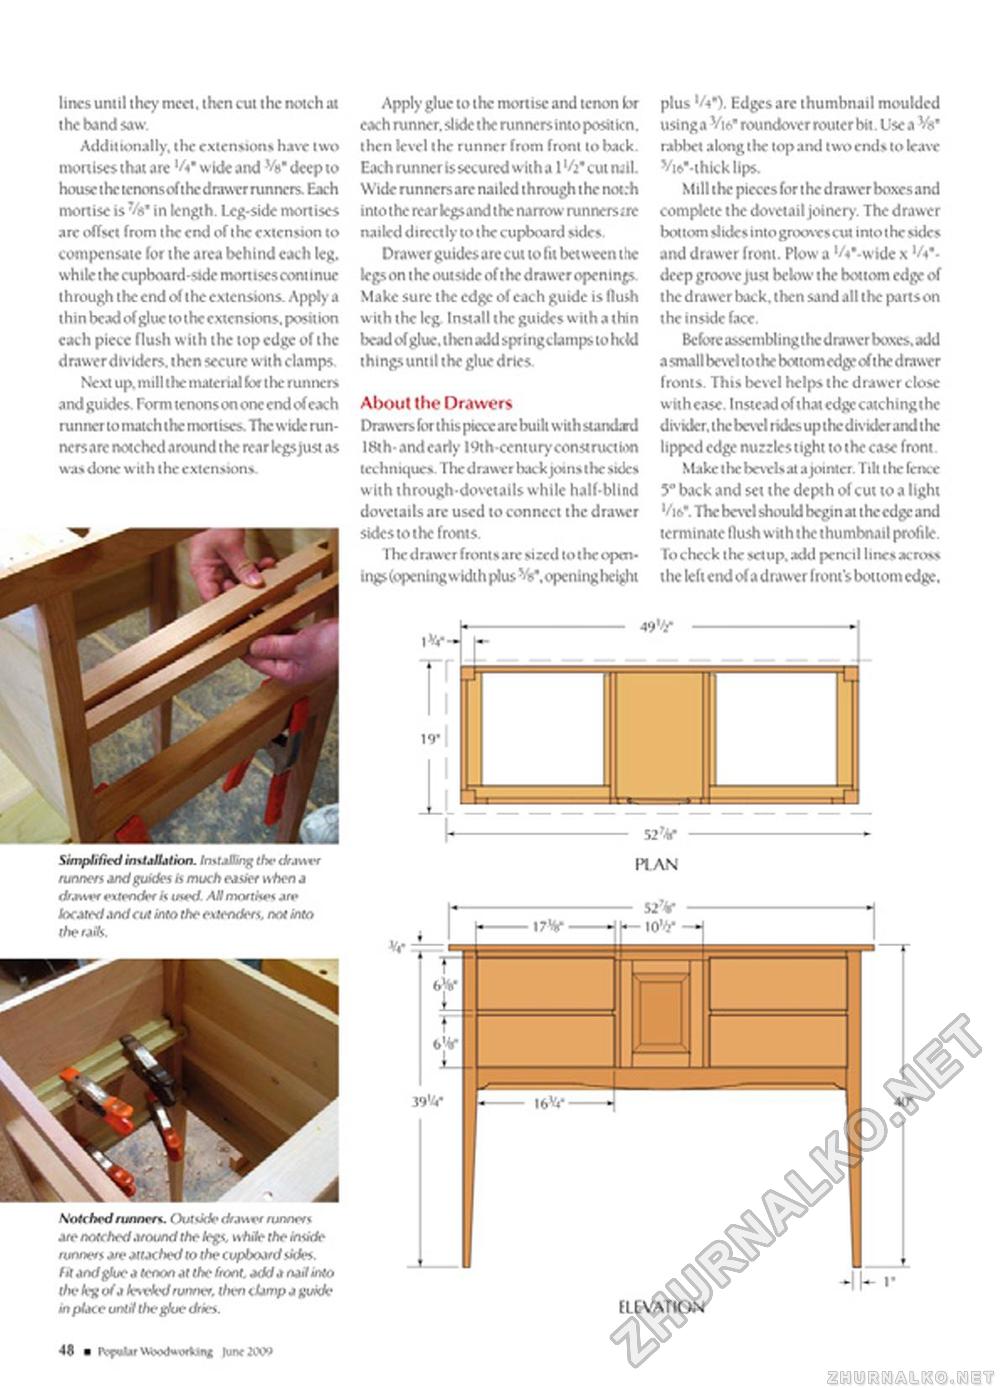
lines until they meet, then cut the notch at the hand saw. Additionally, the extensions have two mortises that are '/«• wide and deep to bousethe tenons ofthedrawer runners. Each mortise is 7/s* in length. Leg-side mortises arc offset from the end of the extension to compensate for the area behind each leg. while t he cupboard-side mort tscs com tnuc through the end of the extensions. Apply a thin bead of glue to the extensions, position each piece flush with the lop edge of the drawerdtviders. then secure with clamps. Next up. mill the material for the runners and guides. Form tenonson one end ofcach runner to match the mortises. The wide runners are notched around the rear legs just as was done with the extensions. Simplified installation. Installing the drassvr runners and guides is much easier \shen a tit.rust extender k uvd. AH moitlvs jrp located and cut into the extenders, not into the rails. \< itched runners. ( hit side drasset runners are notched around the legs, whie the inside runners ate attached to the cupboard sides, fit and glue a tenon at the front, add a nail into the let of a ksvM runner, then damp a guide in place unlH the glue dries. Apply glue to the mortise and tenon lor each runner, slide the runnersintopositicn. then level the runner from front to back. Each runner is secured with a 1 cut nail. Wide runners are nailed through the not:h into the rear legs and the narrow runners;rc nailed directly to the cupboard sides. Drawer guides arccut to fit between the legs on the outside of the drawer openings Make sure the edge of each guide is flush with the leg Install the guides with a thin bead of glue, then add springclamps to held things until the glue dries About the Drawers Drawers for this piece are built with standard 18th-and early 19th-century construction techniques. Thedrawer hac kjooistltcsidc* with through-dovetails while half-blind dovetails are used to connect the drawer sides to the fronts. The drawer frontsare sired to the open-ingsfopenlng w Idih plus V. opening height plus 'A*). Edges are thumbnail moulded using a Vw" roundovcr router bit. Use a rabbet along the lop and two ends to leave Vio'-thick lips. Mill the pieces for the drawer boxes and complete the dovetail joinery. Thedrawer bottom slidesinto grooves cui into the sides and drawer front. Plow a 'A'-wide x 'A*, deep groove just below the bottom edge of the drawer back, then sand all the partson the inside face. Before asscmblingihc drawer boxes, add a small bevel tothe bottom edge of thedrawer fronts. This bevel helps the drawer close withease. Instead ofthatcdgccatchingthc divider, the bevel ndes up ihedivxlcr and the lipped edge nuzzles tight to the case front Make i Ik bevels at a jointer. Tilt the fence 5° back and set the depth of cutto a light 16*. The bevel should begin at the edge and terminate flush with the thumbnail profile. To check the setup, add pencil lines ac ross the left end of a drawer front's bottom edge. En I- 52V -- PI AN
(LEVATON (LEVATON 41 a junt >x« |
|||||||||||||||||


