Popular Woodworking 2009-06 № 176, страница 37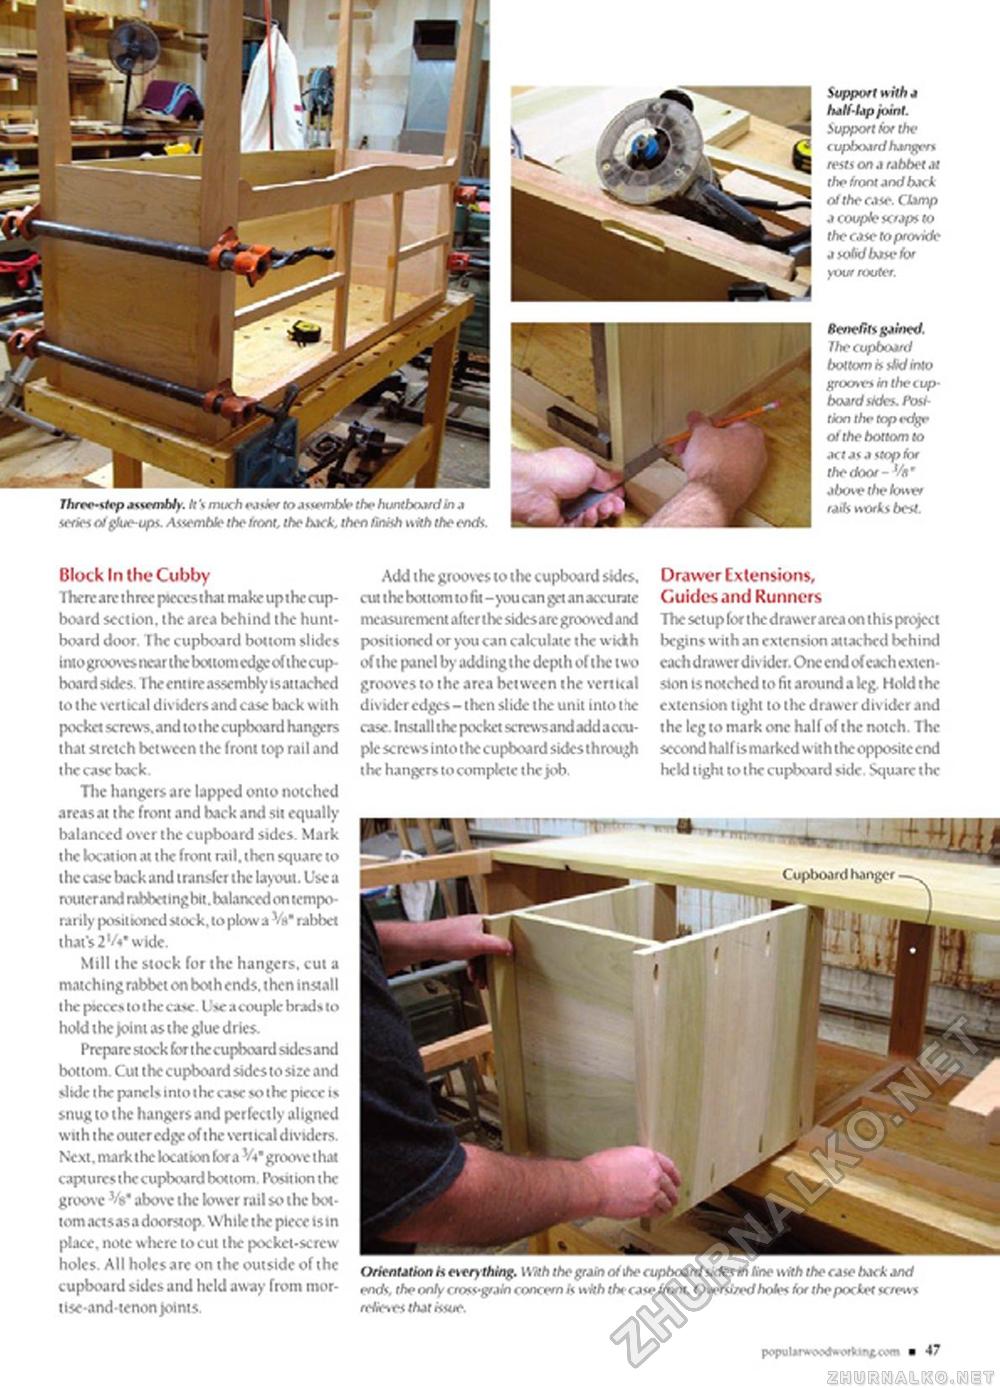
y. It \ much wu« fo j twmhlp lhe httnthoAtd In a ssemhle the front. the hack, then faith with ihe endt. Block In the Cubby There aret hree pteces that make up the cupboard section, the area behind the hunt-board door. The cupboard bottom slides intognxnv* near the bottom edge oftheoip-hoardsides Theenttre assembly isattached to the vertical dividers and case back with pocket screws, and to t he cupboard hanprrs that stretch between the front top rail and the case back Hie lungers are lapped onto notched areasat the front and back and stt equally-balanced over the cupboard sides. Mark the location at the front rail, then square to the case back and transfer the layout. Use a router and rahbettnghit.balanced on temporarily positioned stock, to plow a W rabbet that's 2'A* wide Mill the stock for the hangers, cut a matching rabbet on both ends, then install the pieces to the case. Use acoupkr brads to hold the joint as the glue dries. Prepare stock for t he cupboard sides and bottom. Cut the cupboard sides to size and slide the panels into the case so the piece is snug to the hangers and perfectly aligned wit h t he outer edge of the vertical dividers. Next, markthc location fora Vi* groove that captures the cupboard bottom. Position the groove V$* above tin- lower rail so the bottom act sas a doorstop While t he piece is in place, note where to cut the pocket-screw holes. All holes are on the outside of the cupboard sides and held away from mor-tise and-tenon joints Add the grooves to the cupboard sides, cut t he hot torn to fit - you can get an accurate measurement after the sides are grooved and positioned or you can calculate the width of the panel by addingthc depth of the two grooves to the area between the vertical divider edges - then slide the unit into the case. Install the pocket screws and add a ccu -pie screws into the cupboard sides through the hangers to complete the job. Drawer Extensions, Guides and Runners The set up for the drawer area on this project begins with an extension attached behind each drawvr div ider. Oik end of each extension is notched to fit around a leg. Hold t he extension tight to the drawer divider and the leg to mark one half of the notch. The second hal f is marked wit h the opposite end held tight tothe cupboard side. Square the Orientation h exery thing. Wish thegtAin at ihe cuphoAtd tide* in Kne with the caw hack And ends, the only cross-grjin concern Is wkh the cjse front. Osvcsi/edhobs for the pocket screws reHc-.es thAt issue. pojml»fww»J»o«*»j»£cofli ■ 47 |


