Popular Woodworking 2009-12 № 180, страница 53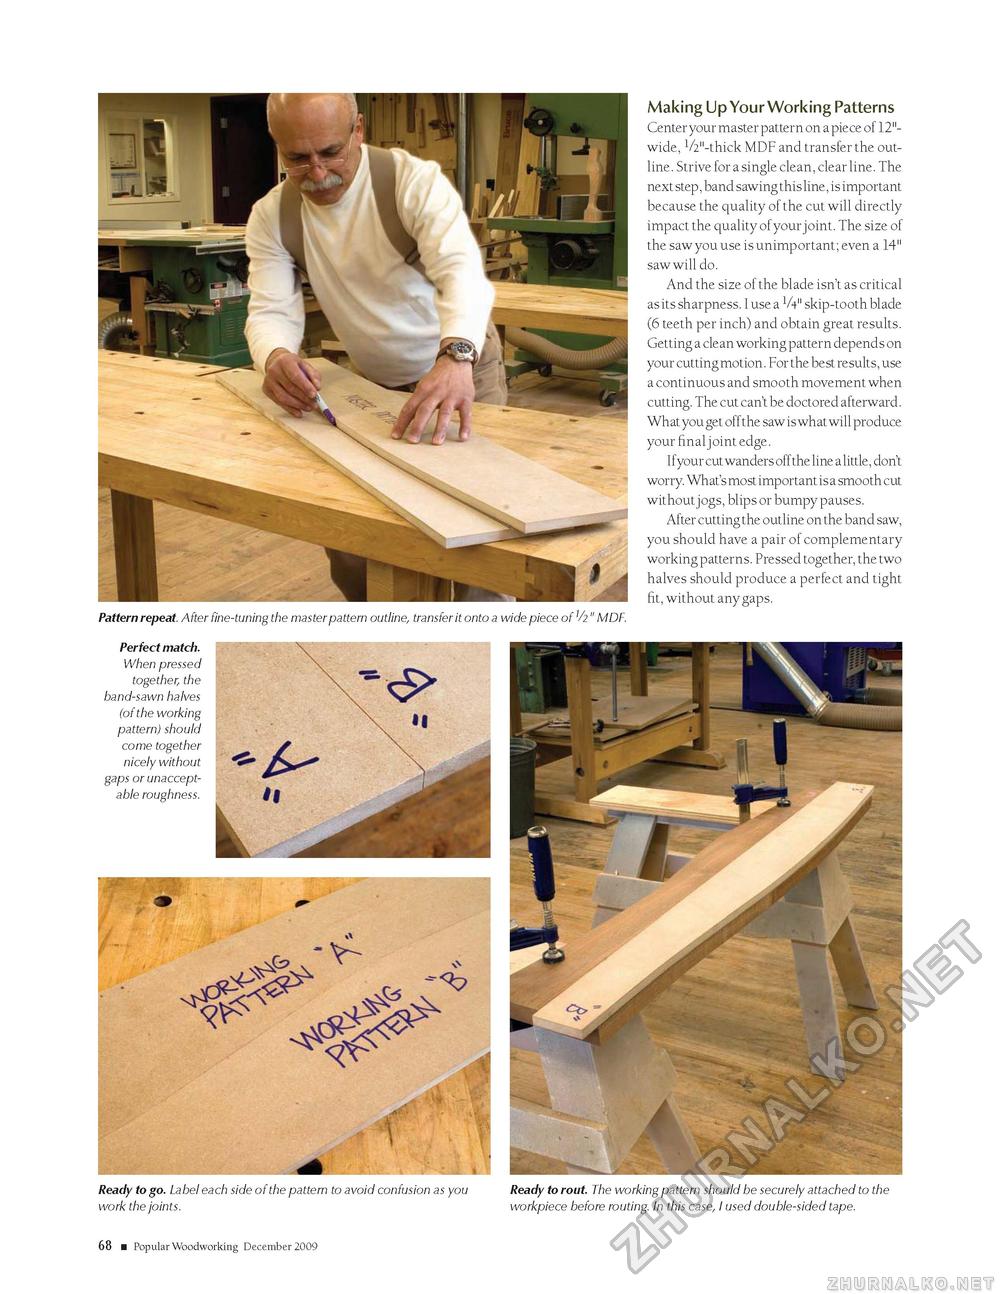
Pattern repeat. After fine-tuning the master pattern outline, transfer it onto a wide piece of V2" MDF. Making Up Your Working PatternsCenter your master pattern on a piece of 12"-wide, 1/2"-thick MDF and transfer the outline. Strive for a single clean, clear line. The next step, band sawing this line, is important because the quality of the cut will directly impact the quality of your joint. The size of the saw you use is unimportant; even a 14" saw will do. And the size of the blade isn't as critical as its sharpness. I use a V4" skip-tooth blade (6 teeth per inch) and obtain great results. Getting a clean working pattern depends on your cutting motion. For the best results, use a continuous and smooth movement when cutting. The cut can't be doctored afterward. What you get offthe saw is what will produce your final joint edge. I f your cut wanders off the line a little, don't worry. What's most important is a smooth cut without jogs, blips or bumpy pauses. After cutting the outline on the band saw, you should have a pair of complementary working patterns. Pressed together, the two halves should produce a perfect and tight fit, without any gaps. Perfect match. When pressed together, the band-sawn halves (of the working pattern) should come together nicely without gaps or unacceptable roughness. Ready to go. Label each side of the pattern to avoid confusion as you work the joints. Ready to rout. The working pattern should be securely attached to the workpiece before routing. In this case, I used double-sided tape. 14 ■ Popular Woodworking December 2009 |


