Popular Woodworking 2009-12 № 180, страница 52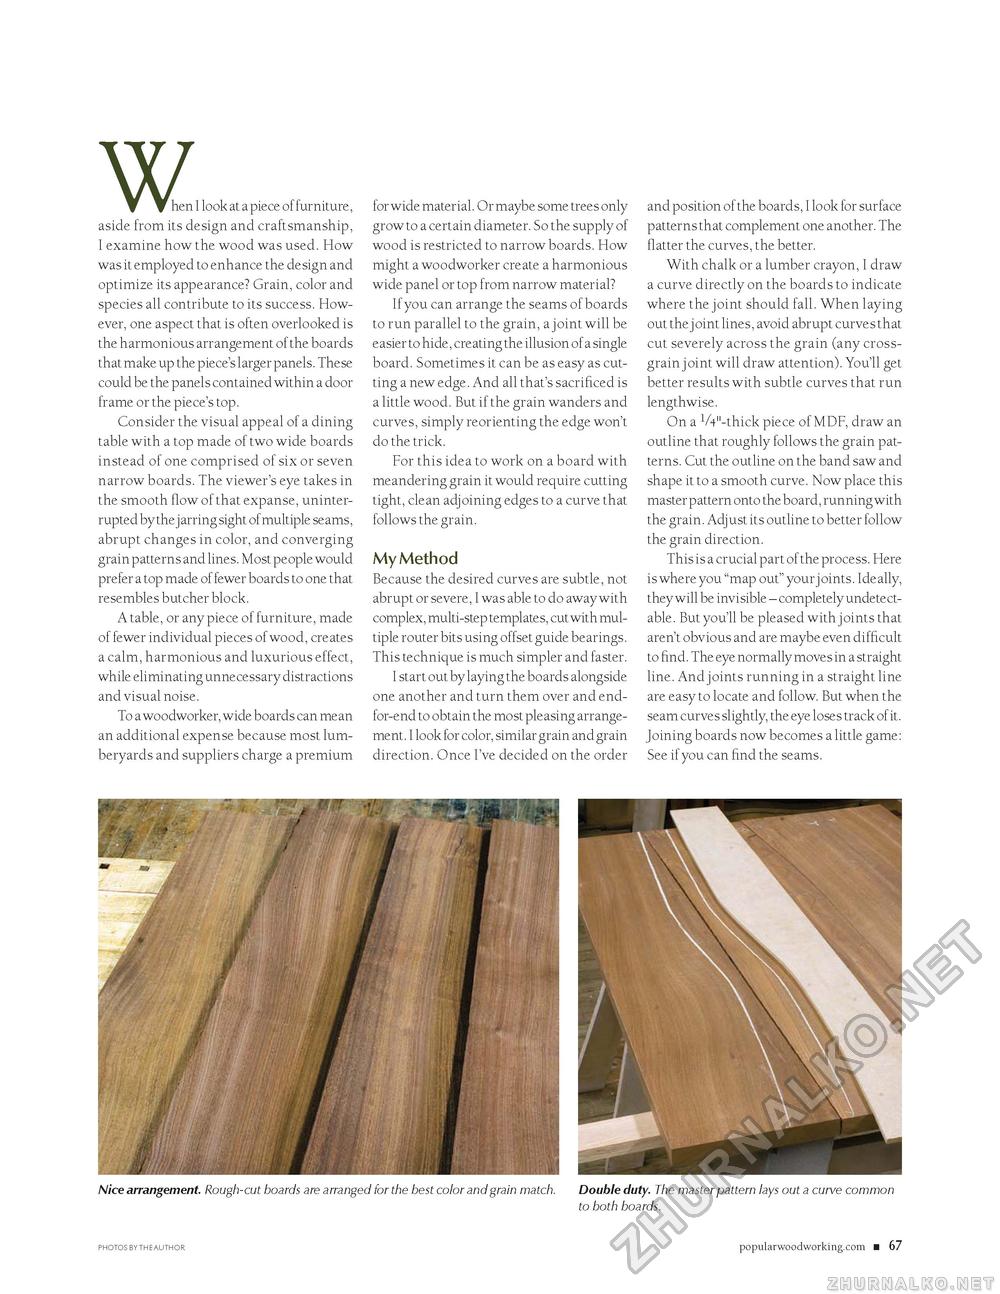
W hen I look at a piece of furniture, aside from its design and craftsmanship, I examine how the wood was used. How was it employed to enhance the design and optimize its appearance? Grain, color and species all contribute to its success. However, one aspect that is often overlooked is the harmonious arrangement of the boards that make up the piece's larger panels. These could be the panels contained within a door frame or the piece's top. Consider the visual appeal of a dining table with a top made of two wide boards instead of one comprised of six or seven narrow boards. The viewer's eye takes in the smooth flow of that expanse, uninterrupted by the jarring sight of multiple seams, abrupt changes in color, and converging grain patterns and lines. Most people would prefer a top made of fewer boards to one that resembles butcher block. A table, or any piece of furniture, made of fewer individual pieces of wood, creates a calm, harmonious and luxurious effect, while eliminating unnecessary distractions and visual noise. To a woodworker, wide boards can mean an additional expense because most lumberyards and suppliers charge a premium for wide material. Or maybe some trees only grow to a certain diameter. So the supply of wood is restricted to narrow boards. How might a woodworker create a harmonious wide panel or top from narrow material? If you can arrange the seams of boards to run parallel to the grain, a joint will be easier to hide, creating the illusion of a single board. Sometimes it can be as easy as cutting a new edge. And all that's sacrificed is a little wood. But if the grain wanders and curves, simply reorienting the edge won't do the trick. For this idea to work on a board with meandering grain it would require cutting tight, clean adjoining edges to a curve that follows the grain. My MethodBecause the desired curves are subtle, not abrupt or severe, I was able to do away with complex, multi-step templates, cut with multiple router bits using offset guide bearings. This technique is much simpler and faster. I start out by laying the boards alongside one another and turn them over and end-for-end to obtain the most pleasing arrangement. I look for color, similar grain and grain direction. Once I've decided on the order and position of the boards, I look for surface patterns that complement one another. The flatter the curves, the better. With chalk or a lumber crayon, I draw a curve directly on the boards to indicate where the joint should fall. When laying out the joint lines, avoid abrupt curves that cut severely across the grain (any cross-grain joint will draw attention). You'll get better results with subtle curves that run lengthwise. On a V4"-thick piece of MDF, draw an outline that roughly follows the grain patterns. Cut the outline on the band saw and shape it to a smooth curve. Now place this master pattern onto the board, running with the grain. Adjust its outline to better follow the grain direction. This is a crucial part of the process. Here is where you "map out" your joints. Ideally, they will be invisible - completely undetect-able. But you'll be pleased with j oints that aren't obvious and are maybe even difficult to find. The eye normally moves in a straight line. And joints running in a straight line are easy to locate and follow. But when the seam curves slightly, the eye loses track of it. Joining boards now becomes a little game: See if you can find the seams. Nice arrangement. Rough-cut boards are arranged for the best color and grain match. Double duty. The master pattern lays out a curve common to both boards. PHOTOS BY THE AUTHOR popularwoodworking.com ■ 67 |


