10 - Heavy Duty Lathe Stand, страница 13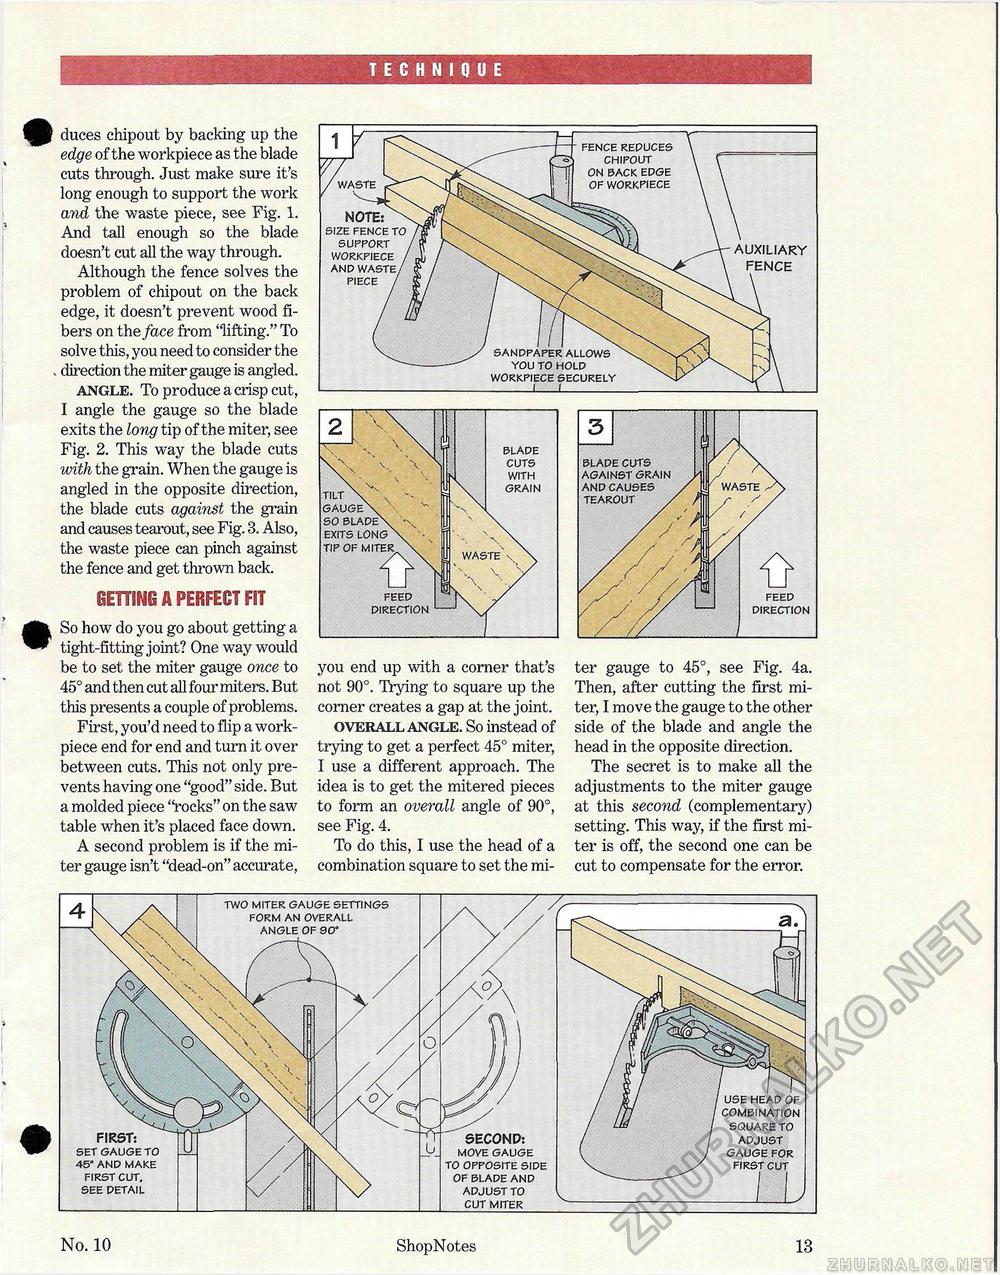
duces chipout by backing up the edge of the workpiece as the blade cuts through. Just make sure it's long enough to support the work and the waste piece, see Fig. 1. And tall enough so the blade doesn't cut all the way through. Although the fence solves the problem of chipout on the back edge, it doesn't prevent wood fibers on the face from 'lifting." To solve this, you need to consider the direction the miter gauge is angled. angle. To produce a crisp cut, I angle the gauge so the blade exits the long tip of the miter, see Fig. 2. This way the blade cuts with the grain. When the gauge is angled in the opposite direction, the blade cuts against the grain and causes tearout, see Fig. 3. Also, the waste piece can pinch against the fence and get thrown back. GETTING A PERFECT FIT So how do you go about getting a tight-fitting joint? One way would be to set the miter gauge once to 45° and then cut all four miters. But this presents a couple of problems. First, you'd need to flip a work-piece end for end and turn it over between cuts. This not only prevents having one "good" side. But a molded piece "rocks" on the saw table when it's placed face down. A second problem is if the miter gauge isn't "dead-on" accurate, TECHNIQUE SO BLADEN. EXITS LONO\ -TIP OF MITER \ FEED DIRECTION you end up with a corner that's not 90°. Trying to square up the corner creates a gap at the joint. overall angle. So instead of trying to get a perfect 45° miter, I use a different approach. The idea is to get the mitered pieces to form an overall angle of 90°, see Fig. 4. To do this, I use the head of a combination square to set the mi ter gauge to 45°, see Fig. 4a. Then, after cutting the first miter, I move the gauge to the other side of the blade and angle the head in the opposite direction. The secret is to make all the adjustments to the miter gauge at this second (complementary) setting. This way, if the first miter is off, the second one can be cut to compensate for the error. No. 10 ShopNotes 13 |


