10 - Heavy Duty Lathe Stand, страница 14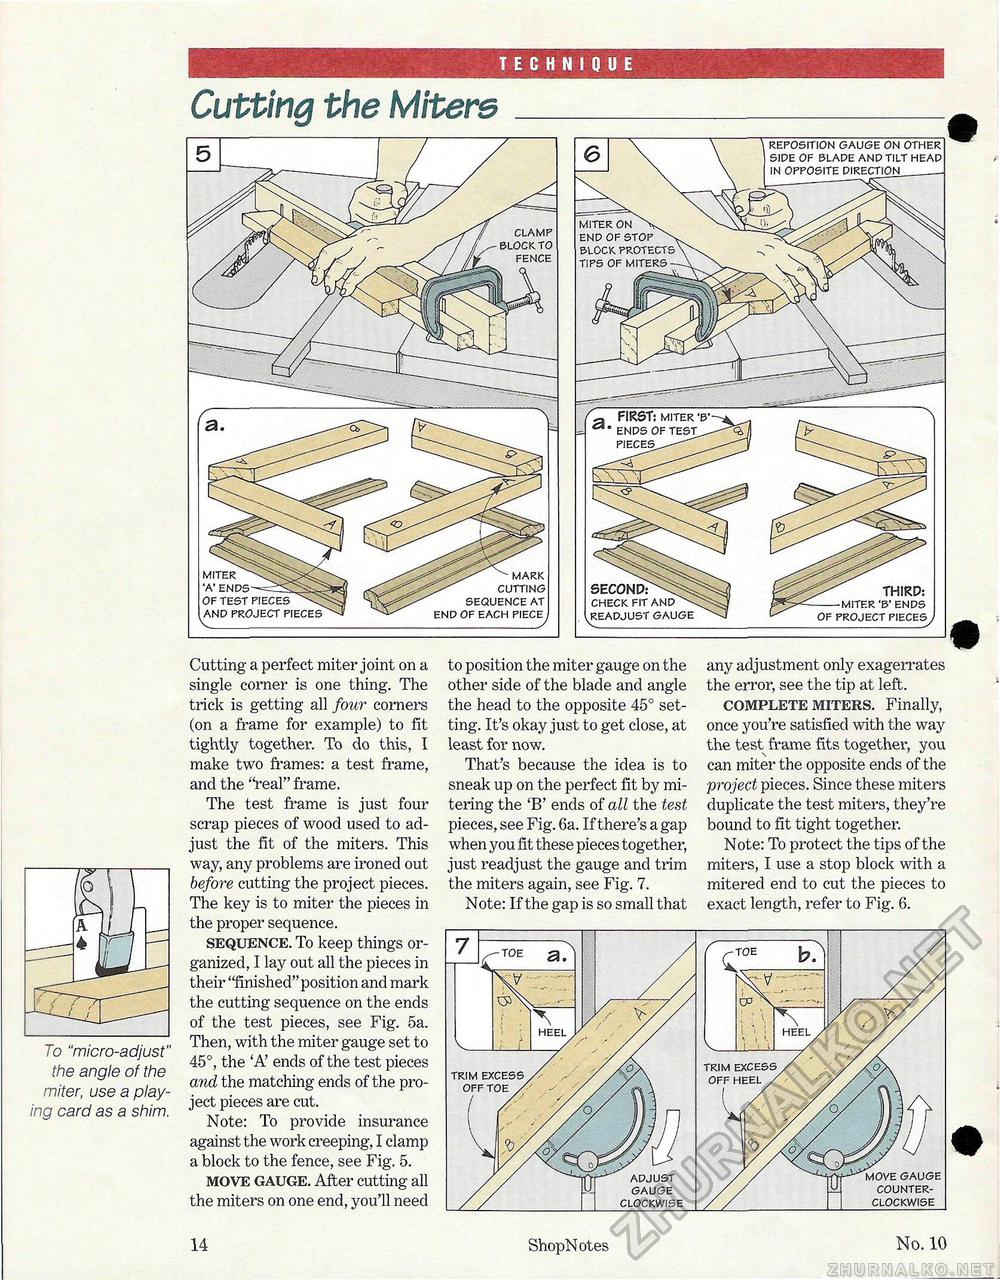
TECHNIQUE Cutting the Mitersreposition gauge on other side of blade and tilt head in opposite direction___- miter on end of stop n block protects tips of miters- clamp blockto fence FIRST: miter ends of test^-PIECES^-^"^ miter 'a' of test pieces and project pieces - mark x cutting sequence at end of each piece, SECOND: check fit and \ readjust gauge THIRD: -miter 'b' ends of project pieces Cutting a perfect miter joint on a single corner is one thing. The trick is getting all four corners (on a frame for example) to fit tightly together. To do this, I make two frames: a test frame, and the "real" frame. The test frame is just four scrap pieces of wood used to adjust the fit of the miters. This way, any problems are ironed out before cutting the project pieces. The key is to miter the pieces in the proper sequence. sequence. To keep things organized, I lay out all the pieces in their "finished" position and mark the cutting sequence on the ends of the test pieces, see Fig. 5a. Then, with the miter gauge set to 45°, the 'A' ends of the test pieces and the matching ends of the project pieces are cut. Note: To provide insurance against the work creeping, I clamp a block to the fence, see Fig. 5. move gauge. After cutting all the miters on one end, you'll need to position the miter gauge on the other side of the blade and angle the head to the opposite 45° setting. It's okay just to get close, at least for now. That's because the idea is to sneak up on the perfect fit by mi-tering the 'B' ends of all the test pieces, see Fig. 6a. If there's a gap when you fit these pieces together, just readjust the gauge and trim the miters again, see Fig. 7. Note: If the gap is so small that any adjustment only exagerrates the error, see the tip at left. complete miters. Finally, once you're satisfied with the way the test frame fits together, you can miter the opposite ends of the project pieces. Since these miters duplicate the test miters, they're bound to fit tight together. Note: To protect the tips of the miters, I use a stop block with a mitered end to cut the pieces to exact length, refer to Fig. 6. To "micro-adjust" the angle of the miter, use a playing card as a shim. 14 ShopNotes No. 10 |


