15 - Sliding Table, страница 12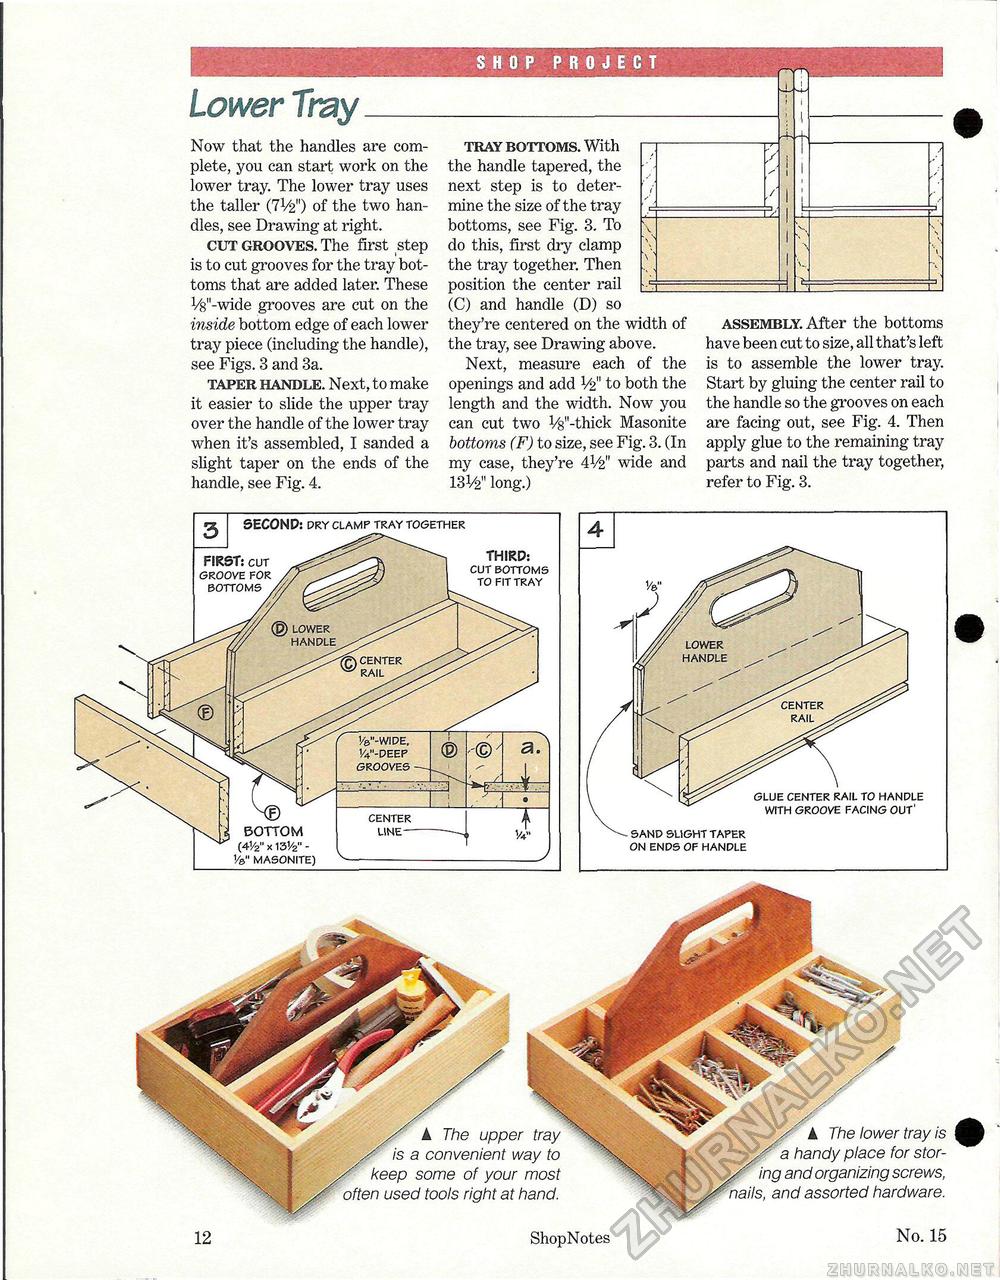
SHOP PROJECT Lower TrayNow that the handles are complete, you can start work on the lower tray. The lower tray uses the taller of the two han dles, see Drawing at right. cut grooves. The first step is to cut grooves for the tray bottoms that are added later. These Vs'-wide grooves are cut on the inside bottom edge of each lower tray piece (including the handle), see Figs. 3 and 3a. taper handle. Next, to make it easier to slide the upper tray over the handle of the lower tray when it's assembled, I sanded a slight taper on the ends of the handle, see Fig. 4. tray bottoms. With the handle tapered, the next step is to determine the size of the tray bottoms, see Fig. 3. To do this, first dry clamp the tray together. Then position the center rail (C) and handle (D) so they're centered on the width of the tray, see Drawing above. Next, measure each of the openings and add V2" to both the length and the width. Now you can cut two V^'-thick Masonite bottoms (F) to size, see Fig. 3. (In my case, they're 41/2" wide and 131/2" long.) XL assembly. After the bottoms have been cut to size, all that's left is to assemble the lower tray. Start by gluing the center rail to the handle so the grooves on each are facing out, see Fig. 4. Then apply glue to the remaining tray parts and nail the tray together, refer to Fig. 3. 12 ShopNotes No. 15 k The lower tray is a 1 >andy place for storing and organizing screws, nails, and assorted hardware. A The upper tray is a convenient way to keep some of your most '/i used tools right at hand. |


