15 - Sliding Table, страница 13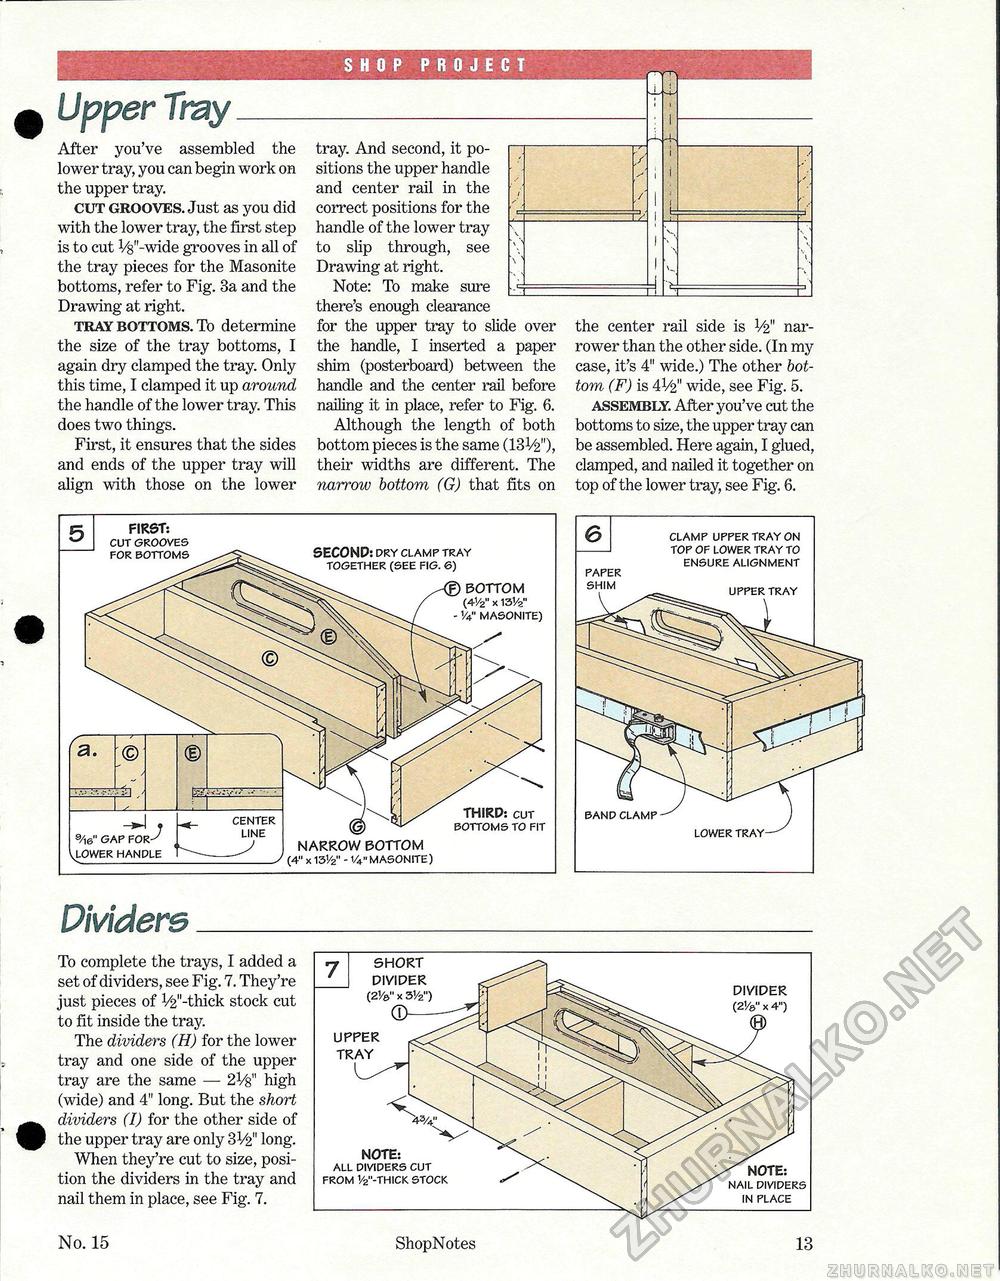
SHOP PROJECT Upper Tray_ After you've assembled the lower tray, you can begin work on the upper tray. cut grooves. Just as you did with the lower tray, the first step is to cut V8n-wide grooves in all of the tray pieces for the Masonite bottoms, refer to Fig. 3a and the Drawing at right. tray bottoms. To determine the size of the tray bottoms, I again dry clamped the tray. Only this time, I clamped it up around the handle of the lower tray. This does two things. First, it ensures that the sides and ends of the upper tray will align with those on the lower tray. And second, it positions the upper handle and center rail in the correct positions for the handle of the lower tray to slip through, see Drawing at right. Note: To make sure there's enough clearance for the upper tray to slide over the handle, I inserted a paper shim (posterboard) between the handle and the center rail before nailing it in place, refer to Fig. 6. Although the length of both bottom pieces is the same (IS1/^"), their widths are different. The narrow bottom (G) that fits on xl the center rail side is ¥2" narrower than the other side. (In my case, it's 4" wide.) The other bottom (F) is 4V2" wide, see Fig. 5. assembly. After you've cut the bottoms to size, the upper tray can be assembled. Here again, I glued, clamped, and nailed it together on top of the lower tray, see Fig. 6. Dividers_ To complete the trays, I added a set of dividers, see Fig. 7. They're just pieces of 1/2n-thick stock cut to fit inside the tray. The dividers (H) for the lower tray and one side of the upper tray are the same — 2¥s" high (wide) and 4" long. But the short dividers (I) for the other side of the upper tray are only 3V2" long. When they're cut to size, position the dividers in the tray and nail them in place, see Fig. 7. FIRST: cut grooves for bottoms 9Ae" gap for vlower handle THIRD: cut bottoms to fit NARROW BOTTOM (4" x 131/2" - 1/4"MASONITE) SECOND: dry clamp tray together (see fig. 6) BOTTOM (41/2" x 131/2" 1/4" masonite) No. 15 ShopNotes 13 |


