15 - Sliding Table, страница 15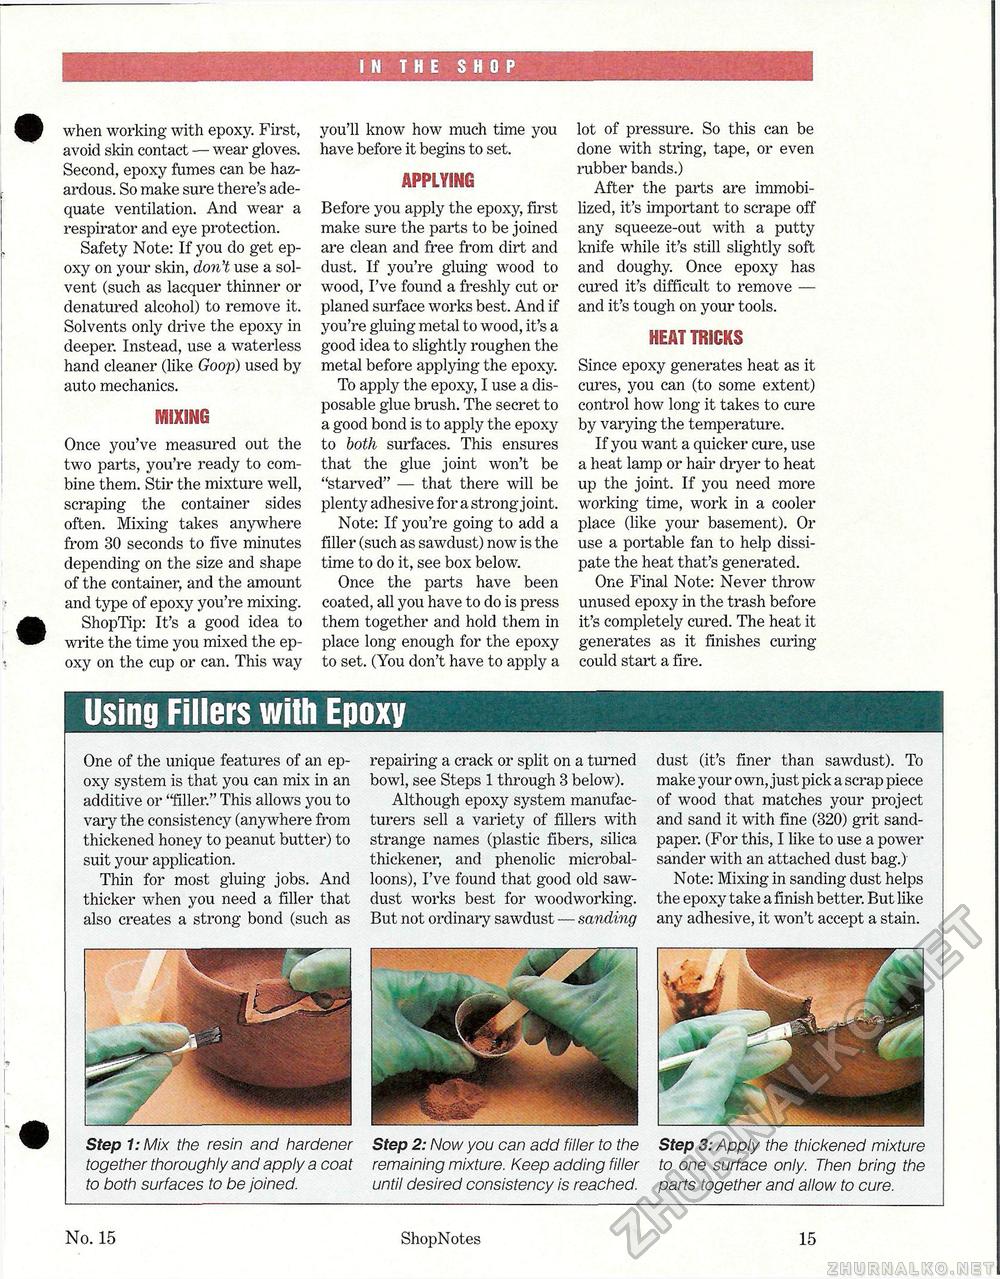
IN THE SHOP when working with epoxy. First, avoid skin contact — wear gloves. Second, epoxy fumes can be hazardous. So make sure there's adequate ventilation. And wear a respirator and eye protection. Safety Note: If you do get epoxy on your skin, don't use a solvent (such as lacquer thinner or denatured alcohol) to remove it. Solvents only drive the epoxy in deeper. Instead, use a waterless hand cleaner (like Goop) used by auto mechanics. BVltXlHO Once you've measured out the two parts, you're ready to combine them. Stir the mixture well, scraping the container sides often. Mixing takes anywhere from 30 seconds to five minutes depending on the size and shape of the container, and the amount and type of epoxy you're mixing. ShopTip: It's a good idea to write the time you mixed the epoxy on the cup or can. This way you'll know how much time you have before it begins to set. APPLYING Before you apply the epoxy, first make sure the parts to be joined are clean and free from dirt and dust. If you're gluing wood to wood, I've found a freshly cut or planed surface works best. And if you're gluing metal to wood, it's a good idea to slightly roughen the metal before applying the epoxy. To apply the epoxy, I use a disposable glue brush. The secret to a good bond is to apply the epoxy to both surfaces. This ensures that the glue joint won't be "starved" — that there will be plenty adhesive for a strong joint. Note: If you're going to add a filler (such as sawdust) now is the time to do it, see box below. Once the parts have been coated, all you have to clo is press them together and hold them in place long enough for the epoxy to set. (You don't have to apply a lot of pressure. So this can be done with string, tape, or even rubber bands.) After the parts are immobilized, it's important to scrape off any squeeze-out with a putty knife while it's still slightly soft and doughy. Once epoxy has cured it's difficult to remove — and it's tough on your tools. HEAT TRICKS Since epoxy generates heat as it cures, you can (to some extent) control how long it takes to cure by varying the temperature. If you want a quicker cure, use a heat lamp or hair dryer to heat up the joint. If you need more working time, work in a cooler place (like your basement). Or use a portable fan to help dissipate the heat that's generated. One Final Note: Never throw unused epoxy in the trash before it's completely cured. The heat it generates as it finishes curing could start a fire. Using Fillers with Epoxy One of the unique features of an epoxy system is that you can mix in an additive or "filler." This allows you to vary the consistency (anywhere from thickened honey to peanut butter) to suit your application. Thin for most gluing jobs. And thicker when you need a filler that also creates a strong bond (such as repairing a crack or split on a turned bowl, see Steps 1 through 3 below). Although epoxy system manufacturers sell a variety of fillers with strange names (plastic fibers, silica thickener, and phenolic microbal-loons), I've found that good old sawdust works best for woodworking. But not ordinary sawdust — sanding dust (it's finer than sawdust). To make your own, just pick a scrap piece of wood that matches your project and sand it with fine (320) grit sandpaper. (For this, I like to use a power sander with an attached dust bag.) Note: Mixing in sanding dust helps the epoxy take a finish better. But like any adhesive, it won't accept a stain. Step 1: Mix the resin and hardener together thoroughly and apply a coat to both surfaces to be joined. Step 2: Now you can add filler to the remaining mixture. Keep adding filler until desired consistency is reached. Step 3: Apply the thickened mixture to one surface only. Then bring the parts together and allow to cure. __ No. 15 ShopNotes 15 |


