15 - Sliding Table, страница 16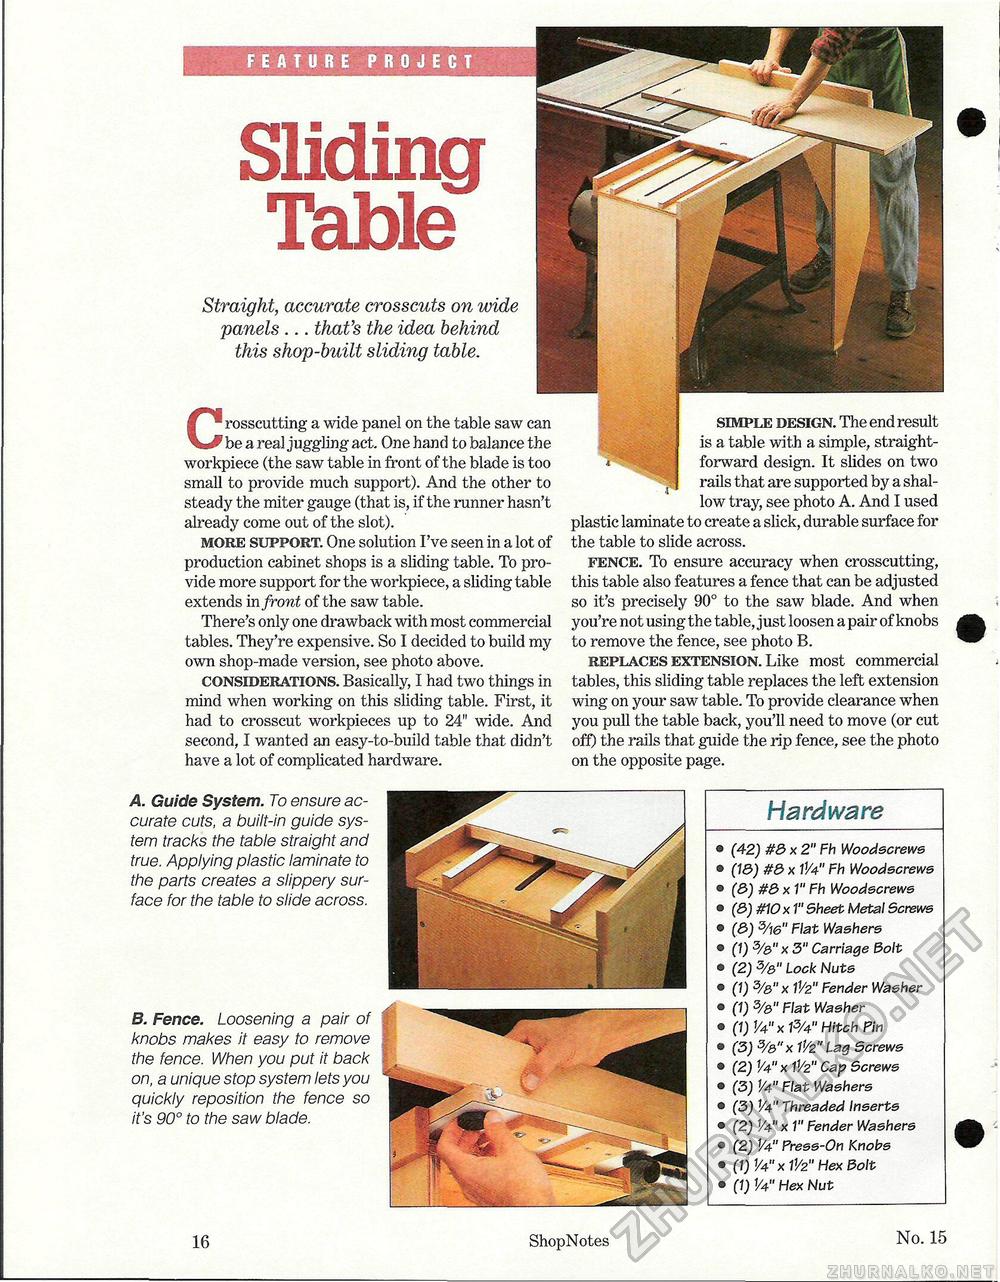
Straight, accurate crosscuts on wide panels ... that's the idea behind this shop-built sliding table. Crosscutting a wide panel on the table saw can be a real juggling act. One hand to balance the workpiece (the saw table in front of the blade is too small to provide much support). And the other to steady the miter gauge (that is, if the runner hasn't already come out of the slot). more support. One solution I've seen in a lot of production cabinet shops is a sliding table. To provide more support for the workpiece, a sliding table extends in front of the saw table. There's only one drawback with most commercial tables. They're expensive. So I decided to build my own shop-made version, see photo above. considerations. Basically, I had two things in mind when working on this sliding table. First, it had to crosscut workpieces up to 24" wide. And second, I wanted an easy-to-build table that didn't have a lot of complicated hardware. A. Guide System. To ensure accurate cuts, a built-in guide system tracks the table straight and true. Applying plastic laminate to the parts creates a slippery surface for the table to slide across. simple design. The end result is a table with a simple, straightforward design. It slides on two rails that are supported by a shallow tray, see photo A. And I used plastic laminate to create a slick, durable surface for the table to slide across. fence. To ensure accuracy when crosscutting, this table also features a fence that can be adjusted so it's precisely 90° to the saw blade. And when you're not using the table, just loosen a pair of knobs to remove the fence, see photo B. replaces extension. Like most commercial tables, this sliding table replaces the left extension wing on your saw table. To provide clearance when you pull the table back, you'll need to move (or cut off) the rails that guide the rip fence, see the photo on the opposite page. B. Fence. Loosening a pair of knobs makes it easy to remove the fence. When you put it back on, a unique stop system lets you quickly reposition the fence so it's 90° to the saw blade. Hardware (42) #3 x 2" Fh Woodscrews (13) #3 x IV4" Fh Woodscrews (3) #3 x 1" Fh Woodscrews (3) mO x 1" Sheet Metal Screws (3) 5/w" Flat Washers (1) 3/&" x 3" Carriage Bolt (2) 3/3" Lock Nuts (1) 5/3"x11/2" Fender Washer (1) 3/3" Flat Washer (1) y4" x 13/4" Hitch Fin (3) 3/3" x V/2" Lag Screws (2) V4" x V/2" Cap Screws (3) 1/4" Flat Washers (3) V4" Threaded Inserts (2) V4" x 1" Fender Washers (2) 1/4" Fress-On Knobs (1) V4" x V/2" Hex Bolt (1) 1/4" Hex Nut 16 ShopNotes No. 15 |


