16 - Custonize Your Radial Arm Saw, страница 20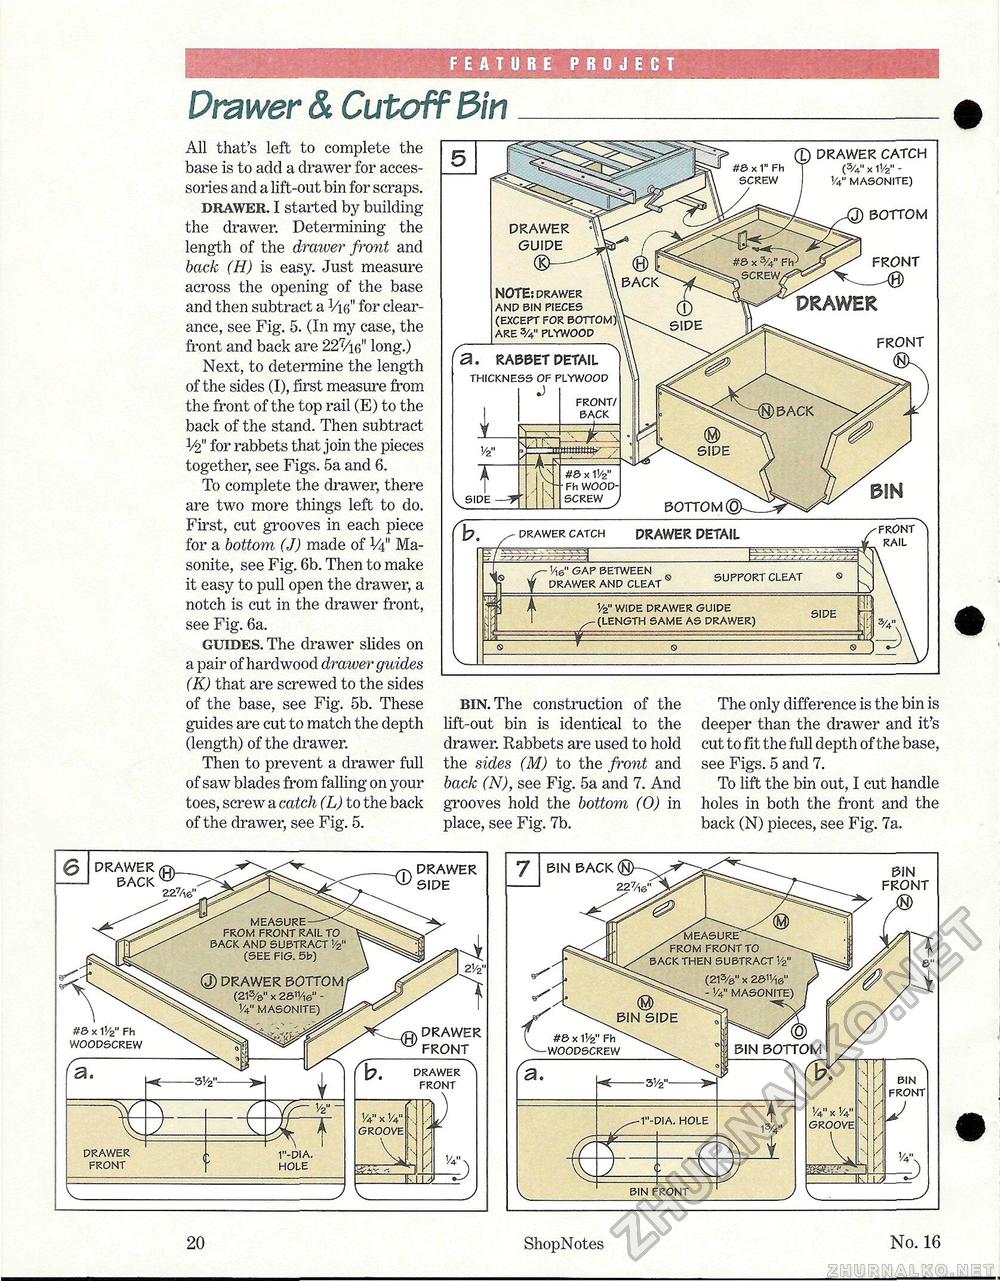
FEATURE PROJECT Drawer & Cutoff 3m All that's left to complete the base is to acid a drawer for accessories and a lift-out bin for scraps. drawer. I started by building the drawer. Determining the length of the drawer front and back (H) is easy. Just measure across the opening of the base and then subtract a Vie" for clearance, see Fig. 5. (In my case, the front and back are 227/i6" long.) Next, to determine the length of the sides (I), first measure from the front of the top rail (E) to the back of the stand. Then subtract V2" for rabbets that join the pieces together, see Figs. 5a and 6. To complete the drawer, there are two more things left to do. First, cut grooves in each piece for a bottom, (J) made of V411 Ma-sonite, see Fig. 6b. Then to make it easy to pull open the drawer, a notch is cut in the drawer front, see Fig. 6a. guides. The drawer slides on a pair of hardwood drawer guides (K) that are screwed to the sides of the base, see Fig. 5b. These guides are cut to match the depth (length) of the drawer. Then to prevent a drawer full of saw blades from falling on your toes, screw a catch (L) to the back of the drawer, see Fig. 5. bin. The construction of the lift-out bin is identical to the drawer. Rabbets are used to hold the sides (M) to the front and back (N), see Fig. 5a and 7. And grooves hold the bottom (0) in place, see Fig. 7b. The only difference is the bin is deeper than the drawer and it's cut to fit the full depth of the base, see Figs. 5 and 7. To lift the bin out, I cut handle holes in both the front and the back (N) pieces, see Fig. 7a. 20 ShopNotes No. 16 BACK(N)- 227/i, BIN FRONT EASURE'^-^^ FROM FRONT TO BACK THEN SUBTRACT Vz" (21%" x 2©1l/iS" V4" MASONiTE) BIN BOTTOM BIN FRONT 1 -P A, HOLE BIN FRONT 1/4" x 1/4" GROOVE |


