16 - Custonize Your Radial Arm Saw, страница 23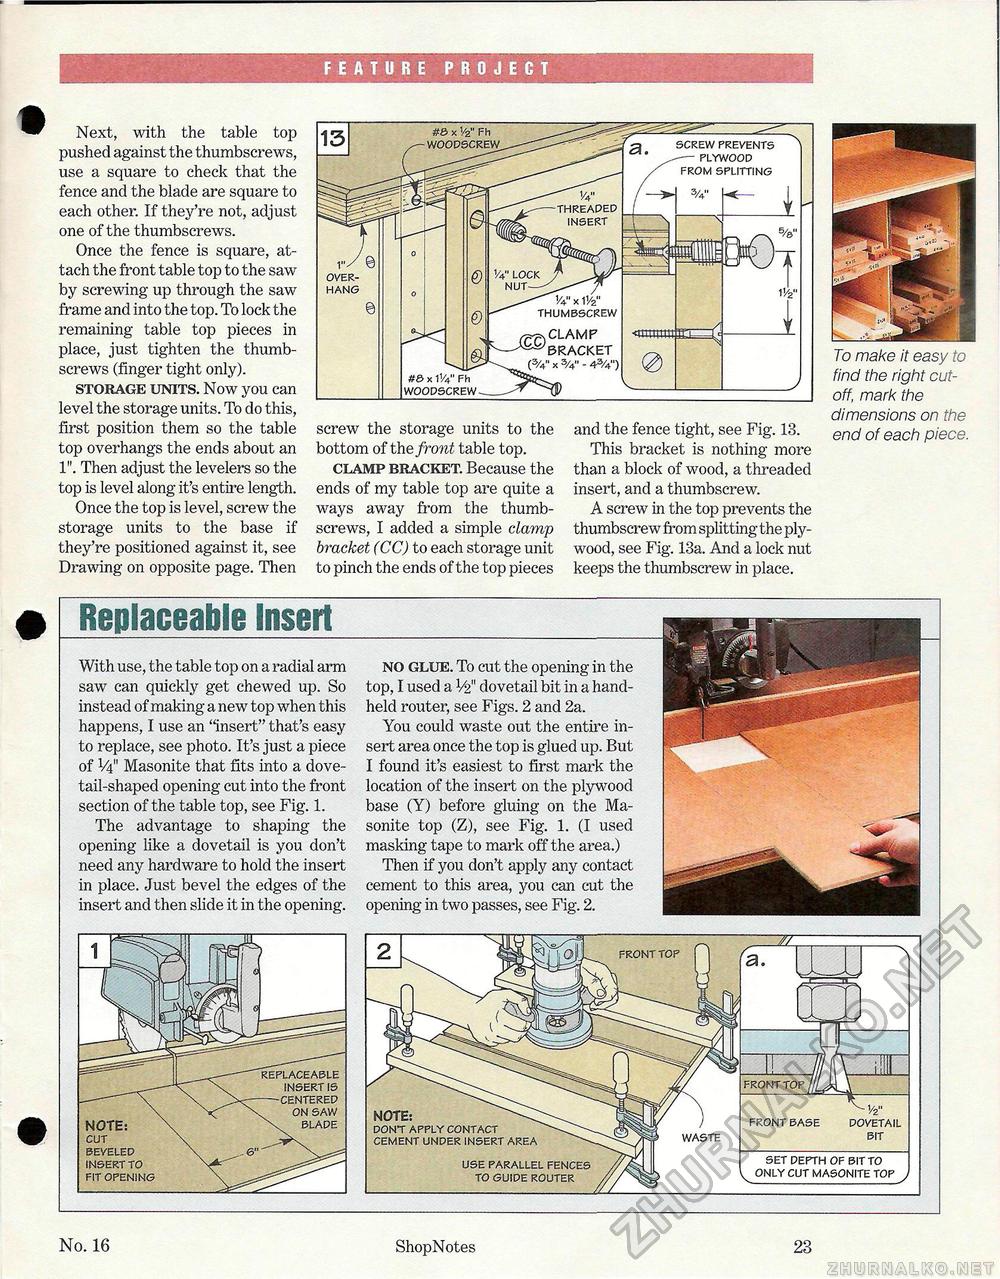
Next, with the table top pushed against the thumbscrews, use a square to check that the fence and the blade are square to each other. If they're not, adjust one of the thumbscrews. Once the fence is square, attach the front table top to the saw by screwing up through the saw frame and into the top. To lock the remaining table top pieces in place, just tighten the thumbscrews (finger tight only). storage units. Now you can level the storage units. To do this, first position them so the table top overhangs the ends about an 1". Then adjust the levelers so the top is level along it's entire length. Once the top is level, screw the storage units to the base if they're positioned against it, see Drawing on opposite page. Then screw the storage units to the bottom of the front table top. clamp bracket. Because the ends of my table top are quite a ways away from the thumbscrews, I added a simple clamp bracket (CC) to each storage unit to pinch the ends of the top pieces and the fence tight, see Fig. 13. This bracket is nothing more than a block of wood, a threaded insert, and a thumbscrew. A screw in the top prevents the thumbscrew from splitting the plywood, see Fig. 13a. And a lock nut keeps the thumbscrew in place. To make it easy to find the right cutoff, mark the dimensions on the end of each piece. THREAPED INSERT 1/4" LOCK NUT— V4" x 11/2" THUMBSCREW CLAMP <mttmtt 1"' OVERHANG #8 x V2" Fh •WOODSCREW SCREW PREVENTS — PLYWOOD FROM SPLITTING BRACKET (%" x 3/4" - 4%") x 11/4" Fh WOODSCREW FRONT TOP Replaceable InsertWith use, the table top on a radial arm saw can quickly get chewed up. So instead of making a new top when this happens, I use an "insert" that's easy to replace, see photo. It's just a piece of V4" Masonite that fits into a dovetail-shaped opening cut into the front section of the table top, see Fig. 1. The advantage to shaping the opening like a dovetail is you don't need any hardware to hold the insert in place. Just bevel the edges of the insert and then slide it in the opening. no glue. To cut the opening in the top, I used a V2" dovetail bit in a handheld router, see Figs. 2 and 2a. You could waste out the entire insert area once the top is glued up. But I found it's easiest to first mark the location of the insert on the plywood base (Y) before gluing on the Masonite top (Z), see Fig. 1. (I used masking tape to mark off the area.) Then if you don't apply any contact cement to this area, you can cut the opening in two passes, see Fig. 2. SET DEPTH OF BIT TO ONLY CUT MASONITE TOP J WASTE
FRONT BASE ■1/2" DOVETAIL BIT NOTE: DONT APPLY CONTACT CEMENT UNDER INSERT AREA FRONT BASE ■1/2" DOVETAIL BIT USE PARALLEL FENCES TO GUIDE ROUTER No. 16 ShopNotes 23 |
||||||||||||||||||||


