25 - Special Table Saw Issue, страница 12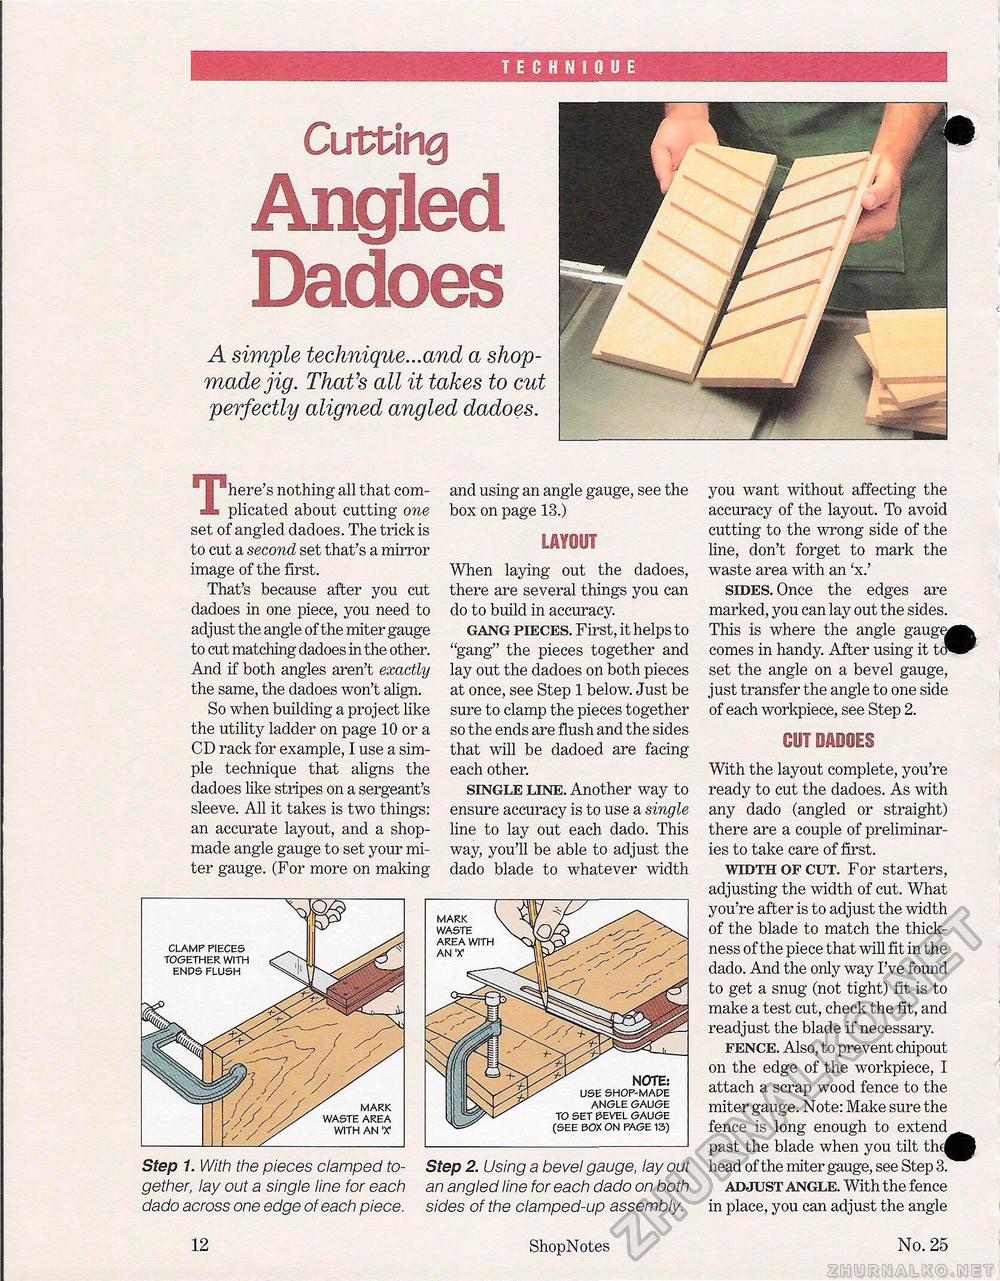
TECHNIQUE Cutting Angled Dadoes A simple technique...and a shop-made jig. That's all it takes to cut perfectly aligned angled dadoes. There's nothing all that complicated about cutting one set of angled dadoes. The trick is to cut a second set that's a mirror image of the first. That's because after you cut dadoes in one piece, you need to adjust the angle of the miter gauge to cut matching dadoes in the other. And if both angles aren't exactly the same, the dadoes won't align. So when building a project like the utility ladder on page 10 or a CD rack for example, I use a simple technique that aligns the dadoes like stripes on a sergeant's sleeve. All it takes is two things: an accurate layout, and a shop-made angle gauge to set your miter gauge. (For more on making Step 1. With the pieces clamped together, lay out a single line for each dado across one edge of each piece. and using an angle gauge, see the box on page 13.) LAYOUT When laying out the dadoes, there are several things you can do to build in accuracy. gang pieces. First, it helps to "gang" the pieces together and lay out the dadoes on both pieces at once, see Step 1 below. Just be sure to clamp the pieces together so the ends are flush and the sides that will be dadoed are facing-each other. single line. Another way to ensure accuracy is to use a single line to lay out each dado. This way, you'll be able to adjust the dado blade to whatever width Step 2. Using a bevel gauge, lay out an angled line for each dado on both sides of the clamped-up assembly. you want without affecting the accuracy of the layout. To avoid cutting to the wrong side of the line, don't forget to mark the waste area with an 'x.' sides. Once the edges are marked, you can lay out the sides. This is where the angle gaugei comes in handy. After using it t.J set the angle on a bevel gauge, just transfer the angle to one side of each workpiece, see Step 2. €111 DADOES With the layout complete, you're ready to cut the dadoes. As with any dado (angled or straight) there are a couple of preliminaries to take care of first. width of cut. For starters, adjusting the width of cut. What you're after is to adjust the width of the blade to match the thickness of the piece that will fit in the dado. And the only way I've found to get a snug (not tight) fit is to make a test cut, check the fit, and readjust the blade if necessary. fence. Also, to prevent chipout on the edge of the workpiece, I attach a scrap wood fence to the miter gauge. Note: Make sure the fence is long enough to extend past the blade when you tilt the! head of the miter gauge, see Step 3. adjust angle. With the fence in place, you can adjust the angle clamp pieces together with ends flush mark waste area with an r 12 ShopNotes No. 25 |


