36 - Miter Trimmer, страница 11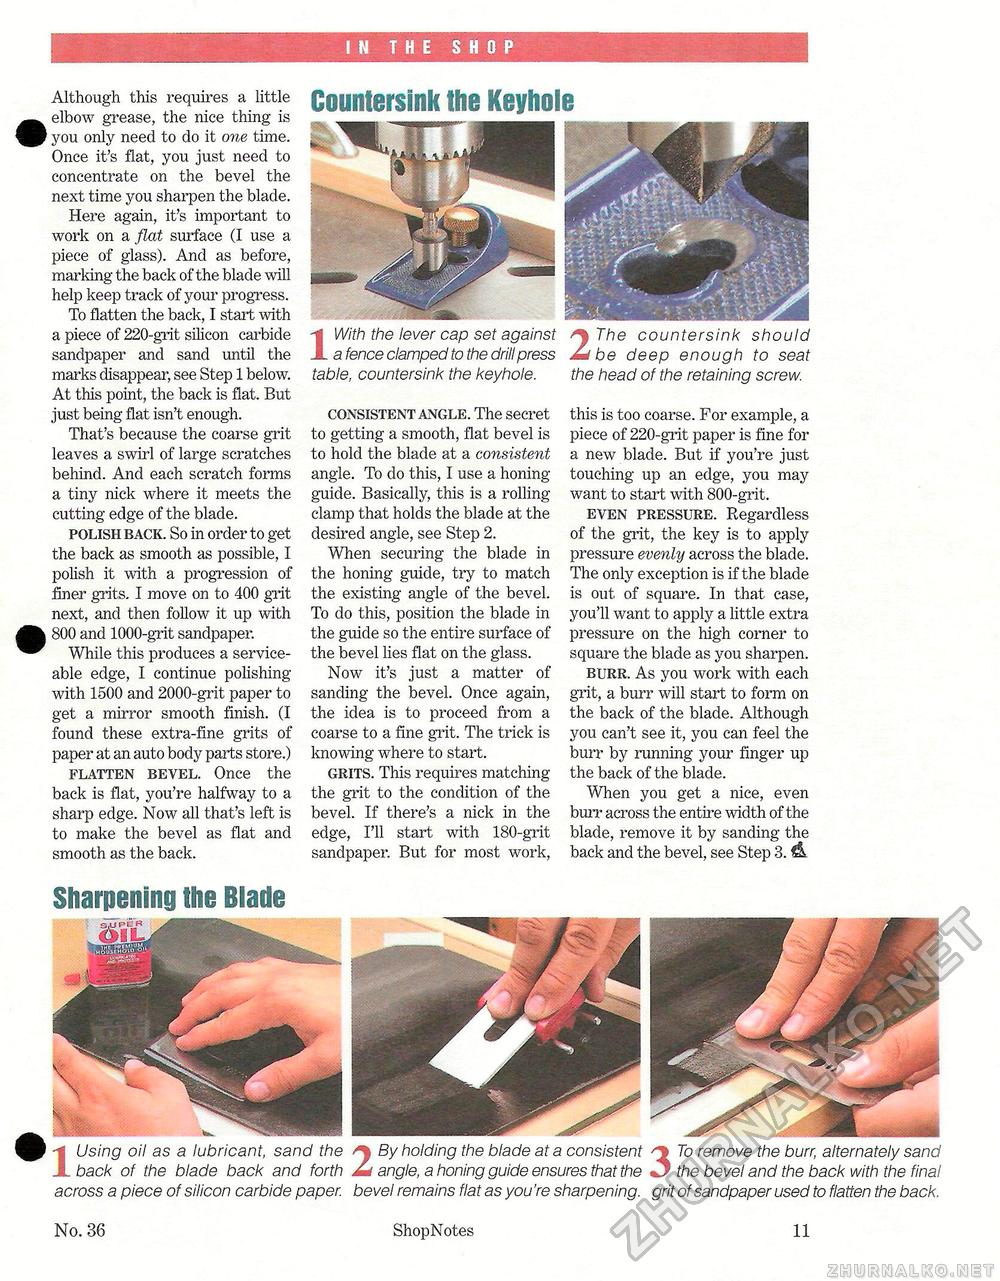
IN THE SHOP Although this requires a little elbow grease, the nice thing is you only need to do it one time. Once it's flat, you just need to concentrate on the bevel the next time you sharpen the blade. Here again, it's important to work on a flat surface (I use a piece of glass). And as before, marking the back of the blade will help keep track of your progress. To flatten the back, I start with a piece of 220-grit silicon carbide sandpaper and sand until the marks disappear, see Step 1 below. At this point, the back is flat. But just being flat isn't enough. That's because the coarse grit leaves a swirl of large scratches behind. And each scratch forms a tiny nick where it meets the cutting edge of the blade. polish back. So in order to get the back as smooth as possible, I polish it with a progression of finer grits. I move on to 400 grit next, and then follow it up with 800 and 1000-grit sandpaper. While this produces a serviceable edge, I continue polishing with 1500 and 2000-grit paper to get a mirror smooth finish. (I found these extra-fine grits of paper at an auto body parts store.) flatten bevel. Once the back is flat, you're halfway to a sharp edge. Now all that's left is to make the bevel as flat and smooth as the back. Sharpening the Blade Countersink the Keyhole -f1 With the lever cap set against i The countersink should a fence clamped to the drill press Ad he deep enough to seat table, countersink the keyhole. the head of the retaining screw. consistent angle. The secret to getting a smooth, flat bevel is to hold the blade at a consistent angle. To do this, I use a honing guide. Basically, this is a rolling clamp that holds the blade at the desired angle, see Step 2. When securing the blade in the honing guide, try to match the existing angle of the bevel. To do this, position the blade in the guide so the entire surface of the bevel lies flat on the glass. Now it's just a matter of sanding the bevel. Once again, the idea is to proceed from a coarse to a fine grit. The trick is knowing where to start. grits. This requires matching the grit to the condition of the bevel. If there's a nick in the edge, I'll start with 180-grit sandpaper. But for most work, this is too coarse. For example, a piece of 220-grit paper is fine for a new blade. But if you're just touching up an edge, you may want to start with 800-grit. even pressure. Regardless of the grit, the key is to apply pressure evenly across the blade. The only exception is if the blade is out of square. In that case, you'll want to apply a little extra pressure on the high corner to square the blade as you sharpen. burr. As you work with each grit, a burr will start to form on the back of the blade. Although you can't see it, you can feel the burr by running your finger up the back of the blade. When you get a nice, even burr across the entire width of the blade, remove it by sanding the back and the bevel, see Step 3. & ■n 1 Using oil as a lubricant, sand the back of the blade back and forth JU angle, a honing guide ensures that the %J the bevel and the back with the final across a piece of silicon carbide paper, bevel remains flat as you're sharpening, grit of sandpaper used to flatten the back. 2 By holding the blade at a consistent <*% To remove the burr, alternately sand angle, a honing guide ensures that the J No. 36 ShopNotes 11 |


