36 - Miter Trimmer, страница 9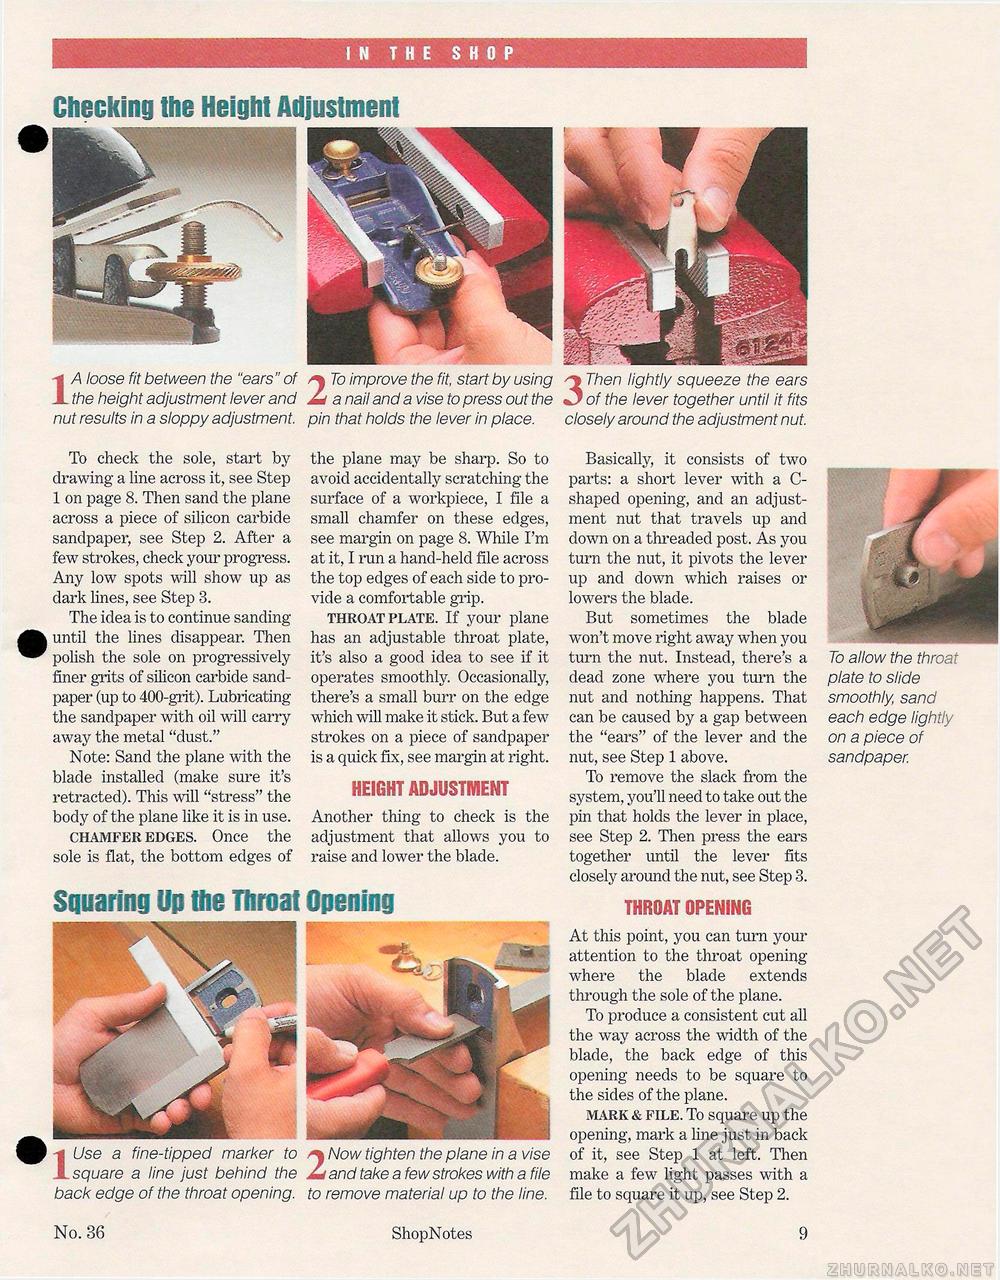
IN THE SHOP Checking the Height Adjustment A loose fit between the "ears" of To improve the fit, start by using the height adjustment lever and Id a nail and a vise to press out the 1A loose nt between tne "ears " or the height adjustment lever and Id nut results in a sloppy adjustment, pin that holds the lever in place. To check the sole, start by drawing a line across it, see Step 1 on page 8. Then sand the plane across a piece of silicon carbide sandpaper, see Step 2. After a few strokes, check your progress. Any low spots will show up as dark lines, see Step 3. The idea is to continue sanding until the lines disappear. Then polish the sole on progressively finer grits of silicon carbide sandpaper (up to 400-grit). Lubricating the sandpaper with oil will carry away the metal "dust." Note: Sand the plane with the blade installed (make sure it's retracted). This will "stress" the body of the plane like it is in use. chamfer edges. Once the sole is flat, the bottom edges of the plane may be sharp. So to avoid accidentally scratching the surface of a workpiece, I file a small chamfer on these edges, see margin on page 8. While I'm at it, I run a hand-held file across the top edges of each side to provide a comfortable grip. throat plate. If your plane has an adjustable throat plate, it's also a good idea to see if it operates smoothly. Occasionally, there's a small burr on the edge which will make it stick. But a few strokes on a piece of sandpaper is a quick fix, see margin at right. HEIGHT ADJUSTMENT Another thing to check is the adjustment that allows you to raise and lower the blade. Squaring Up the Throat Opening IUse a fine-tipped marker to ^ Now tighten the plane in a vise square a line just behind the As and take a few strokes with a file back edge of the throat opening, to remove material up to the line. 3 Then lightly squeeze the ears of the lever together until it fits closely around the adjustment nut. Basically, it consists of two parts: a short lever with a C-shaped opening, and an adjustment nut that travels up and down on a threaded post. As you turn the nut, it pivots the lever up and clown which raises or lowers the blade. But sometimes the blade won't move right away when you turn the nut. Instead, there's a dead zone where you turn the nut and nothing happens. That can be caused by a gap between the "ears" of the lever and the nut, see Step 1 above. To remove the slack from the system, you'll need to take out the pin that holds the lever in place, see Step 2. Then press the ears together until the lever fits closely around the nut, see Step 3. THROAT OPENING At this point, you can turn your attention to the throat opening where the blade extends through the sole of the plane. To produce a consistent cut all the way across the width of the blade, the back edge of this opening needs to be square to the sides of the plane. mark & file. To square up the opening, mark a line just in back of it, see Step 1 at left. Then make a few light passes with a file to square it up, see Step 2. To allow the throat plate to slide smoothly sand each edge lightly on a piece of sandpaper. No. 36 ShopNotes 9 |


