36 - Miter Trimmer, страница 10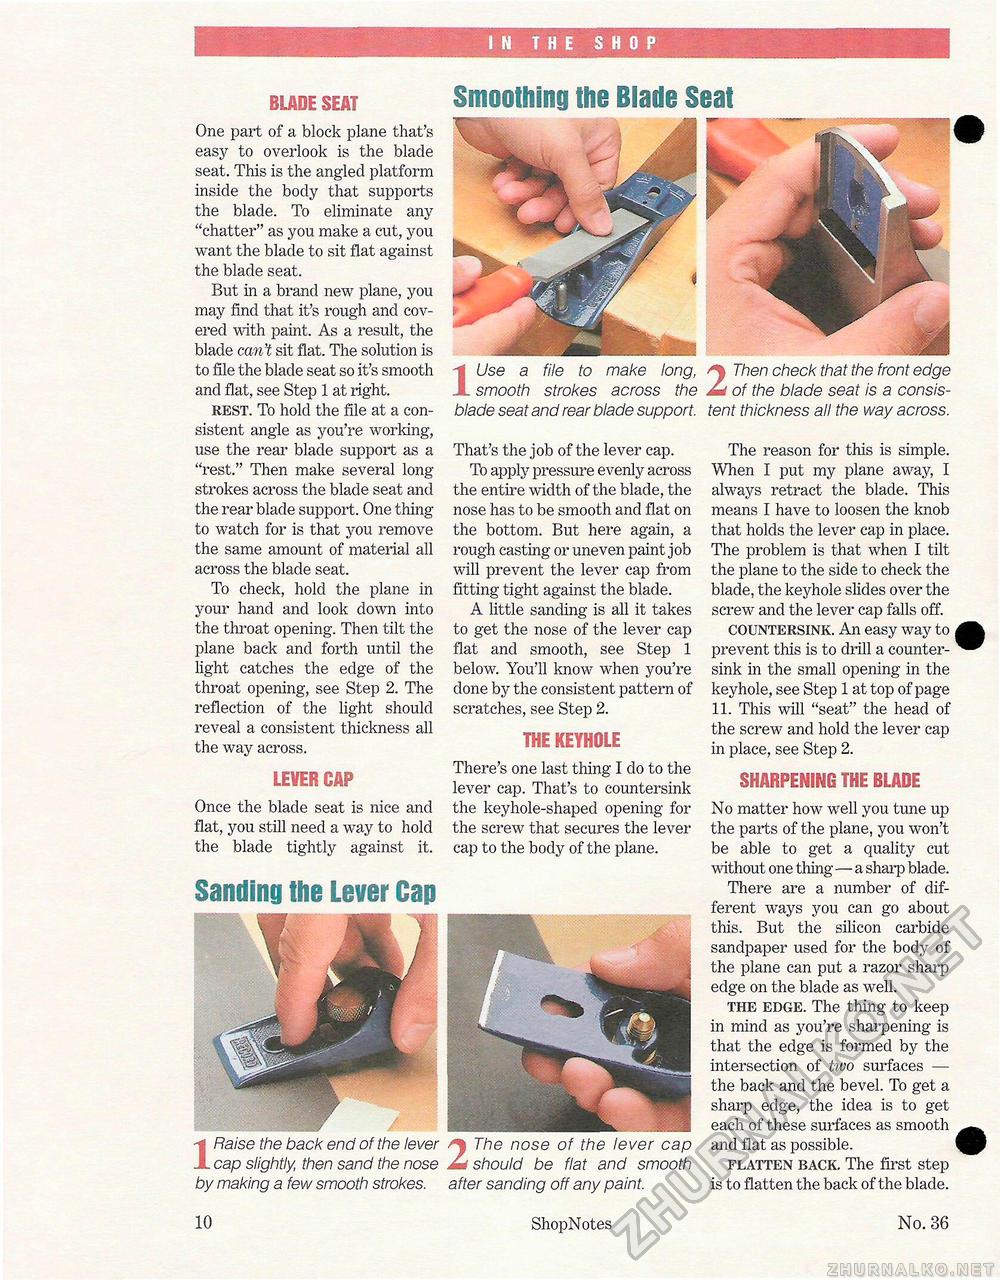
IN THE SHOP blade seat Smoothing the Blade Seat One part of a block plane that's easy to overlook is the blade seat. This is the angled platform inside the body that supports the blade. To eliminate any "chatter" as you make a cut, you want the blade to sit flat against the blade seat. But in a brand new plane, you may find that it's rough and covered with paint. As a result, the blade can 't sit fiat. The solution is to file the blade seat so it's smooth and flat, see Step 1 at right. rest. To hold the file at a consistent angle as you're working, use the rear blade support as a "rest." Then make several long-strokes across the blade seat and the rear blade support. One thing to watch for is that you remove the same amount of material all across the blade seat. To check, hold the plane in your hand and look down into the throat opening. Then tilt the plane back and forth until the light catches the edge of the throat opening, see Step 2. The reflection of the light should reveal a consistent thickness all the way across. lever OAF Once the blade seat is nice and flat, you still need a way to hold the blade tightly against it. Sanding the Lever Cap IUse a file to make long, smooth strokes across the blade seat and rear blade support. That's the job of the lever cap. To apply pressure evenly across the entire width of the blade, the nose has to be smooth and flat on the bottom. But here again, a rough casting or uneven paint job will prevent the lever cap from fitting tight against the blade. A little sanding is all it takes to get the nose of the lever cap flat and smooth, see Step 1 below. You'll know when you're done by the consistent pattern of scratches, see Step 2. the keyhole There's one last thing I do to the lever cap. That's to countersink the keyhole-shaped opening for the screw that secures the lever cap to the body of the plane. 1 Raise the back end of the lever The nose of the lever cap cap slightly, then sand the nose Ad should be flat and smooth by making a few smooth strokes, after sanding off any paint. 2 Then check that the front edge of the blade seat is a consistent thickness all the way across. The reason for this is simple. When I put my plane away, I always retract the blade. This means I have to loosen the knob that holds the lever cap in place. The problem is that when I tilt the plane to the side to check the blade, the keyhole slides over the screw and the lever cap falls off. countersink. An easy way to , prevent this is to drill a countersink in the small opening in the keyhole, see Step 1 at top of page 11. This will "seat" the head of the screw and hold the lever cap in place, see Step 2. sharpening the blade No matter how well you tune up the parts of the plane, you won't be able to get a quality cut without one thing—a sharp blade. There are a number of different ways you can go about this. But the silicon carbide sandpaper used for the body of the plane can put a razor sharp edge on the blade as well. the edge. The thing to keep in mind as you're sharpening is that the edge is formed by the intersection of two surfaces — the back and the bevel. To get a sharp edge, the idea is to get each of these surfaces as smooth and flat as possible. flatten back. The first step is to flatten the back of the blade. 10 ShopNotes No. 36 |


