36 - Miter Trimmer, страница 6
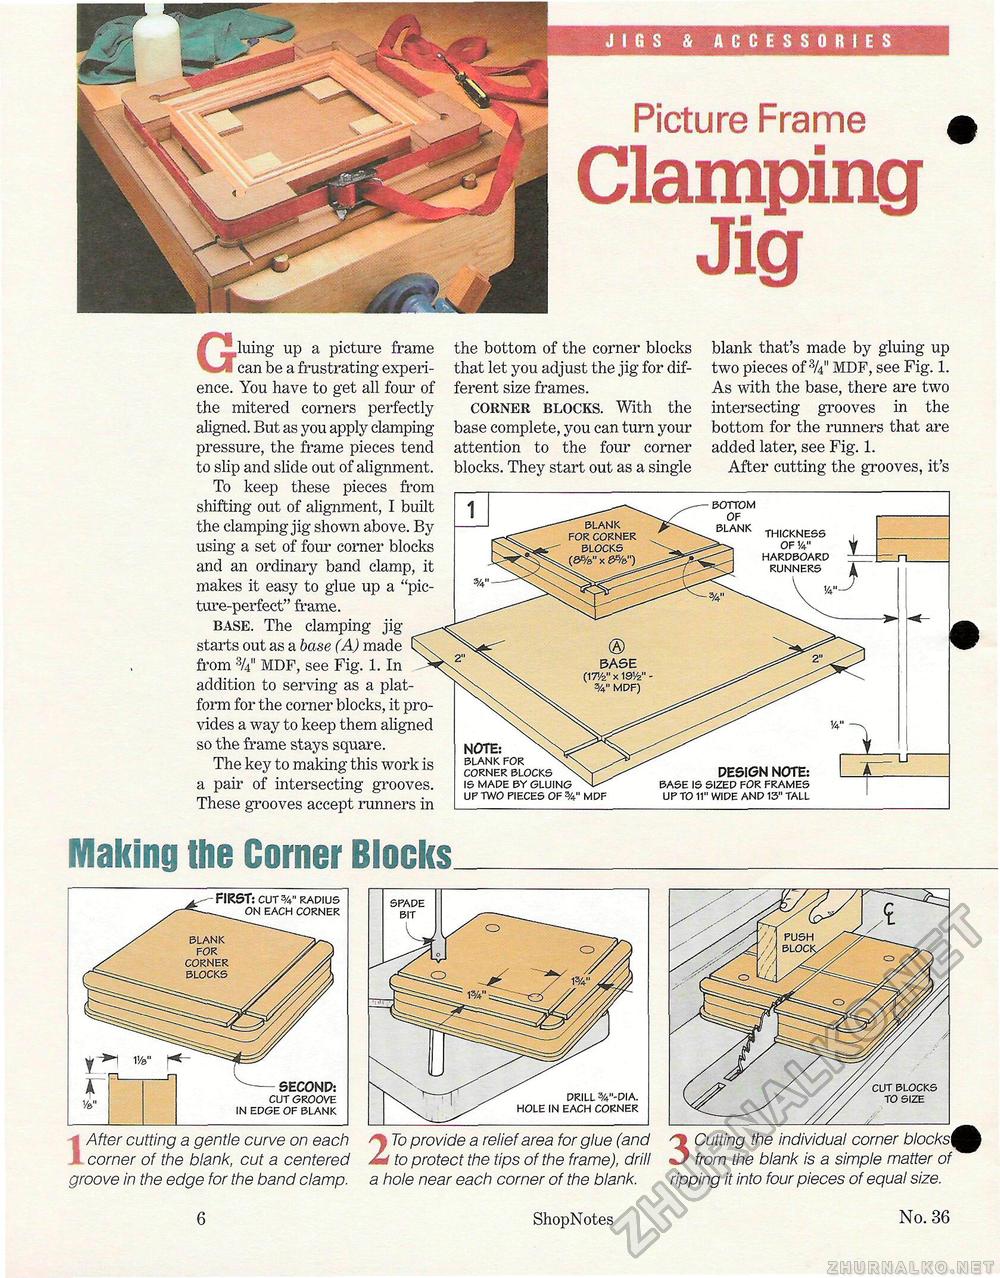
jigs & accessories Picture Frame £ ClampingJigblank for corner blocks Gluing up a picture frame can be a frustrating experience. You have to get all four of the mitered corners perfectly aligned. But as you apply clamping pressure, the frame pieces tend to slip and slide out of alignment. To keep these pieces from shifting out of alignment, I built the clamping jig shown above. By using a set of four corner blocks and an ordinary band clamp, it makes it easy to glue up a "picture-perfect" frame. base. The clamping jig starts out as a base (A) made from MDF, see Fig. 1. In addition to serving as a platform for the corner blocks, it provides a way to keep them aligned so the frame stays square. The key to making this work is a pair of intersecting grooves. These grooves accept runners in the bottom of the corner blocks that let you adjust the jig for different size frames. corner blocks. With the base complete, you can turn your attention to the four corner blocks. They start out as a single blank that's made by gluing up two pieces of MDF, see Fig. 1. As with the base, there are two intersecting grooves in the bottom for the runners that are added later, see Fig. 1. After cutting the grooves, it's bottom blank thickness of 1/4" hardboard runners NOTE blank for corner blocks is made by gluing up two pieces of v mdf DESIGN NOTE: base is sized for frames up to 11" wide and 13" tall Making the Corner Blocks
After cutting a gentle curve on each corner of the blank, cut a centered groove in the edge for the band clamp. After cutting a gentle curve on each corner of the blank, cut a centered groove in the edge for the band clamp. 2 To provide a relief area for glue (and to protect the tips of the frame), drill a hole near each corner of the blank. drill %"-dia. hole in each corner 3 Cutting the individual corner blocks(\ from the blank is a simple matter of ripping it into four pieces of equal size. cut blocks to size 6 Shop Notes No. 36 |
||||||||||||||||||||||||||||||


