38 - Ring Boxes, страница 22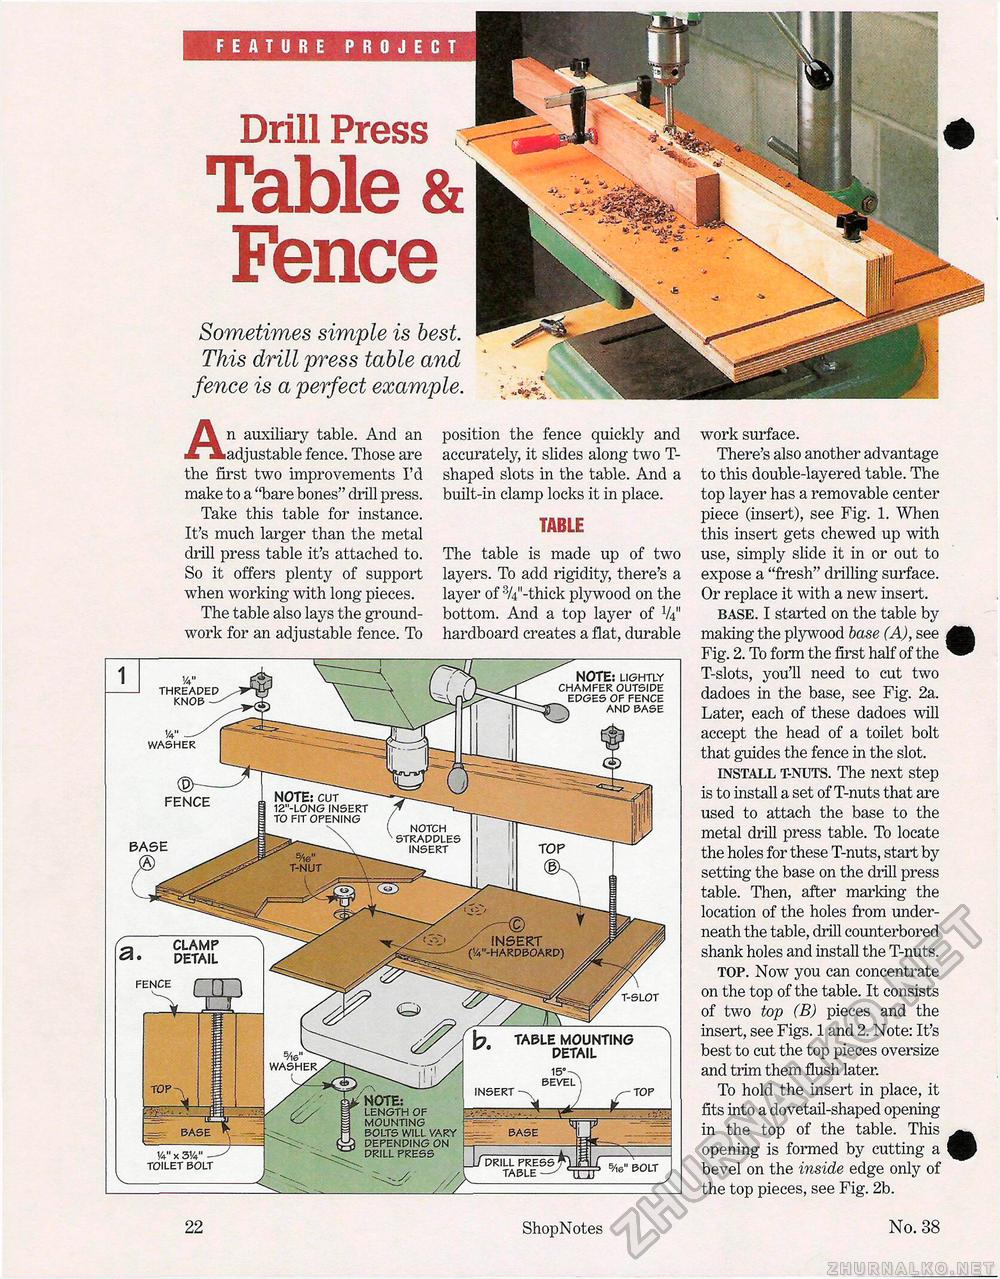
FEATURE PROJECT Drill Press Table & Fence Sometimes simple is best. This drill press table and fence is a perfect example. An auxiliary table. And an adjustable fence. Those are the first two improvements I'd make to a "bare bones" drill press. Take this table for instance. It's much larger than the metal drill press table it's attached to. So it offers plenty of support when working with long pieces. The table also lays the groundwork for an adjustable fence. To position the fence quickly and accurately, it slides along two T-shaped slots in the table. And a built-in clamp locks it in place. TABLEThe table is made up of two layers. To add rigidity, there's a layer of 3/4"-thick plywood on the bottom. And a top layer of V4" hardboard creates a flat, durable work surface. There's also another advantage to this double-layered table. The top layer has a removable center piece (insert), see Fig. 1. When this insert gets chewed up with use, simply slide it in or out to expose a "fresh" drilling surface. Or replace it with a new insert. base. I started on the table by making the plywood base (A), see Fig. 2. To form the first half of the T-slots, you'll need to cut two dadoes in the base, see Fig. 2a.. Later, each of these dadoes will accept the head of a toilet bolt that guides the fence in the slot. install t-nuts. The next step is to install a set of T-nuts that are used to attach the base to the metal drill press table. To locate the holes for these T-nuts, start by setting the base on the drill press table. Then, after marking the location of the holes from underneath the table, drill counterbored shank holes and install the T-nuts. top. Now you can concentrate on the top of the table. It consists of two top (B) pieces and the insert, see Figs. 1 and 2. Note: It's best to cut the top pieces oversize and trim them flush later. To hold the insert in place, it fits into a dovetail-shaped opening in the top of the table. This opening is formed by cutting a bevel on the inside edge only of the top pieces, see Fig. 2b. 22 ShopNotes No. 38 |


