43 - Build Your Own Dovetail Jig, страница 27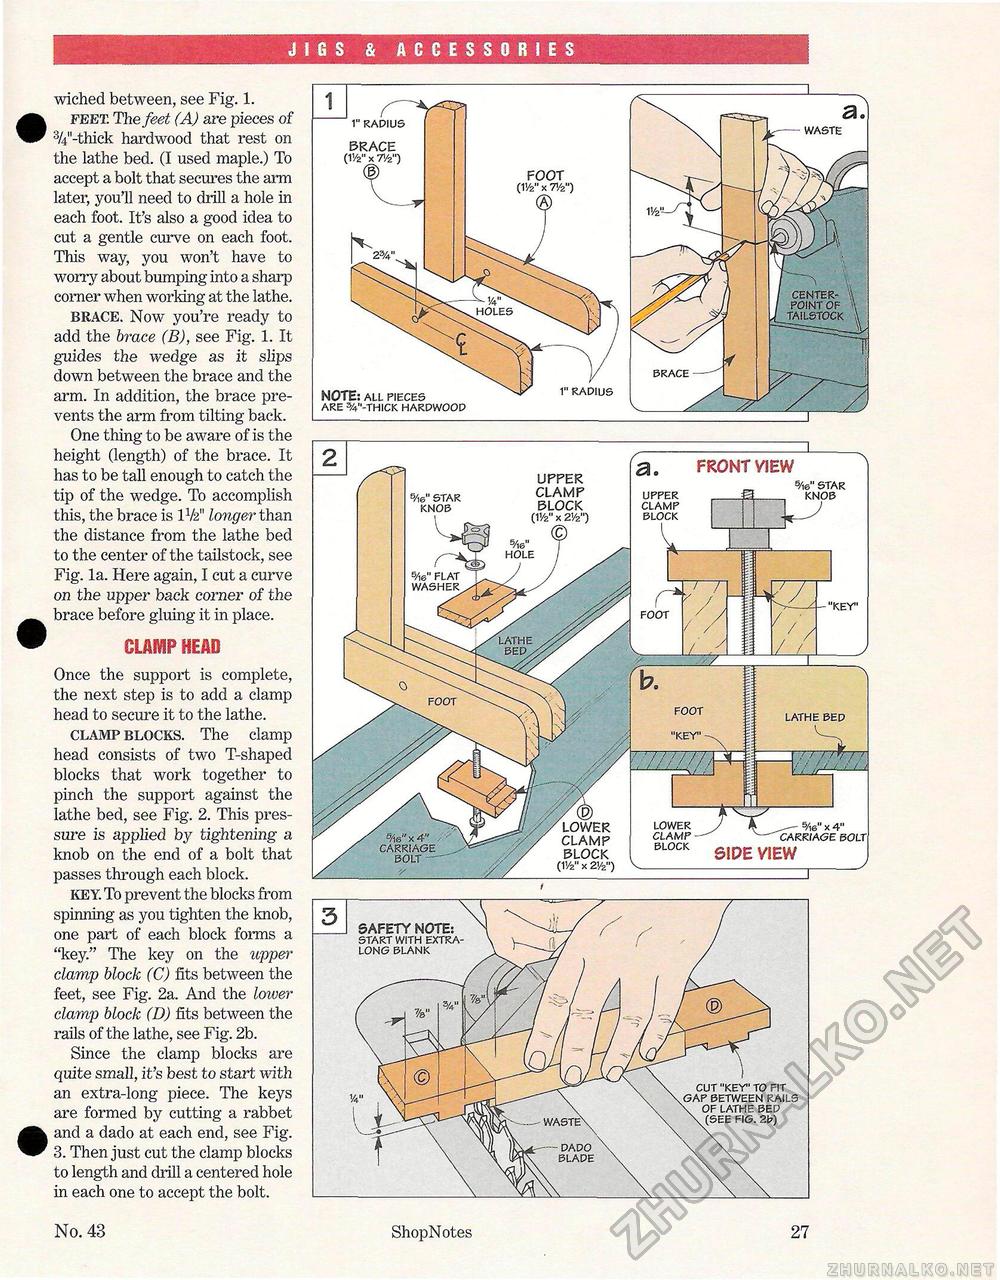
JIGS & ACCESSORIES wiched between, see Fig. 1. • FEET. The feet (A) are pieces of 34"-thick hardwood that rest on the lathe bed. (I used maple.) To accept a bolt that secures the arm later, you'll need to drill a hole in each foot. It's also a good idea to cut a gentle curve on each foot. This way, you won't have to worry about bumping into a sharp corner when working at the lathe. BRACE. Now you're ready to add the brace (B), see Fig. 1. It guides the wedge as it slips down between the brace and the arm. In addition, the brace prevents the arm from tilting back. One thing to be aware of is the height (length) of the brace. It has to be tall enough to catch the tip of the wedge. To accomplish this, the brace is IV2" longer than the distance from the lathe bed to the center of the tailstock, see Fig. la. Here again, I cut a curve on the upper back corner of the ^^ brace before gluing it in place. ™ CLAMP HEAD Once the support is complete, the next step is to add a clamp head to secure it to the lathe. CLAMP BLOCKS. The clamp head consists of two T-shaped blocks that work together to pinch the support against the lathe bed, see Fig. 2. This pressure is applied by tightening a knob on the end of a bolt that passes through each block. KEY. To prevent the blocks from spinning as you tighten the knob, one part of each block forms a "key." The key on the upper clamp block (C) fits between the feet, see Fig. 2a. And the lower clamp block (I)) fits between the rails of the lathe, see Fig. 2b. Since the clamp blocks are quite small, it's best to start with an extra-long piece. The keys are formed by cutting a rabbet • and a dado at each end, see Fig. 3. Then just cut the clamp blocks to length and drill a centered hole in each one to accept the bolt. No. 43 ShopNotes 27 |


