43 - Build Your Own Dovetail Jig, страница 8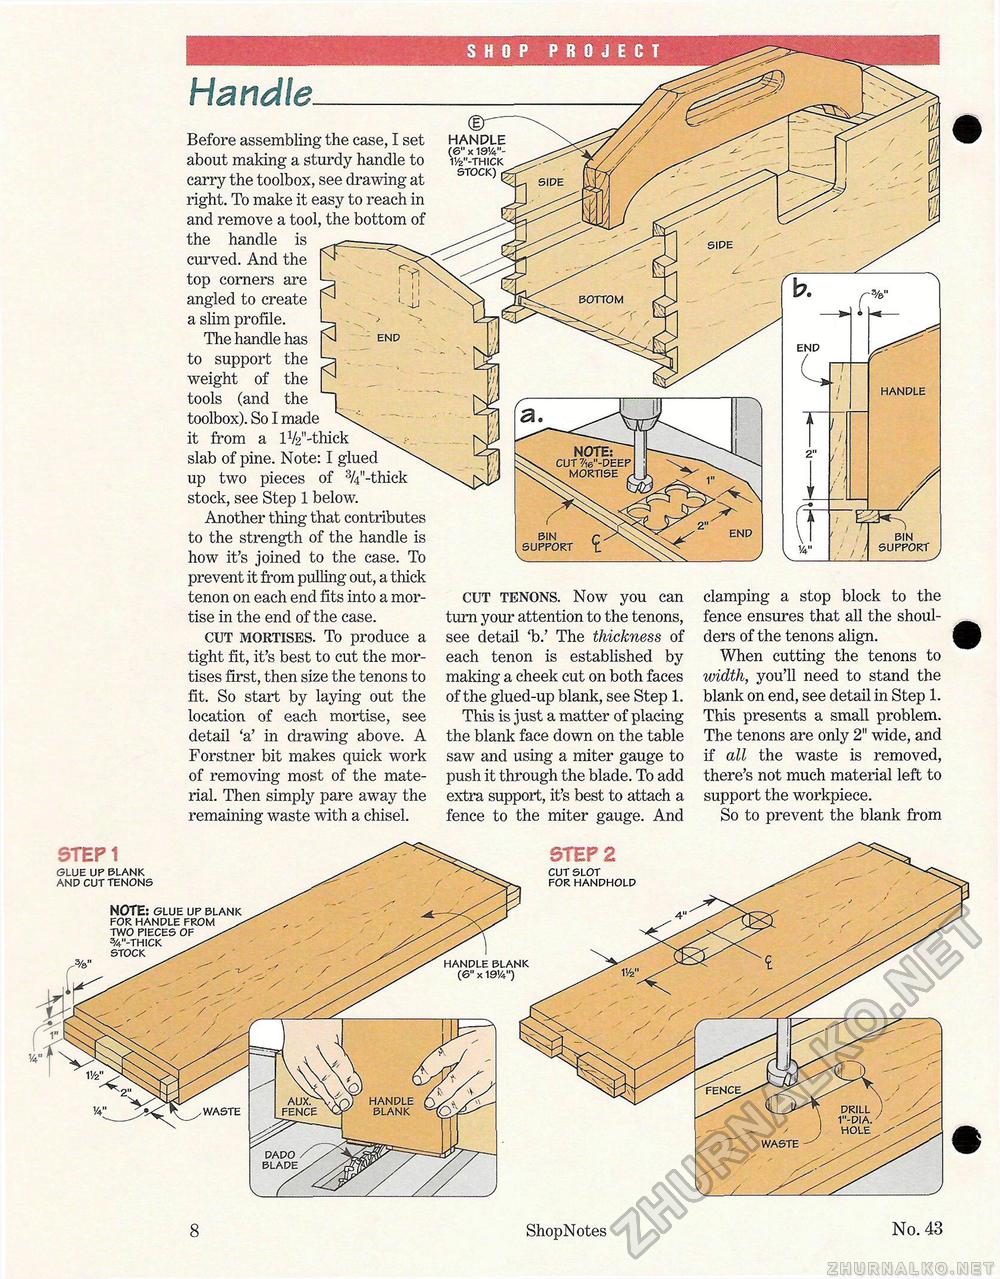
Handle. Before assembling the case, I set about making a sturdy handle to carry the toolbox, see drawing at right. To make it easy to reach in and remove a tool, the bottom of the handle is curved. And the top corners are angled to create a slim profile. The handle has to support the weight of the tools (and the toolbox). So I made it from a lV2"-thick slab of pine. Note: I glued up two pieces of 3/4"-thick stock, see Step 1 below. Another thing that contributes to the strength of the handle is how it's joined to the case. To prevent it from pulling out, a thick tenon on each end fits into a mortise in the end of the case. cut mortises. To produce a tight fit, it's best to cut the mortises first, then size the tenons to fit. So start by laying out the location of each mortise, see detail 'a' in drawing above. A Forstner bit makes quick work of removing most of the material. Then simply pare away the remaining waste with a chisel. handle {&• x 191/4"-W-THICK STOCK) bin support V_ cut tenons. Now you can turn your attention to the tenons, see detail 'b.' The thickness of each tenon is established by making a cheek cut on both faces of the glued-up blank, see Step 1. This is just a matter of placing the blank face down on the table saw and using a miter gauge to push it through the blade. To add extra support, it's best to attach a fence to the miter gauge. And clamping a stop block to the fence ensures that all the shoulders of the tenons align. When cutting the tenons to width, you'll need to stand the blank on end, see detail in Step 1. This presents a small problem. The tenons are only 2" wide, and if all the waste is removed, there's not much material left to support the workpiece. So to prevent the blank from fb. end handle 8 ShopNotes No. 43 |


