43 - Build Your Own Dovetail Jig, страница 9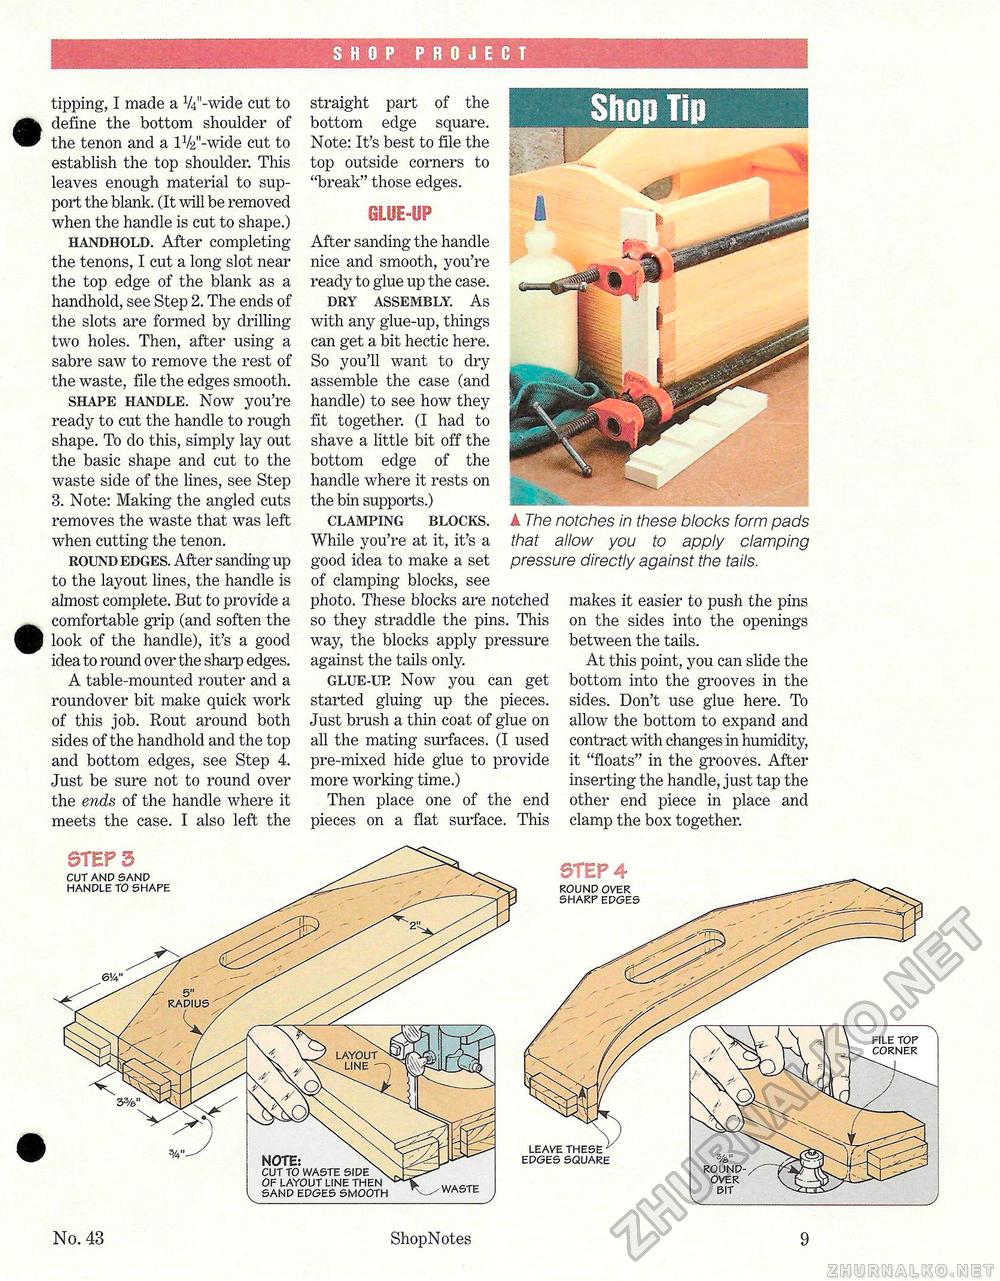
SHOP PROJECT tipping, I made a VZ-wide cut to define the bottom shoulder of the tenon and a lV2H-wide cut to establish the top shoulder. This leaves enough material to support the blank. (It will be removed when the handle is cut to shape.) handhold. After completing the tenons, I cut a long slot near the top edge of the blank as a handhold, see Step 2. The ends of the slots are formed by drilling two holes. Then, after using a sabre saw to remove the rest of the waste, file the edges smooth. shape handle. Now you're ready to cut the handle to rough shape. To do this, simply lay out the basic shape and cut to the waste side of the lines, see Step 3. Note: Making the angled cuts removes the waste that was left when cutting the tenon. round edges. After sanding up to the layout lines, the handle is almost complete. But to provide a comfortable grip (and soften the look of the handle), it's a good idea to round over the sharp edges. A table-mounted router and a roundover bit make quick work of this job. Rout around both sides of the handhold and the top and bottom edges, see Step 4. Just be sure not to round over the ends of the handle where it meets the case. I also left the straight part of the bottom edge square. Note: It's best to file the top outside corners to "break" those edges. GLUE-UP STEPS CUT AND SAND HANDLE TO SHAPE NOTE: CUT TO WASTE SIDE OF LAYOUT LINE THEN SAND EDGES SMOOTH WASTE After sanding the handle nice and smooth, you're ready to glue up the case. dry assembly. As with any glue-up, things can get a bit hectic here. So you'll want to dry assemble the case (and handle) to see how they fit together. (I had to shave a little bit off the bottom edge of the handle where it rests on the bin supports.) clamping blocks. While you're at it, it's a good idea to make a set of clamping blocks, see photo. These blocks are notched so they straddle the pins. This way, the blocks apply pressure against the tails only. glue-up Now you can get started gluing up the pieces. Just brush a thin coat of glue on all the mating surfaces. (I used pre-mixed hide glue to provide more working time.) Then place one of the end pieces on a flat surface. This A The notches in these blocks form pads that allow you to apply clamping pressure directly against the tails. makes it easier to push the pins on the sides into the openings between the tails. At this point, you can slide the bottom into the grooves in the sides. Don't use glue here. To allow the bottom to expand and contract with changes in humidity, it "floats" in the grooves. After inserting the handle, just tap the other end piece in place and clamp the box together. 0TEP4 ROUND OVER SHARP EDGES LEAVE THESE y EDGES SQUARE ROUND-OVER BIT V FILE TOP CORNER No. 43 ShopNotes 9 |


