57 - A Shop-Built Pin Router, страница 24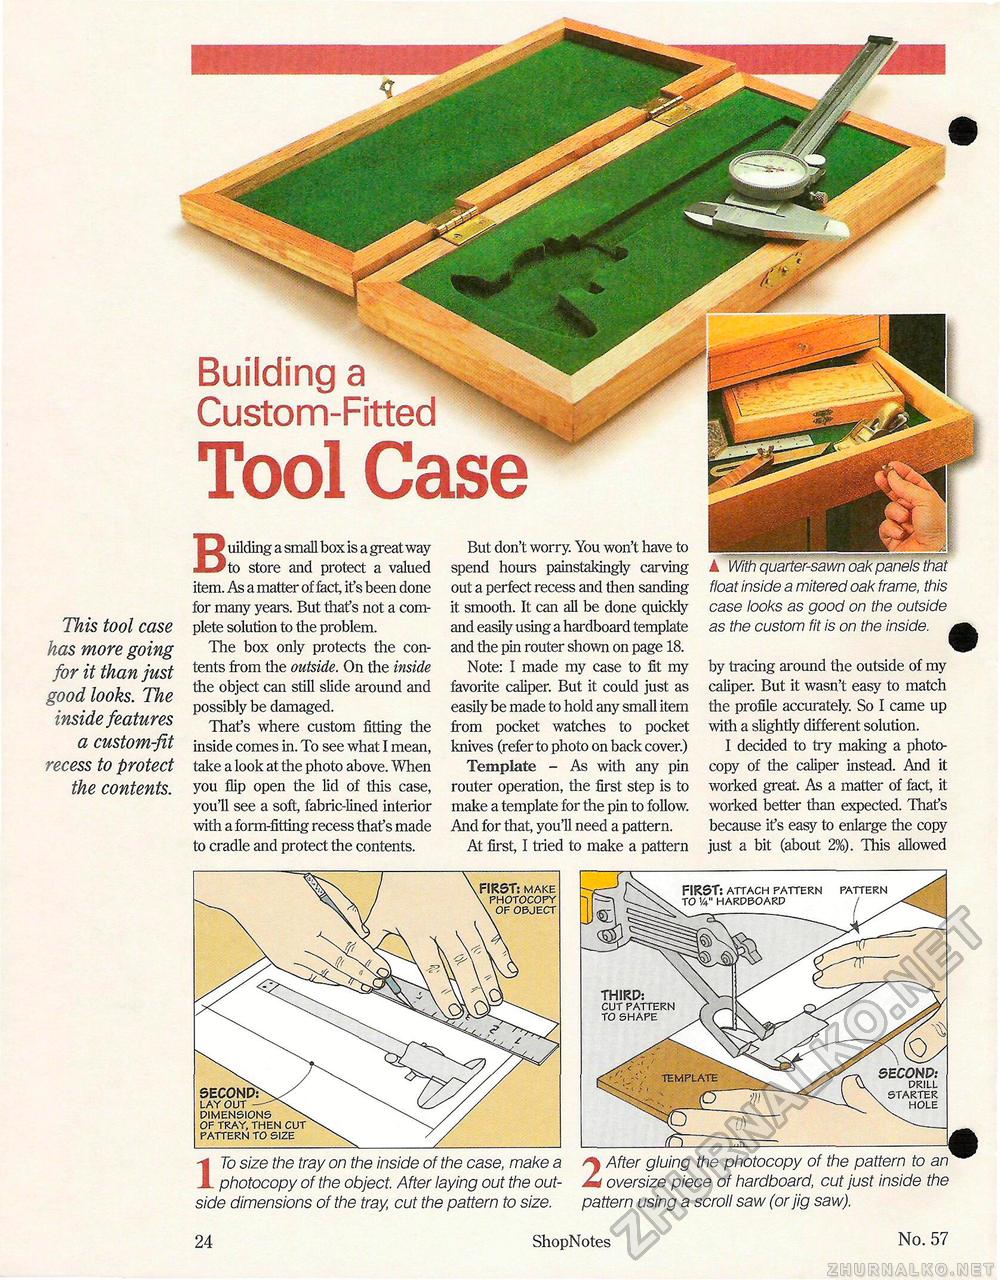
This tool case has more going for it than just good looks. The inside features a custom-fit recess to protect the contents. Tool Case Building a small box is a great way to store and protect a valued item. As a matter of fact, if s been done for many years. But thaf s not a complete solution to the problem. The box only protects the contents from the outside. On the inside the object can still slide around and possibly be damaged. That's where custom fitting the inside comes in. To see what I mean, take a look at the photo above. When you flip open the lid of this case, you'll see a soft, fabric-lined interior with a form-fitting recess that's made to cradle and protect the contents. But don't worry. You won't have to spend hours painstakingly carving out a perfect recess and then sanding it smooth. It can all be done quickly and easily using a hardboard template and the pin router shown on page 18. Note: I made my case to fit my favorite caliper. But it could just as easily be made to hold any small item from pocket watches to pocket knives (refer to photo on back cover.) Template - As with any pin router operation, the first step is to make a template for the pin to follow. And for that, you'll need a pattern. At first, I tried to make a pattern ▲ With quarter-sawn oak panels that float inside a mitered oak frame, this case looks as good on the outside as the custom fit is on the inside. by tracing around the outside of my caliper. But it wasn't easy to match the profile accurately. So I came up with a slightly different solution. I decided to try making a photocopy of the caliper instead. And it worked great. As a matter of fact, it worked better than expected. Thafs because ifs easy to enlarge the copy just a bit (about 2%). This allowed Building a Custom-Fitted FIRST: make photocopy of object dimensions of tray, then cut pattern to size 17o size the tray on the inside of the case, make a photocopy of the object. After laying out the outside dimensions of the tray, cut the pattern to size. FIRST: attach pattern pattern to va" hardboard / template THIRD: cut pattern to shape SECOND: drill starter hole 2 After gluing the photocopy of the pattern to an oversize piece of hardboard, cut just inside the pattern using a scroll saw (or jig saw). 24 ShopNotes No. 57 |


