57 - A Shop-Built Pin Router, страница 22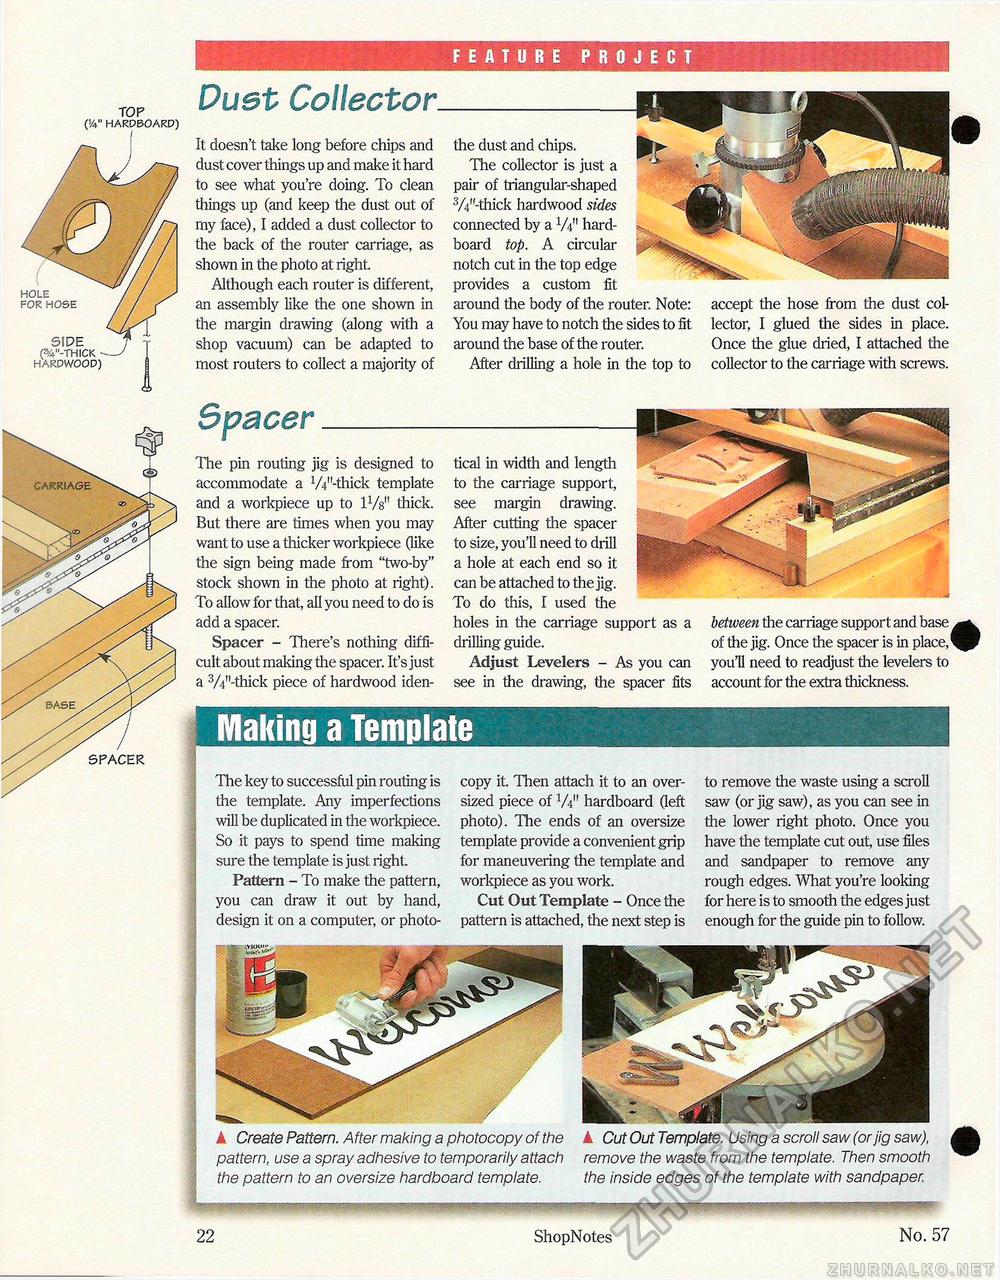
FEATURE PROJECT HOLE FOR HOSE SIDE (3/4"-THICK HARDWOOD) Duet CollectorIt doesn't take long before chips and dust cover things up and make it hard to see what you're doing. To clean things up (and keep the dust out of my face), I added a dust collector to the back of the router carriage, as shown in the photo at right. Although each router is different, an assembly like the one shown in the margin drawing (along with a shop vacuum) can be adapted to most routers to collect a majority of The pin routing jig is designed to accommodate a 1/V'-thick template and a workpiece up to lVs" thick. But there are times when you may want to use a thicker workpiece (like the sign being made from "two-by" stock shown in the photo at right). To allow for that, all you need to do is add a spacer. Spacer - There's nothing difficult about making the spacer. It's just a 3/4M-thick piece of hardwood iden- The key to successful pin routing is the template. Any imperfections will be duplicated in the workpiece. So it pays to spend time making sure the template is just right. Pattern - To make the pattern, you can draw it out by hand, design it on a computer, or photo- tical in width and length to the carriage support, see margin drawing. After cutting the spacer to size, you'll need to drill a hole at each end so it copy it. Then attach it to an oversized piece of V4" hardboard (left photo). The ends of an oversize template provide a convenient grip for maneuvering the template and workpiece as you work. Cut Out Template - Once the pattern is attached, the next step is to remove the waste using a scroll saw (or jig saw), as you can see in the lower right photo. Once you have the template cut out, use files and sandpaper to remove any rough edges. What you're looking for here is to smooth the edges just enough for the guide pin to follow. Making a Template Spacer▲ Create Pattern. After making a photocopy of the pattern, use a spray adhesive to temporarily attach the pattern to an oversize hardboard template. gSWIftj A Cut Out Template. Using a scroll saw (or jig saw), remove the waste from the template. Then smooth the inside edges of the template with sandpaper. the dust and chips. The collector is just a pair of triangular-shaped 3/Vf-thick hardwood sides connected by a W hard-board top. A circular notch cut in the top edge provides a custom fit around the body of the router. Note: You may have to notch the sides to fit around the base of the router. After drilling a hole in the top to accept the hose from the dust collector, I glued the sides in place. Once the glue dried, I attached the collector to the carriage with screws. SPACER can be attached to the jig. To do this, I used the holes in the carriage support as a drilling guide. Adjust Levelers - As you can see in the drawing, the spacer fits between the carriage support and base ^^ of the jig. Once the spacer is in place, ^^ you'll need to readjust the levelers to account for the extra thickness. 22 ShopNotes No. 57 |


