62 - Box Joint Jig, страница 12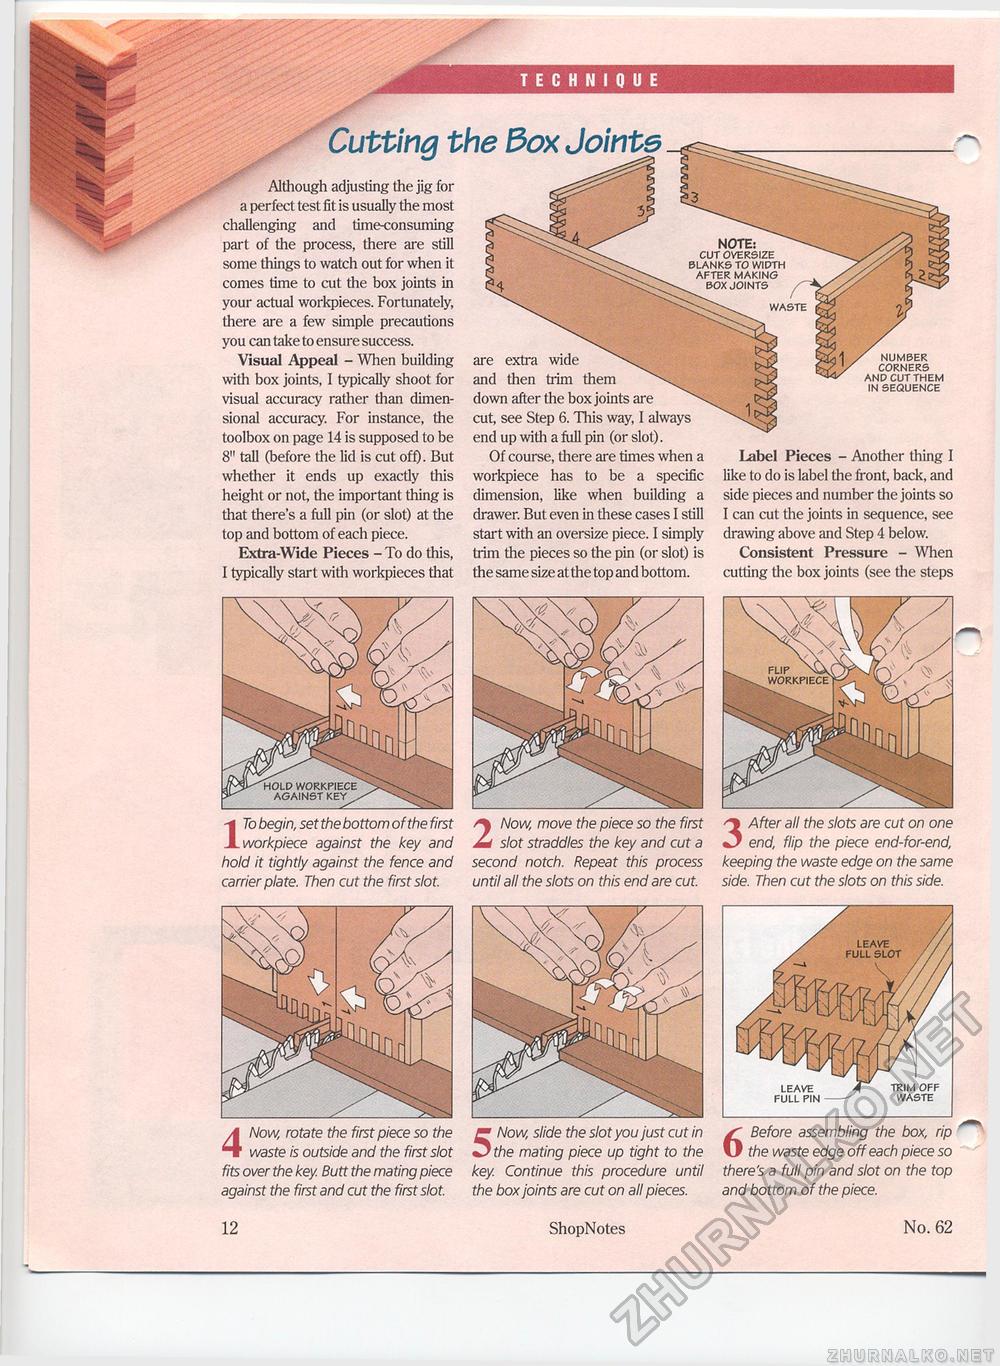
TECHNIQUE Cutting the Box Joints Although adjusting the jig for a perfect test fit is usually the most challenging and time-consuming part of the process, there are still some things to watch out for when it comes time to cut the box joints in your actual workpieces. Fortunately, there are a few simple precautions you can take to ensure success. Visual Appeal - When building with box joints, I typically shoot for visual accuracy rather than dimensional accuracy. For instance, the toolbox on page 14 is supposed to be 8" tall (before the lid is cut off). But whether it ends up exactly this height or not, the important thing is that there's a full pin (or slot) at the top and bottom of each piece. Extra-Wide Pieces - To do this, I typically start with workpieces that NOTE: CUT OVERSIZE BLANKS TO WIDTH AFTER MAKING BOX JOINTS WASTE are extra wide and then trim them down after the box joints are cut, see Step 6. This way, I always end up with a full pin (or slot). Of course, there are times when a workpiece has to be a specific dimension, like when building a drawer. But even in these cases I still start with an oversize piece. I simply trim the pieces so the pin (or slot) is the same size at the top and bottom. NUMBER CORNERS AND CUT THEM IN SEQUENCE Label Pieces - Another thing I like to do is label the front, back, and side pieces and number the joints so I can cut the joints in sequence, see drawing above and Step 4 below. Consistent Pressure - When cutting the box joints (see the steps 17o begin, set the bottom of the first workpiece against the key and hold it tightly against the fence and carrier plate. Then cut the first slot. 2 Now, move the piece so the first slot straddles the key and cut a second notch. Repeat this process until all the slots on this end are cut. 3 After all the slots are cut on one end, flip the piece end-for-end, keeping the waste edge on the same side. Then cut the slots on this side. 4 Now, rotate the first piece so the waste is outside and the first slot fits over the key. Butt the mating piece against the first and cut the first slot. 5 Now, slide the slot you just cut in the mating piece up tight to the key. Continue this procedure until the box joints are cut on all pieces. 6 Before assembling the box, rip the waste edge off each piece so there's a full pin and slot on the top and bottom of the piece. LEAVE FULL PIN TRIM OFF WASTE 12 ShopNotes No. 62 |


