62 - Box Joint Jig, страница 10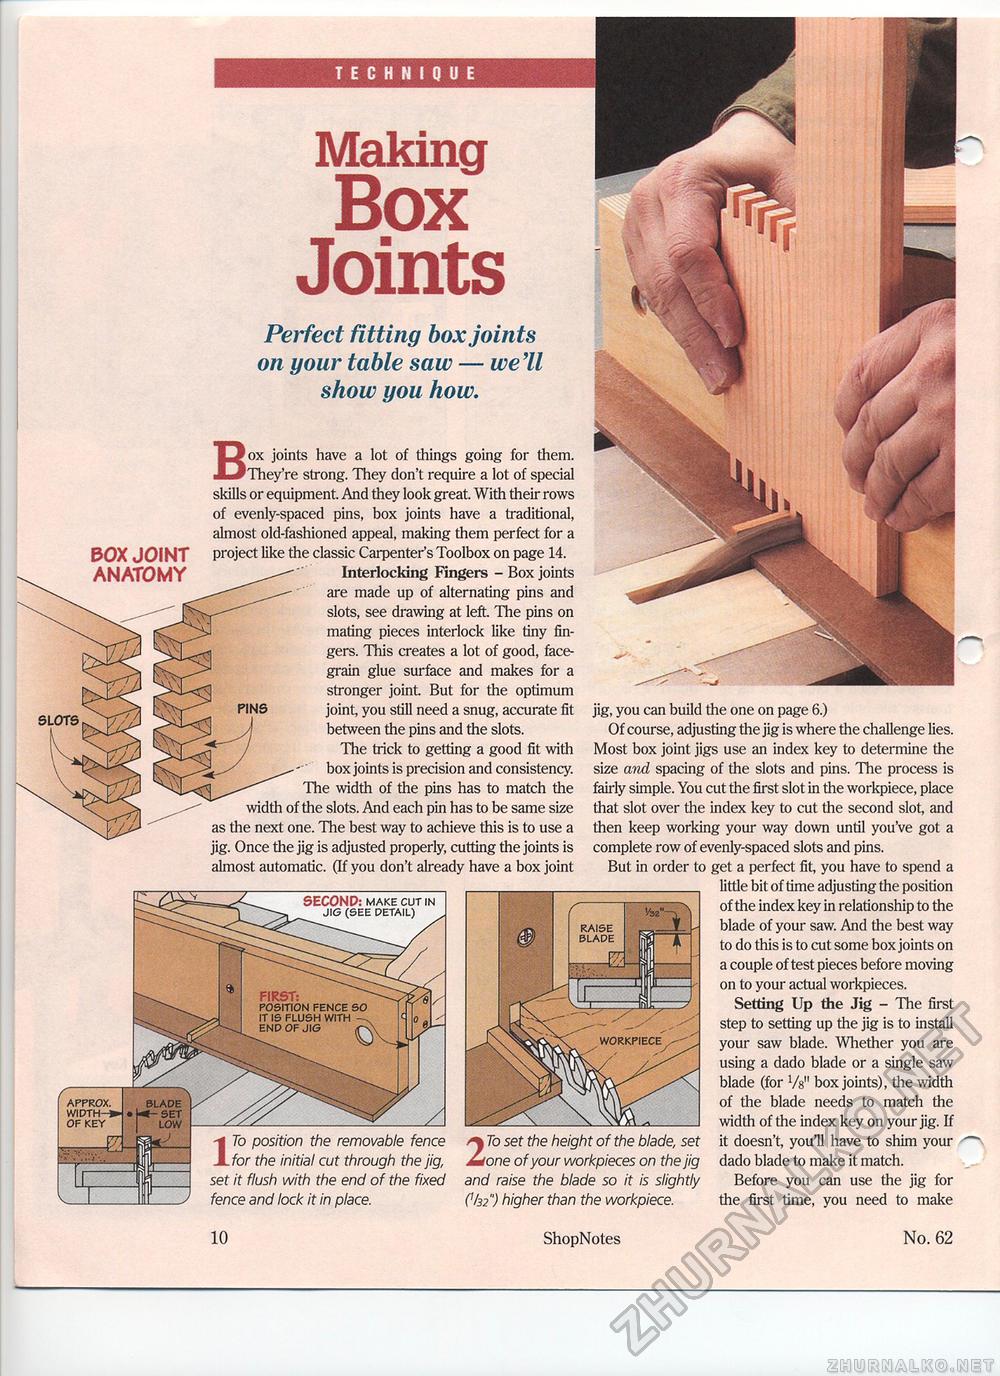
Making Box Joints Perfect fitting box joints on your table saw — we'll show you how. BOX JOINT ANATOMY PINS Box joints have a lot of things going for them. They're strong. They don't require a lot of special skills or equipment. And they look great. With their rows of evenly-spaced pins, box joints have a traditional, almost old-fashioned appeal, making them perfect for a project like the classic Carpenter's Toolbox on page 14. Interlocking Fingers - Box joints are made up of alternating pins and slots, see drawing at left. The pins on mating pieces interlock like tiny fingers. This creates a lot of good, face-grain glue surface and makes for a stronger joint But for the optimum joint, you still need a snug, accurate fit between the pins and the slots. The trick to getting a good fit with box joints is precision and consistency. The width of the pins has to match the width of the slots. And each pin has to be same size as the next one. The best way to achieve this is to use a jig. Once the jig is adjusted properly, cutting the joints is almost automatic. (If you don't already have a box joint jig, you can build the one on page 6.) Of course, adjusting the jig is where the challenge lies. Most box joint jigs use an index key to determine the size and spacing of the slots and pins. The process is fairly simple. You cut the first slot in the workpiece, place that slot over the index key to cut the second slot, and then keep working your way down until you've got a complete row of evenly-spaced slots and pins. But in order to get a perfect fit, you have to spend a little bit of time adjusting the position of the index key in relationship to the blade of your saw. And the best way to do this is to cut some box joints on a couple of test pieces before moving on to your actual workpieces. Setting Up the Jig - The first step to setting up the jig is to install your saw blade. Whether you are using a dado blade or a single saw blade (for Vs" box joints), the width of the blade needs to match the width of the index key on your jig. If it doesn't, you'll have to shim your dado blade to make it match. Before you can use the jig for the first time, you need to make 17o position the removable fence for the initial cut through the jig, set it flush with the end of the fixed fence and lock it in place. 8EC0NP: make cut in r<=IFF DFTAII 1 APrROX. WIDTH-*-OF KEY blade t- set low 2 To set the height of the blade, set one of your workpieces on the jig and raise the blade so it is slightly C/32") higher than the workpiece. 10 ShopNotes No. 62 |


