62 - Box Joint Jig, страница 6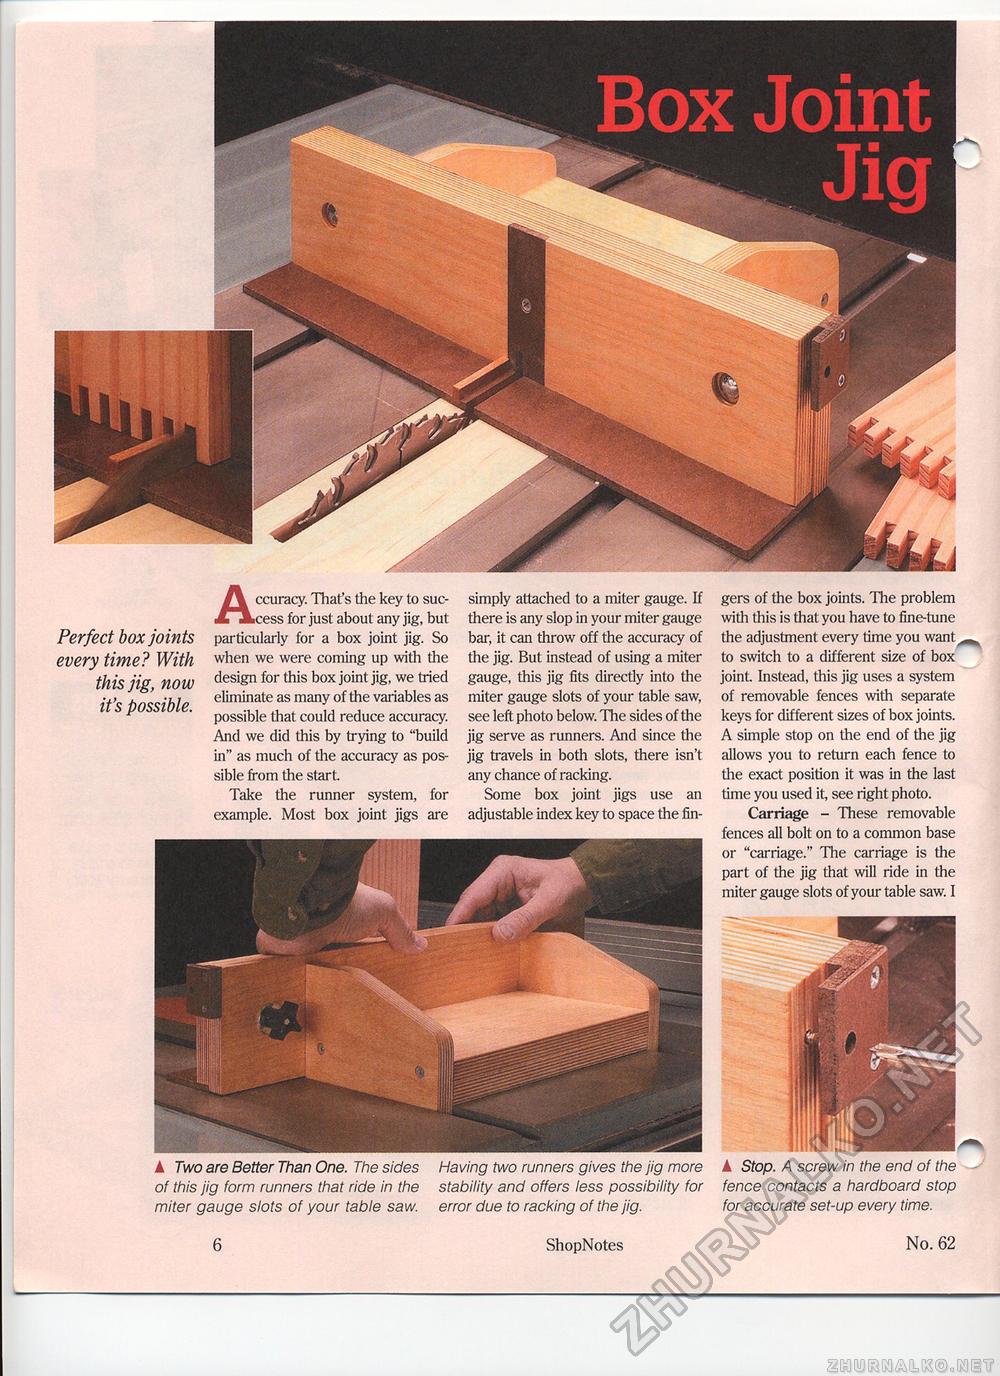
Perfect box joints every time? With this jig, now it's possible. Accuracy. That's the key to success for just about any jig, but particularly for a box joint jig. So when we were coming up with the design for this box joint jig, we tried eliminate as many of the variables as possible that could reduce accuracy. And we did this by trying to "build in" as much of the accuracy as possible from the start. Take the runner system, for example. Most box joint jigs are simply attached to a miter gauge. If there is any slop in your miter gauge bar, it can throw off the accuracy of the jig. But instead of using a miter gauge, this jig fits directly into the miter gauge slots of your table saw, see left photo below. The sides of the jig serve as runners. And since the jig travels in both slots, there isn't any chance of racking. Some box joint jigs use an adjustable index key to space the fin gers of the box joints. The problem with this is that you have to fine-tune the adjustment every time you want to switch to a different size of box joint Instead, this jig uses a system of removable fences with separate keys for different sizes of box joints. A simple stop on the end of the jig allows you to return each fence to the exact position it was in the last time you used it, see right photo. Carriage - These removable fences all bolt on to a common base or "carriage." The carriage is the part of the jig that will ride in the miter gauge slots of your table saw. I A Two are Better Than One. The sides Having two runners gives the jig more of this jig form runners that ride in the stability and offers less possibility for miter gauge slots of your table saw. error due to racking of the jig. 6 ShopNotes No. 62 Box JointJig A Stop. A screw in the end of the fence contacts a hardboard stop for accurate set-up every time. |


