77 - Sliding Door Shop Cabinet, страница 13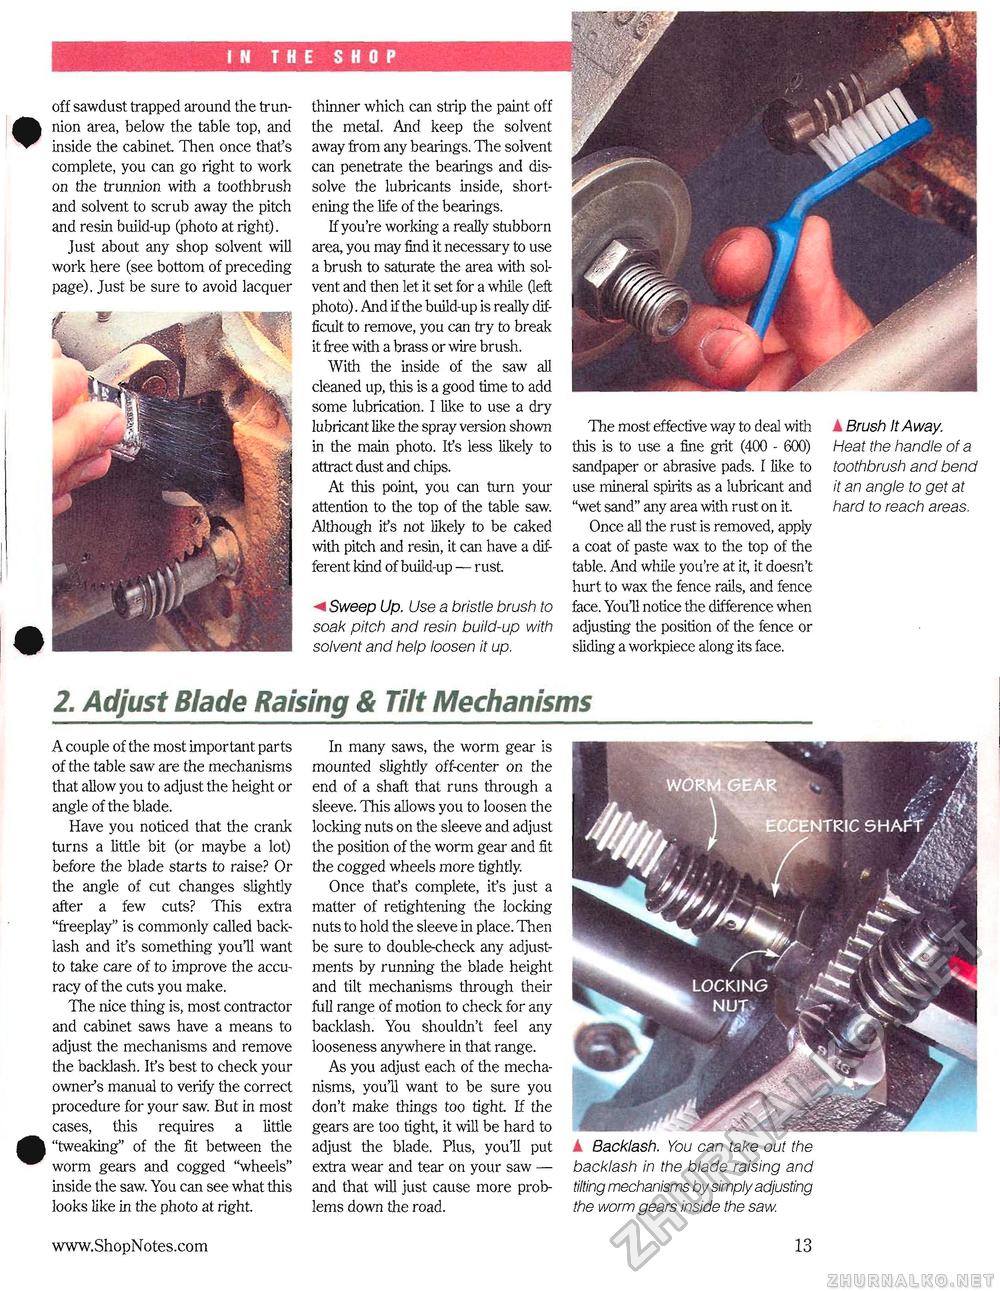
off sawdust trapped around the trunnion area, below the table top, and inside the cabinet Then once thafs complete, you can go right to work on the trunnion with a toothbrush and solvent to scrub away the pitch and resin build-up (photo at right). Just about any shop solvent will work here (see bottom of preceding page). Just be sure to avoid lacquer thinner which can strip the paint off the metal. And keep the solvent away from any bearings. The solvent can penetrate the bearings and dissolve the lubricants inside, shortening the life of the bearings. If you're working a really stubborn area, you may find it necessary to use a brush to saturate the area with solvent and then let it set for a while (left photo). And if the build-up is really difficult to remove, you can try to break it free with a brass or wire brush. With the inside of the saw all cleaned up, this is a good time to add some lubrication. I like to use a dry lubricant like the spray version shown in the man photo. Ifs less likely to attract dust and chips. At this point, you can turn your attention to the top of the table saw. Although ifs not likely to be caked with pitch and resin, it can have a different kind of build-up — rust Sweep Up. Use a bristle brush to soak pitch and resin build-up with solvent and help loosen it up. A Brush It Away. Heat the handle of a toothbrush and bend it an angle to get at hard to reach areas. The most effective way to deal with this is to use a fine grit (400 - 600) sandpaper or abrasive pads. I like to use mineral spirits as a lubricant and "wet sand" any area with rust on it Once all the rust is removed, apply a coat of paste wax to the top of the table. And while you're at it, it doesn't hurt to wax the fence rails, and fence face. YouH notice the difference when adjusting the position of the fence or sliding a workpiece along its face. 2. Adjust Blade Raising & Tilt MechanismsA couple of the most important parts of the table saw are the mechanisms that allow you to adjust the height or angle of the blade. Have you noticed that the crank turns a little bit (or maybe a lot) before the blade starts to raise? Or the angle of cut changes slightly after a few cuts? This extra "freeplay" is commonly called backlash and it's something youll want to take care of to improve the accuracy of the cuts you make. The nice thing is, most contractor and cabinet saws have a means to adjust the mechanisms and remove the backlash. Ifs best to check your owner's manual to verily the correct procedure for your saw. But in most cases, this requires a little "tweaking" of the fit between the worm gears and cogged "wheels" inside the saw. You can see what this looks like in the photo at right In many saws, the worm gear is mounted slightly off-center on the end of a shaft that runs through a sleeve. This allows you to loosen the locking nuts on the sleeve and adjust the position of the worm gear and fit the cogged wheels more tightly. Once thafs complete, ifs just a matter of retightening the locking nuts to hold the sleeve in place. Then be sure to doubl^check any adjustments by running the blade height and tilt mechanisms through their full range of motion to check for any backlash. You shouldn't feel any looseness anywhere in that range. As you adjust each of the mechanisms, you'll want to be sure you don't make things too tight If the gears are too tight, it will be hard to adjust the blade. Plus, youll put extra wear and tear on your saw — and that will just cause more problems down the road. & Backlash. You can take out the backlash in the blade raising and tilting mechanisms by simply adjusting the worm gears inside the saw. 13 |


