79 - Slant Front Tool Cart, страница 21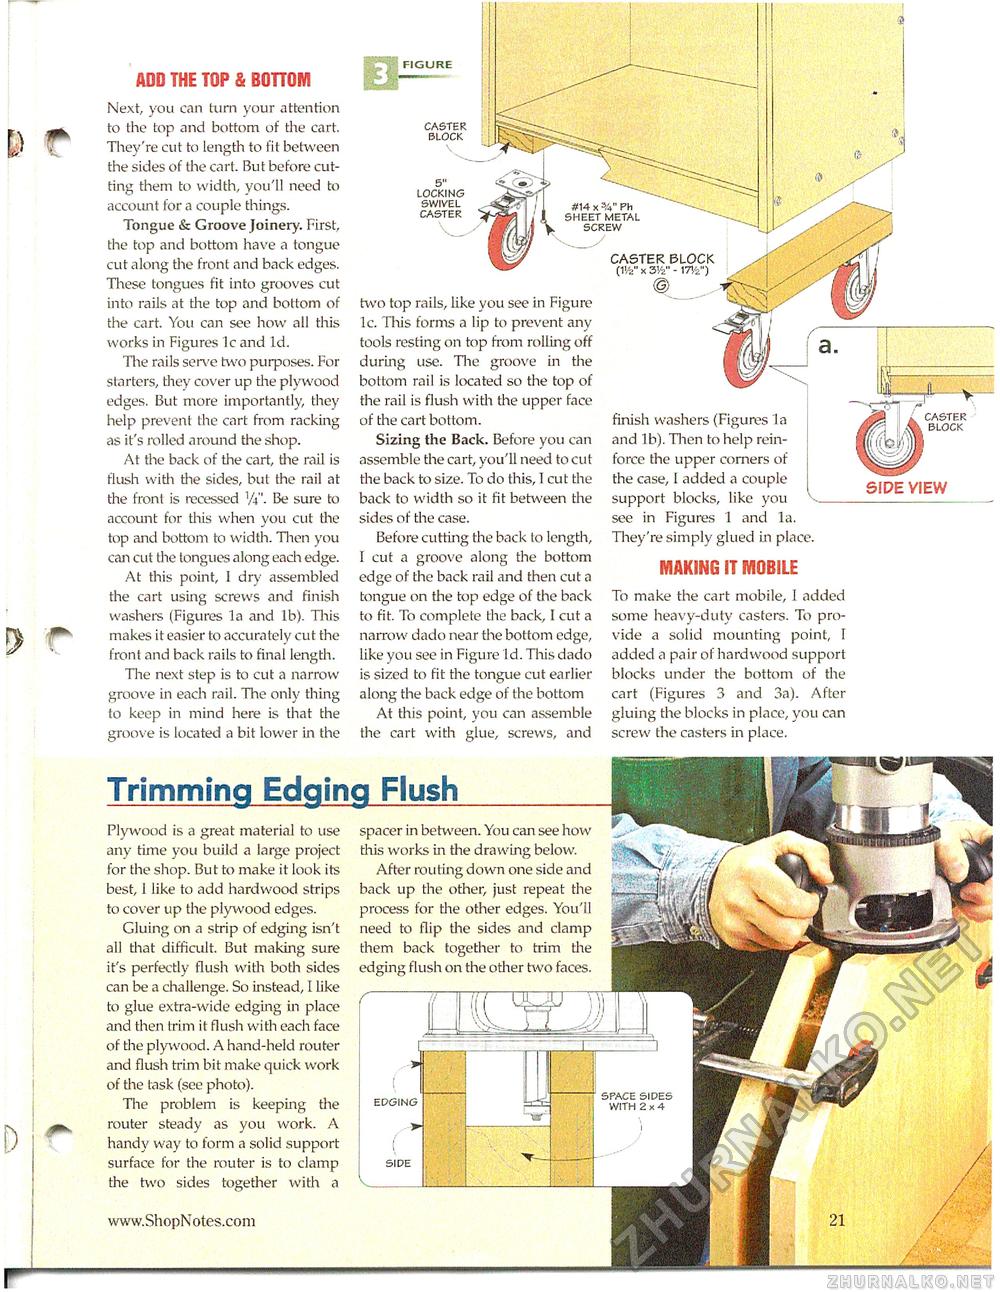
ADD THE TOP & BOTTOM Next, you can turn your attention to the top and bottom of the cart. They're cut to length to fit between the sides of the cart. But before cutting them to width, you'll need to account for a couple tilings. Tongue & Groove Joinery. First, the top and bottom have a tongue cut along the front and back edges. These tongues fit into grooves cut into rails at the top and bottom of the cart. You can see how all this works in Figures lc and Id. The rails serve two purposes. For starters, they cover up the plywood edges, But more importantly, they help prevent the cart from racking as it's rolled around the shop. At the back of the cart, the rail is flush with the sides, but the rail at the front is recessed Vi". Be sure to account for this when you cut the top and bottom to width. Then you can ait the tongues along each edge. At this point, 1 dry assembled the cart using screws and finish washers (Figures la and lb). Tliis makes it easier to accurately cut the front and back rails to final length. The next step is to cut a narrow groove in each rail. The only thing to keep in mind here is that the groove is located a bit lower in the two top rails, like you see in Figure lc. Tliis forms a lip to prevent any tools resting on top from rolling off during use. The groove in the bottom rail is located so the top of the rail is flush with the upper face of the cart bottom. Sizing the Back. Before you can assemble the cart, you'll need to cut the back to size. To do this, I cut the back to width so it fit between the sides of the case. Before cutting the back to length, I cut a groove along the bottom edge of the back rail and then cut a tongue on the top edge of the back to fit. To complete the back, I cut a narrow dado near the bottom edge, like you see in Figure Id. This dado is sized to fit the tongue cut earlier along the back edge of the bottom At this point, you can assemble the cart with glue, screws, and 5" LOCKING SWIVEL CASTER MAKING IT MOBILE To make the cart mobile, I added some heavy-duty casters. To provide a solid mounting point, I added a pair of hardwood support blocks under the bottom of the cart (Figures 3 and 3a). After gluing the blocks in place, you can screw the casters in place. CASTER BLOCK finish washers (Figures la and lb). Then to help reinforce the upper corners of the case, I added a couple support blocks, like you see in Figures 1 and la. They're simply glued in place. CASTER BLOCK SIDE VIEW #14 x %" PH SHEET METAL SCREW Trimming Edging Flush Plywood is a great material to use any time you build a large project for the shop. But to make it look its best, 1 like to add hardwood strips to cover up the plywood edges. Gluing on a strip of edging isn't all that difficLilt. But making sure it's perfectly flush with both sides can be a challenge. So instead, I like to glue extra-wide edging in place and then trim it flush with each face of the plywood. A hand-held router and flush trim bit make quick work of the task (see photo). The problem is keeping the router steady as you work. A handy way to form a solid support surface for the router is to clamp the two sides together with a spacer in between. You can see how this works in the drawing below. After routing down one side and back up the other, just repeat the process for the other edges. You'll need to flip the sides and clamp them back together to trim the edging flush on the other two faces. EDGING »■ ( SIDE "W SPACE SIDES WITH 2x4 |


