79 - Slant Front Tool Cart, страница 24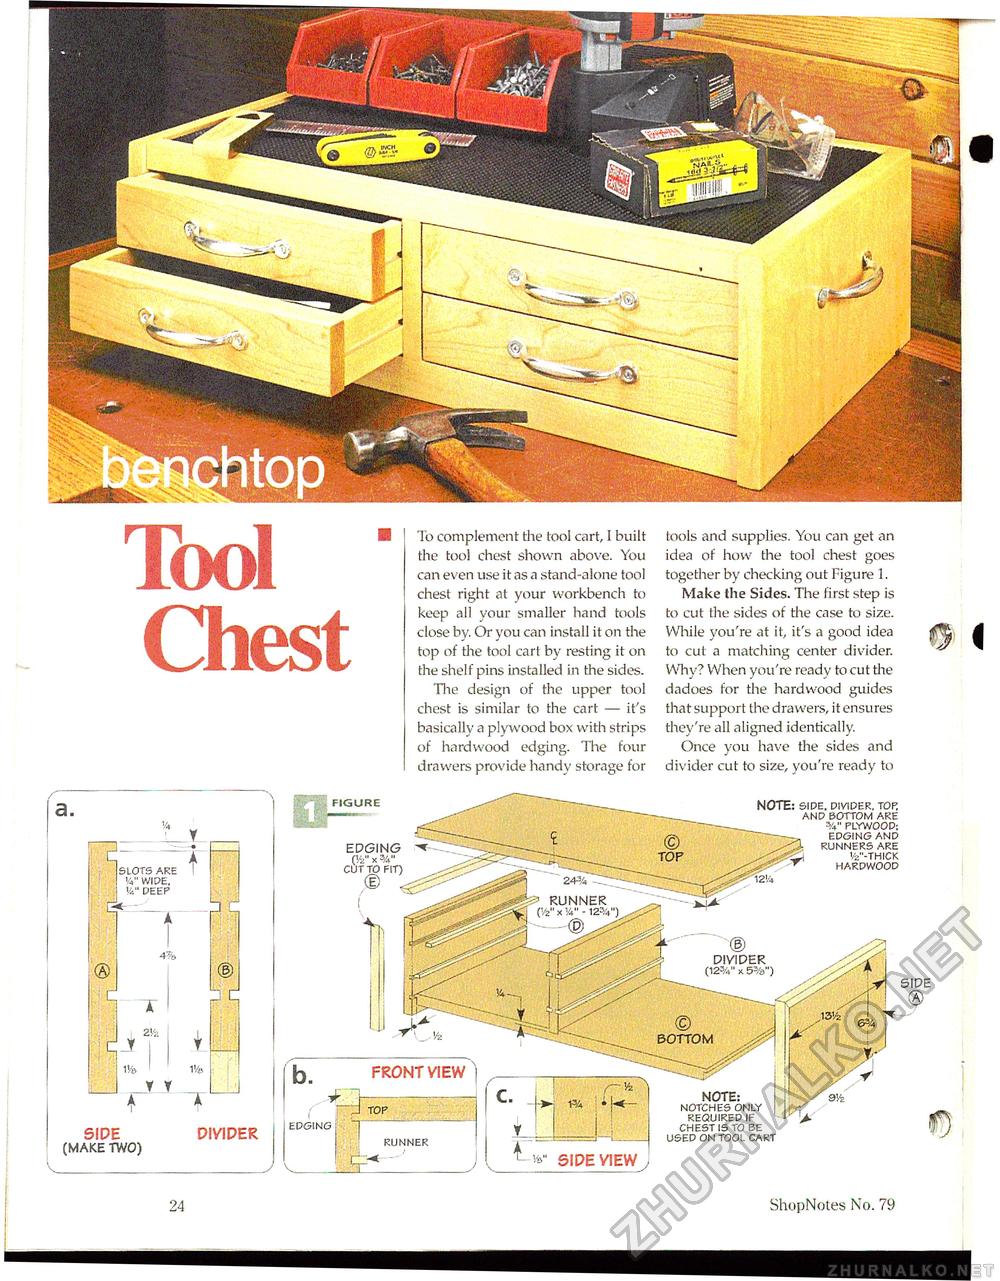
£2§*P\ Tool ChestTo complement the tool cart, I built the too! chest shown above. You can even use it as a stand-alone tool chest right at your workbench to keep all your smaller hand tools close by. Or you can install it on the top of the tool cart by resting it on the shelf pins installed in the sides. The design of the upper tool chest is similar to the cart — it's basically a plywood box with strips of hardwood edging. The four drawers provide handy storage for tools and supplies. You can get an idea of how the tool chest goes together by checking out Figure 1. Make the Sides. The first step is to cut the sides of the case to size. While you're at it, it's a good idea to cut a matching center divider. Why? When you're ready to cut the dadoes for the hardwood guides that support the drawers, it ensures they're all aligned identically. Once you have the sides and divider cut to size, you're ready to NOTE: SIDE. DIVIDER, TOF, AND BOTTOM ARE PLYWOOD: EDGING AND RUNNERS ARE V-THICK HARDWOOD SIDE (MAKE TWO) V_ DIVIDER _J EPGING CV2" X 3/j" CUT TO FIT) SIDE VIEW NOTE: NOTCHES ONLY REQUIRED IF CHEST IS TO BE USED ON TOOL CART b. ( EDGING FRONT VIEW 24 ShopNotes No. 79 |


